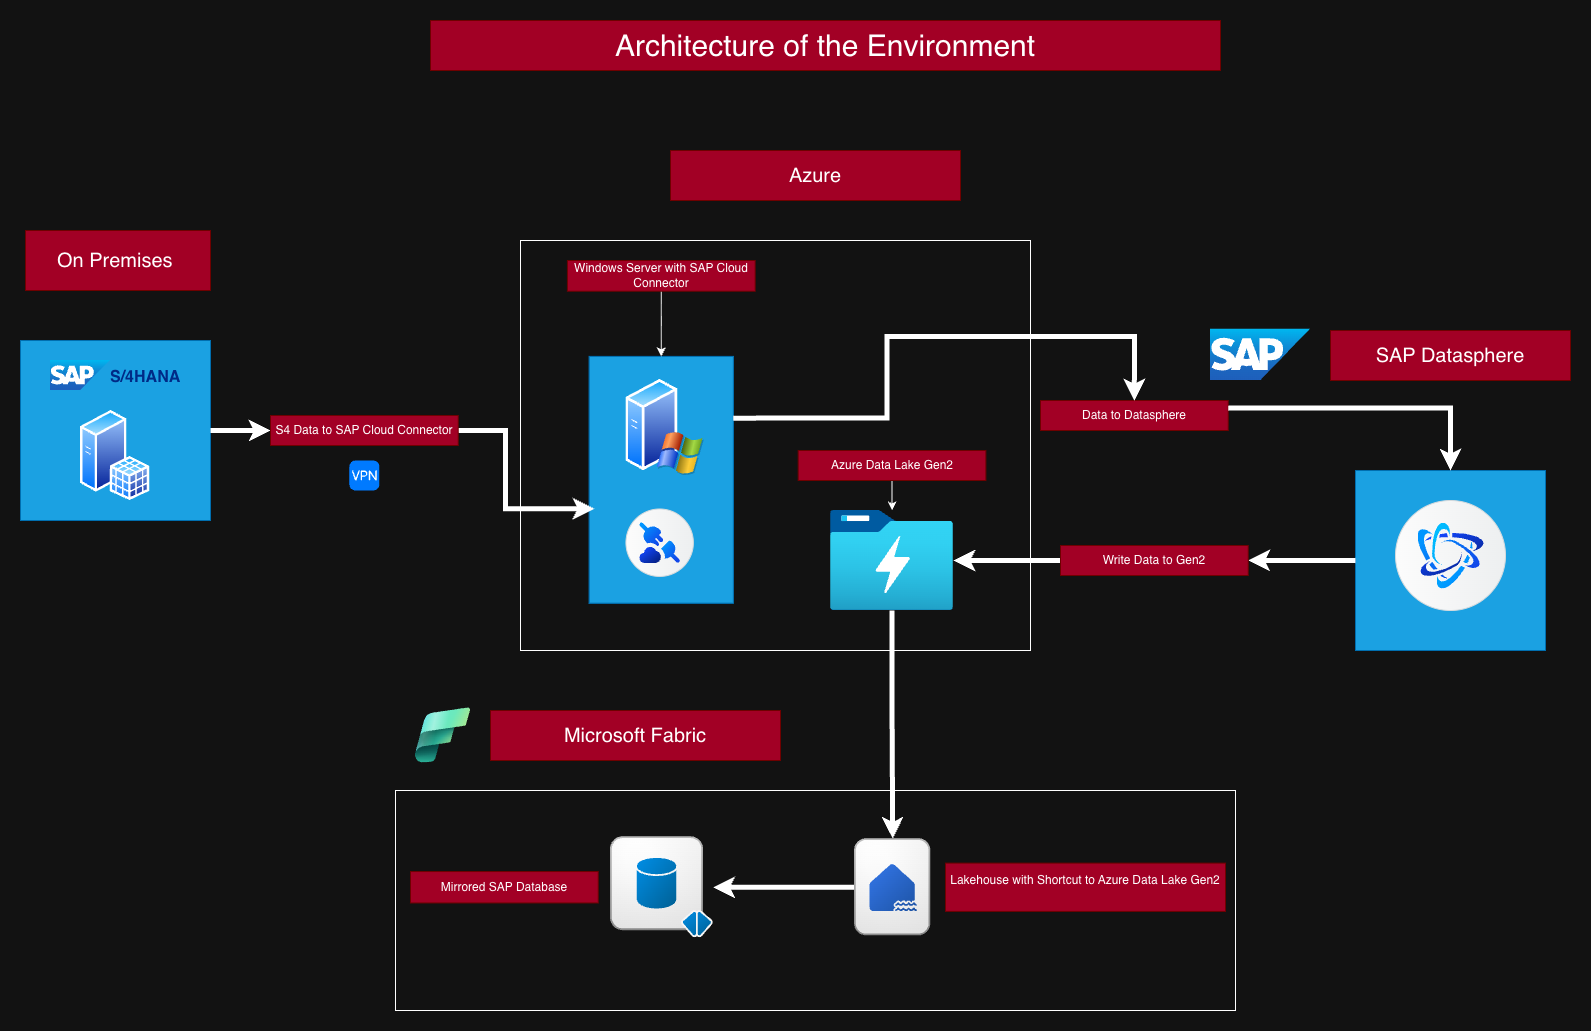
-
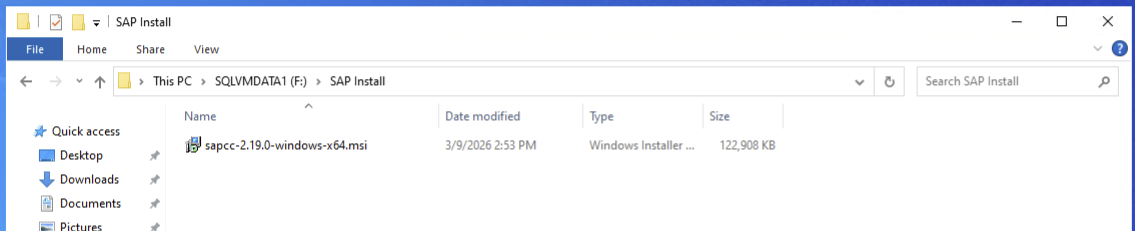
- SAP Cloud Connector Install FIle
-
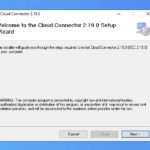
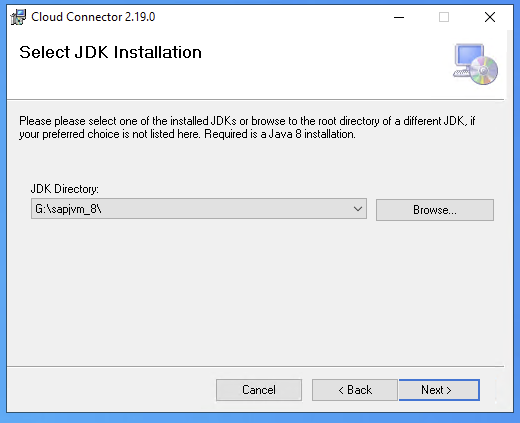
- Step 1 – Install SAP Cloud Connector

-
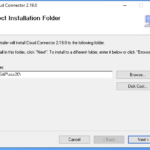
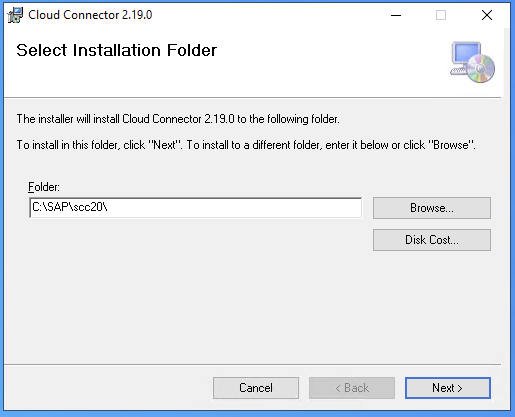
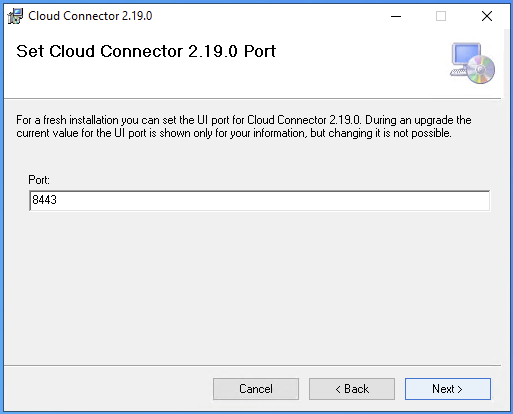
- Step 2 – Install SAP Cloud Connector
-
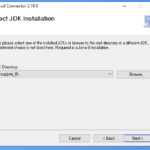
- Step 3- Install SAP Cloud Connector
-
- Step 3 – Install SAP Cloud Connector
-
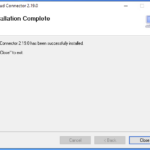
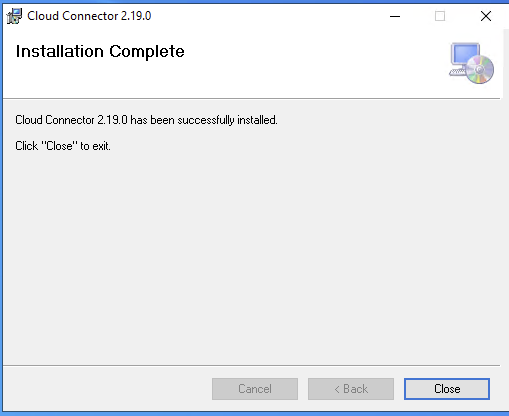
- Step 4- Install SAP Cloud Connector Finish
-
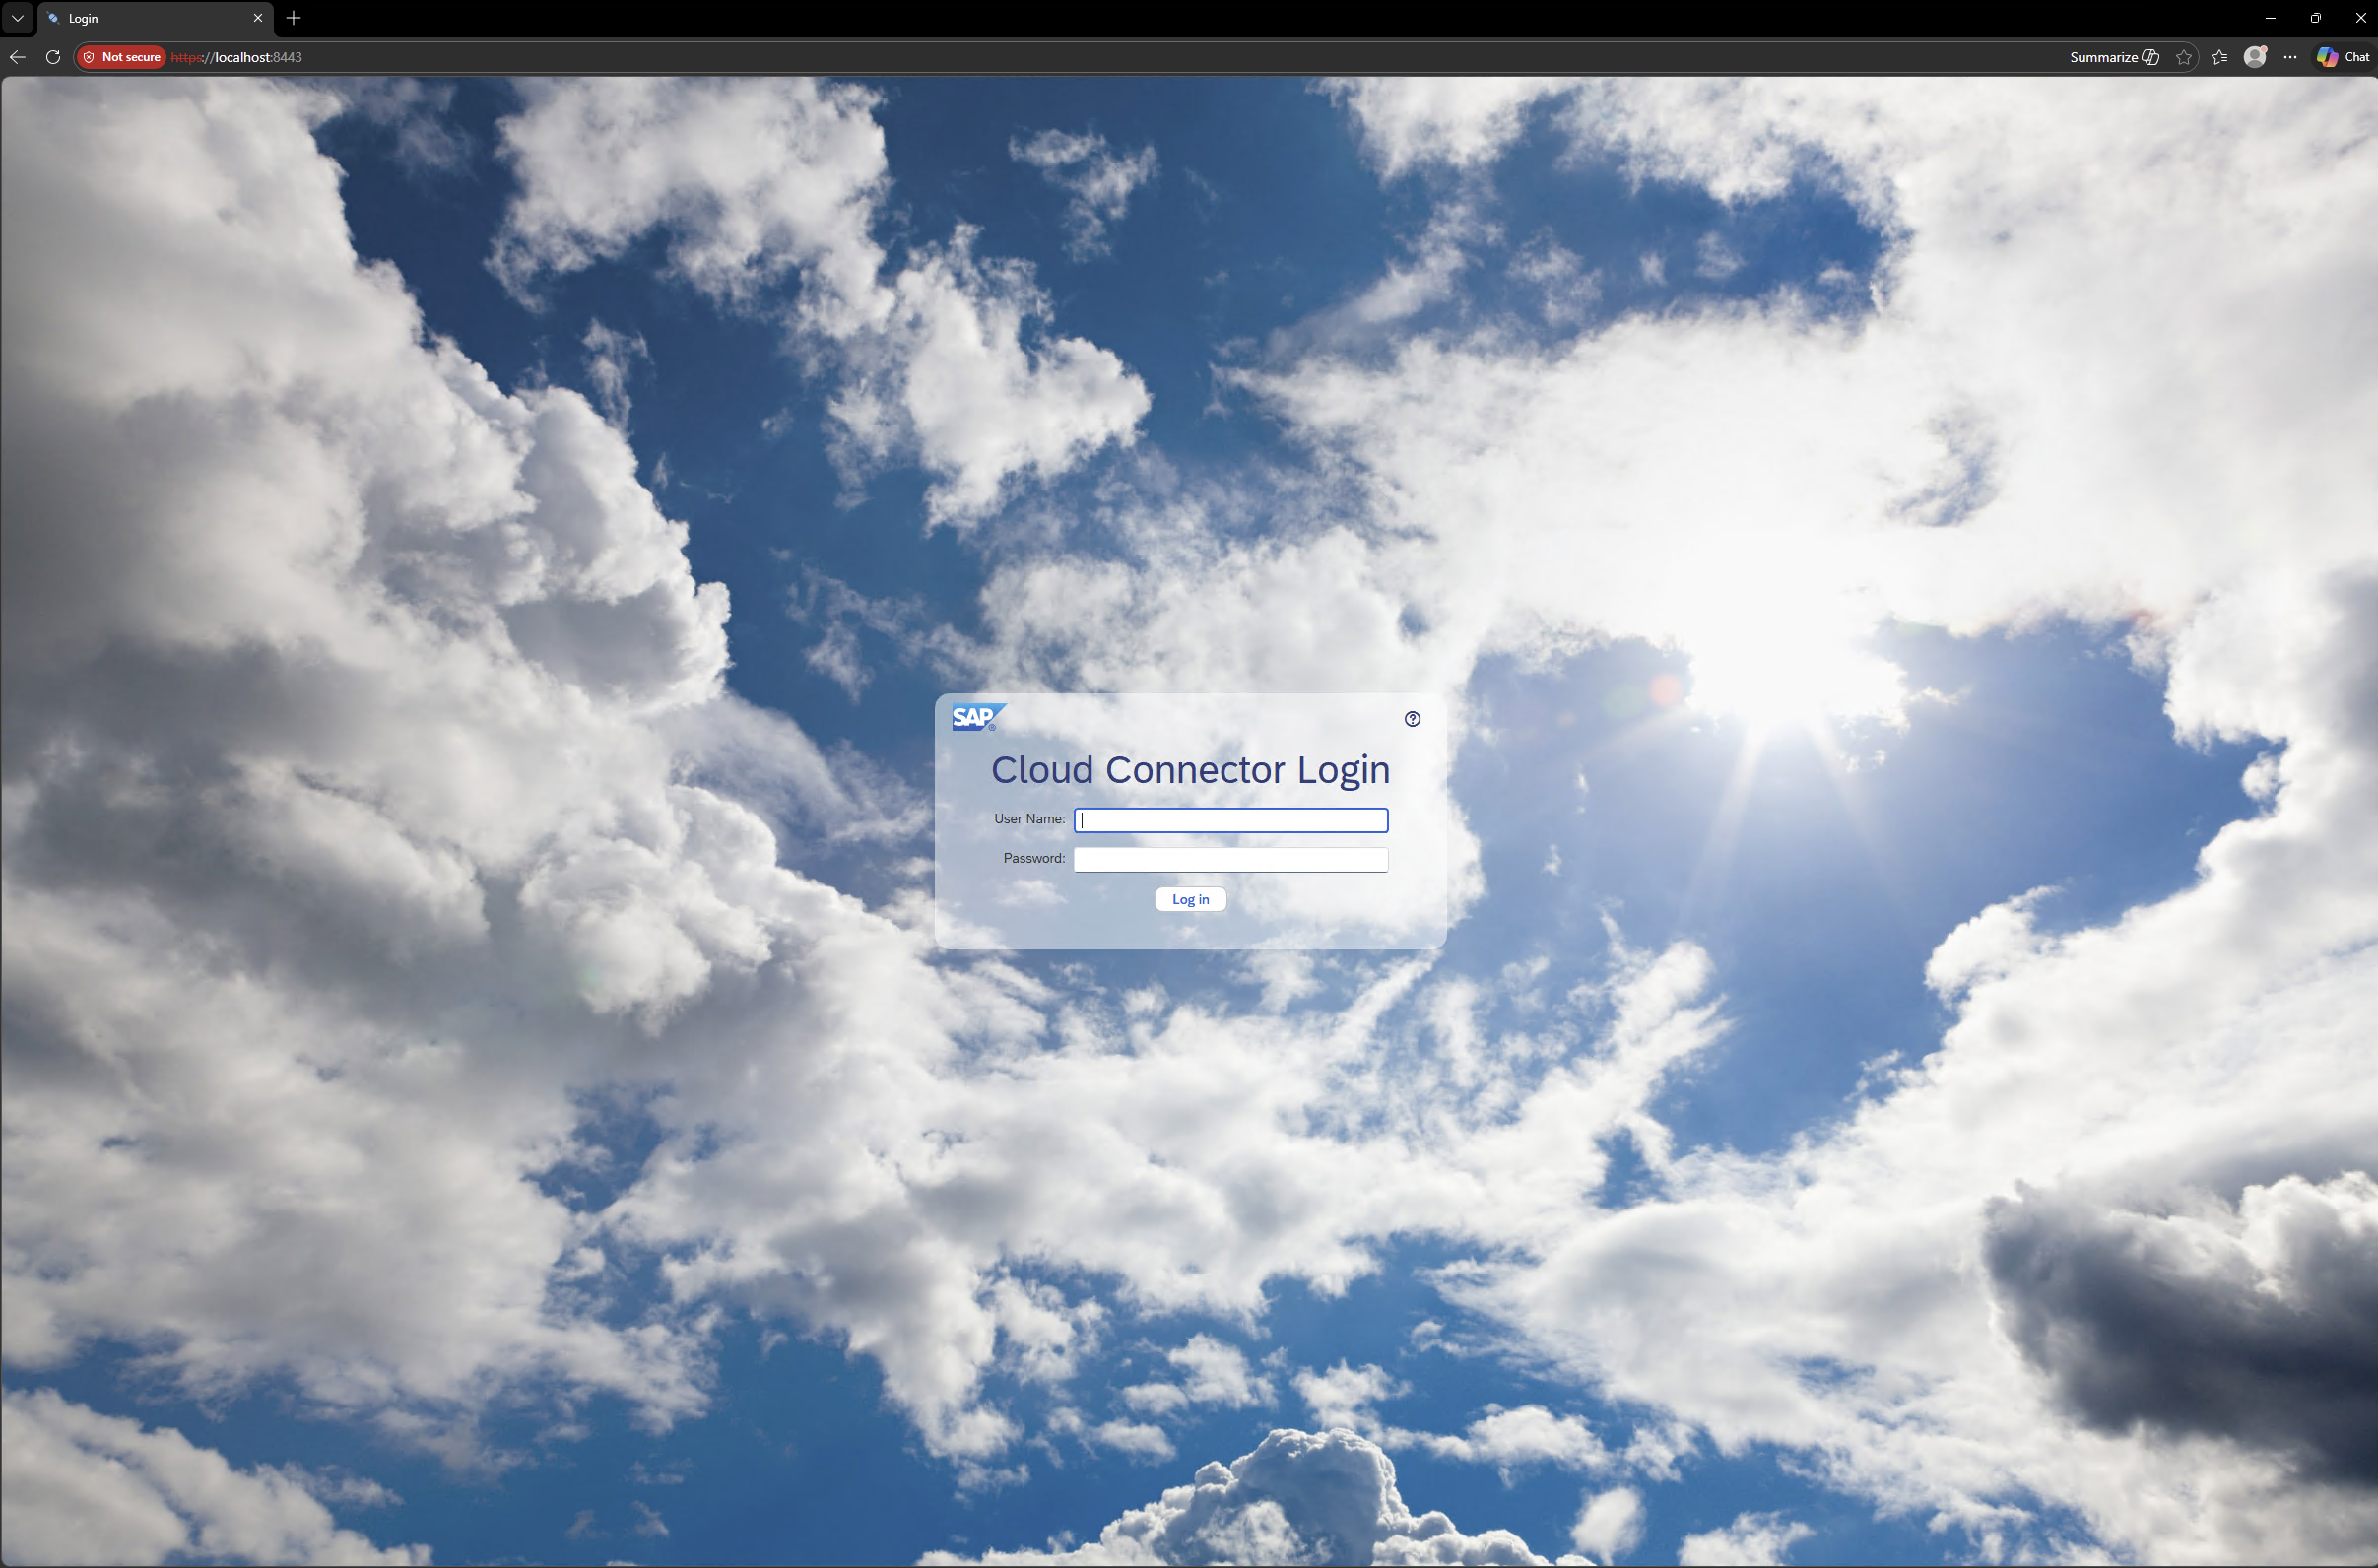
- Step 1 – SAP Cloud Connector Startsite
-

- Step 2 – Add Subcaccount

-
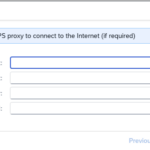
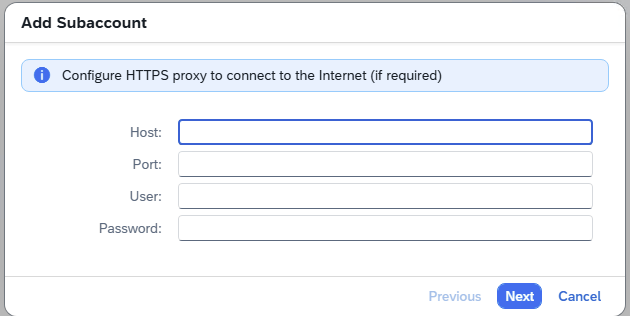
- Step 3 – Proxy
-

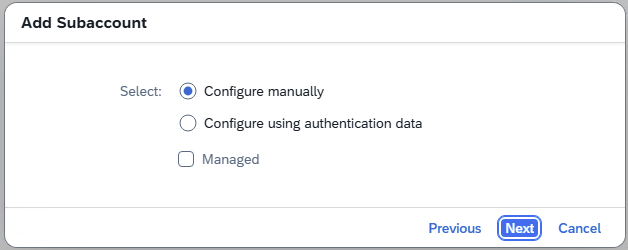
- Step 4 – Default
-
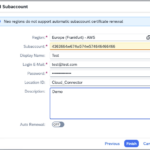
- Step 5 – Config and Finish

-

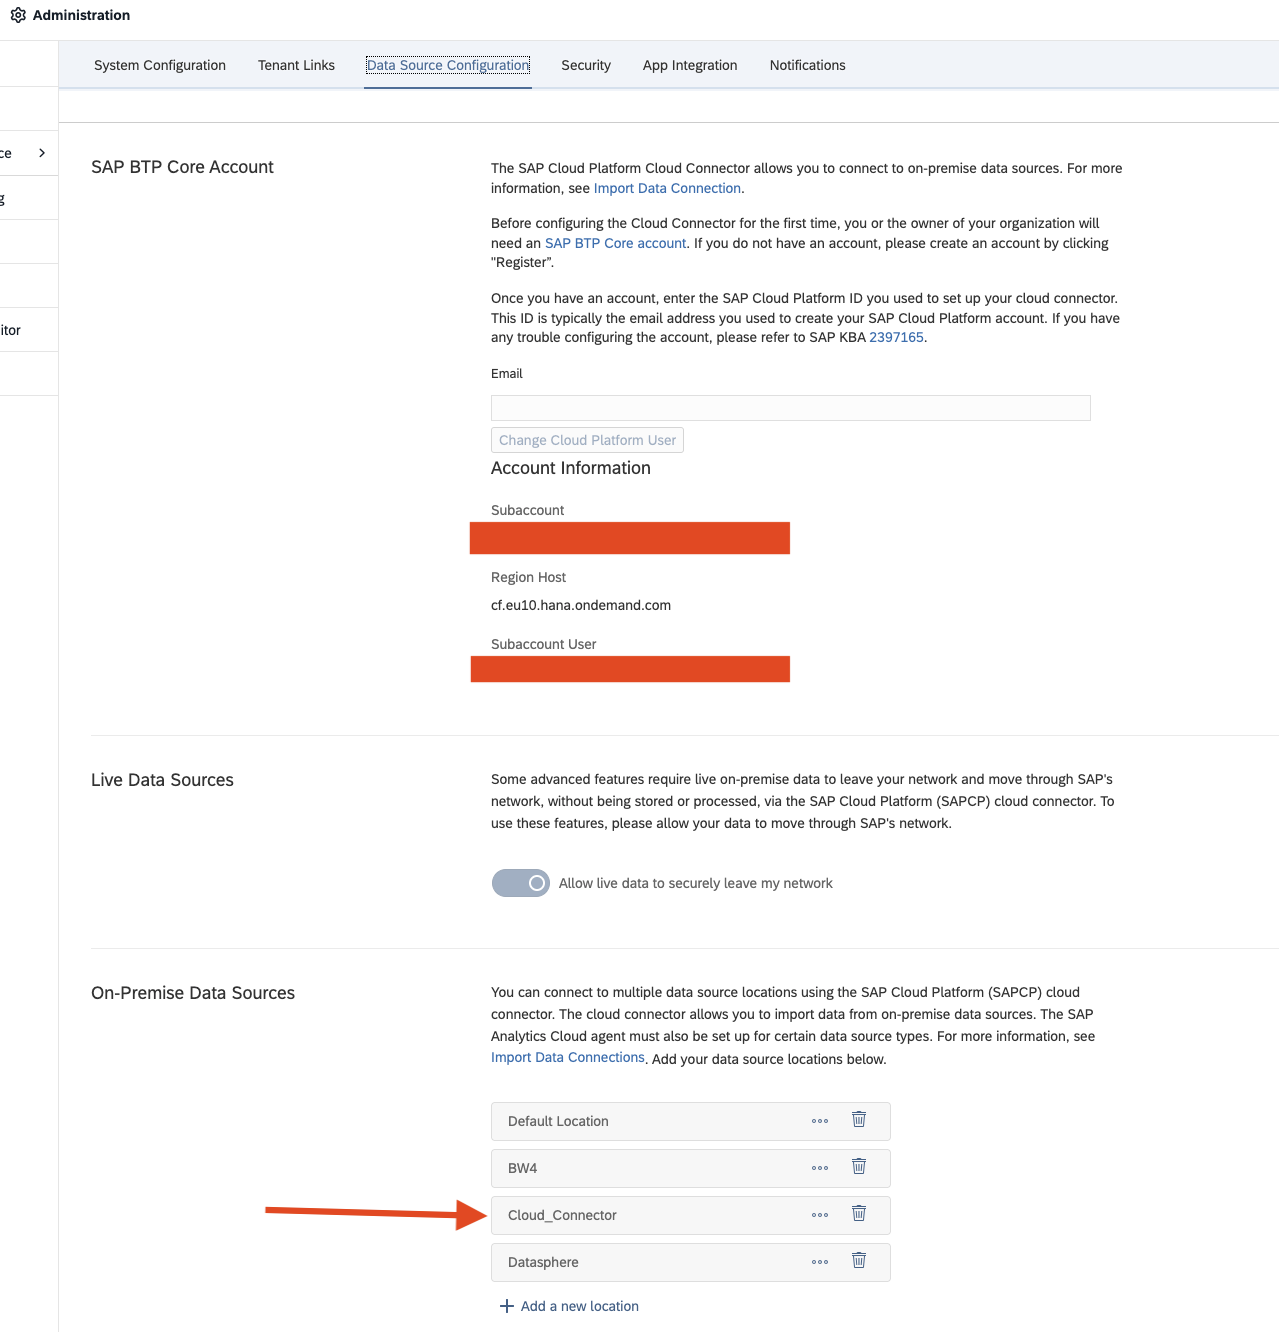
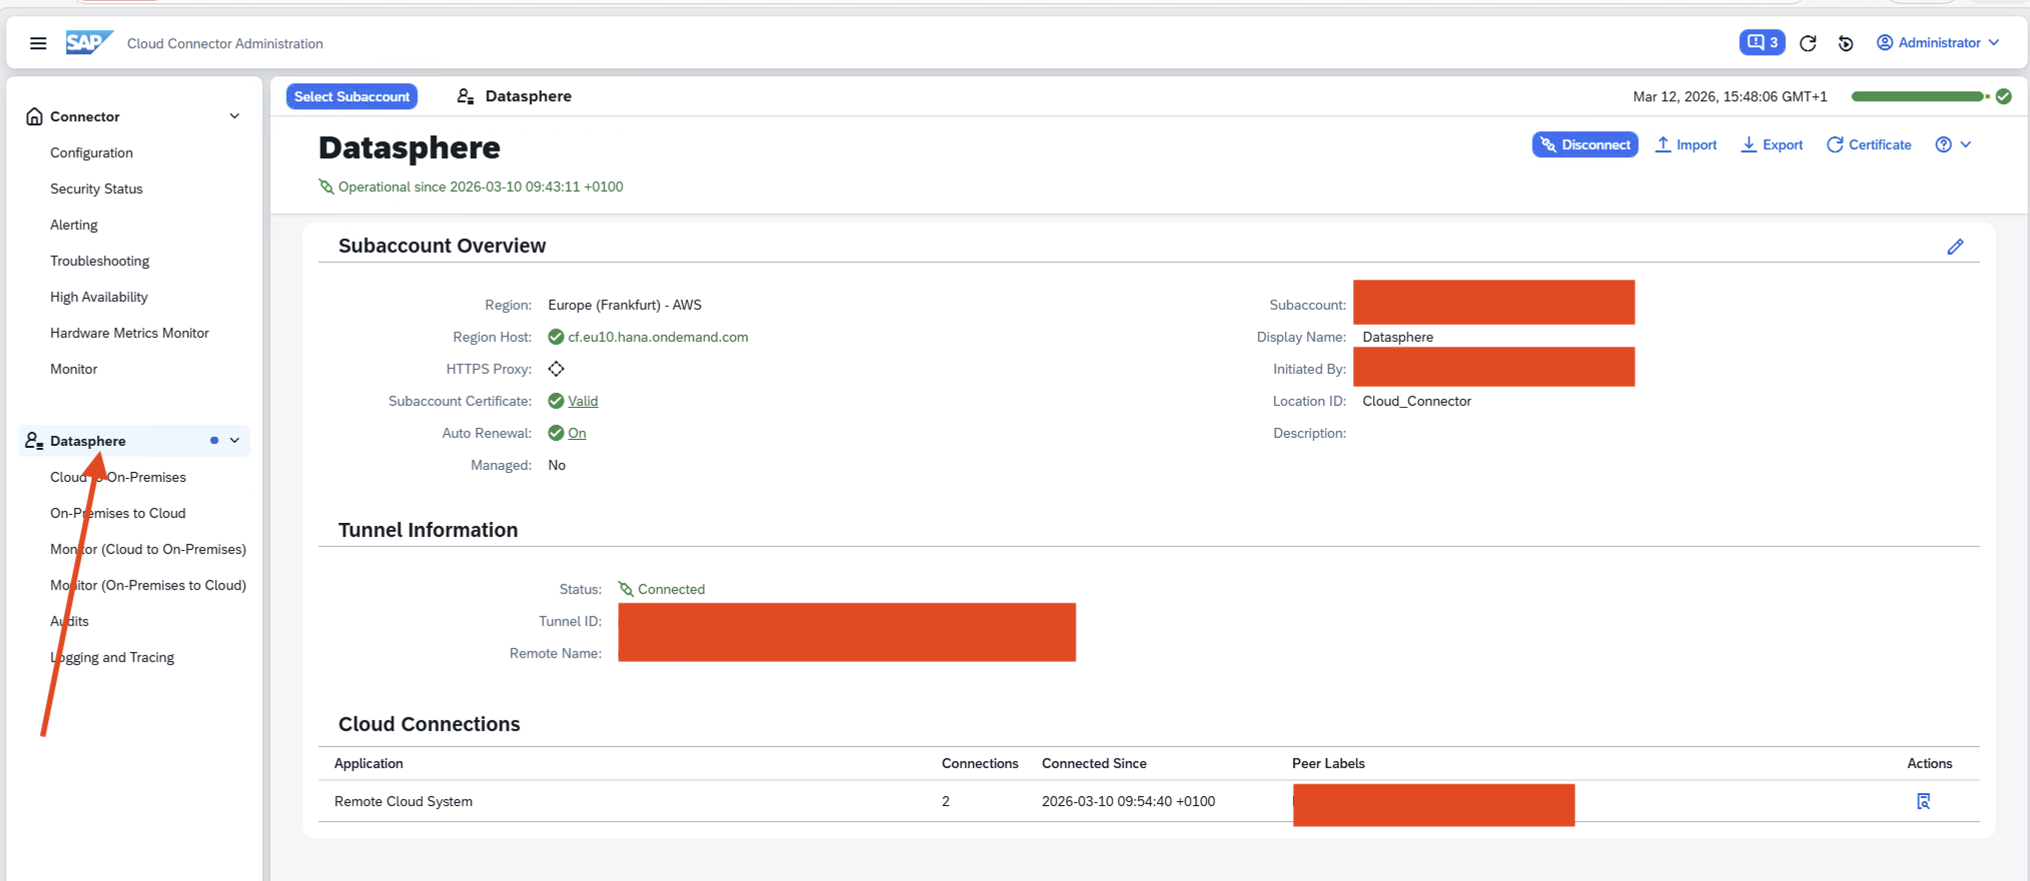
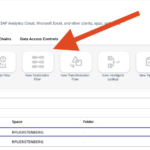
- SAP Datasphere Administrator Cloud Connector
-
- SAP Cloud Connector Datasphere Overview
-
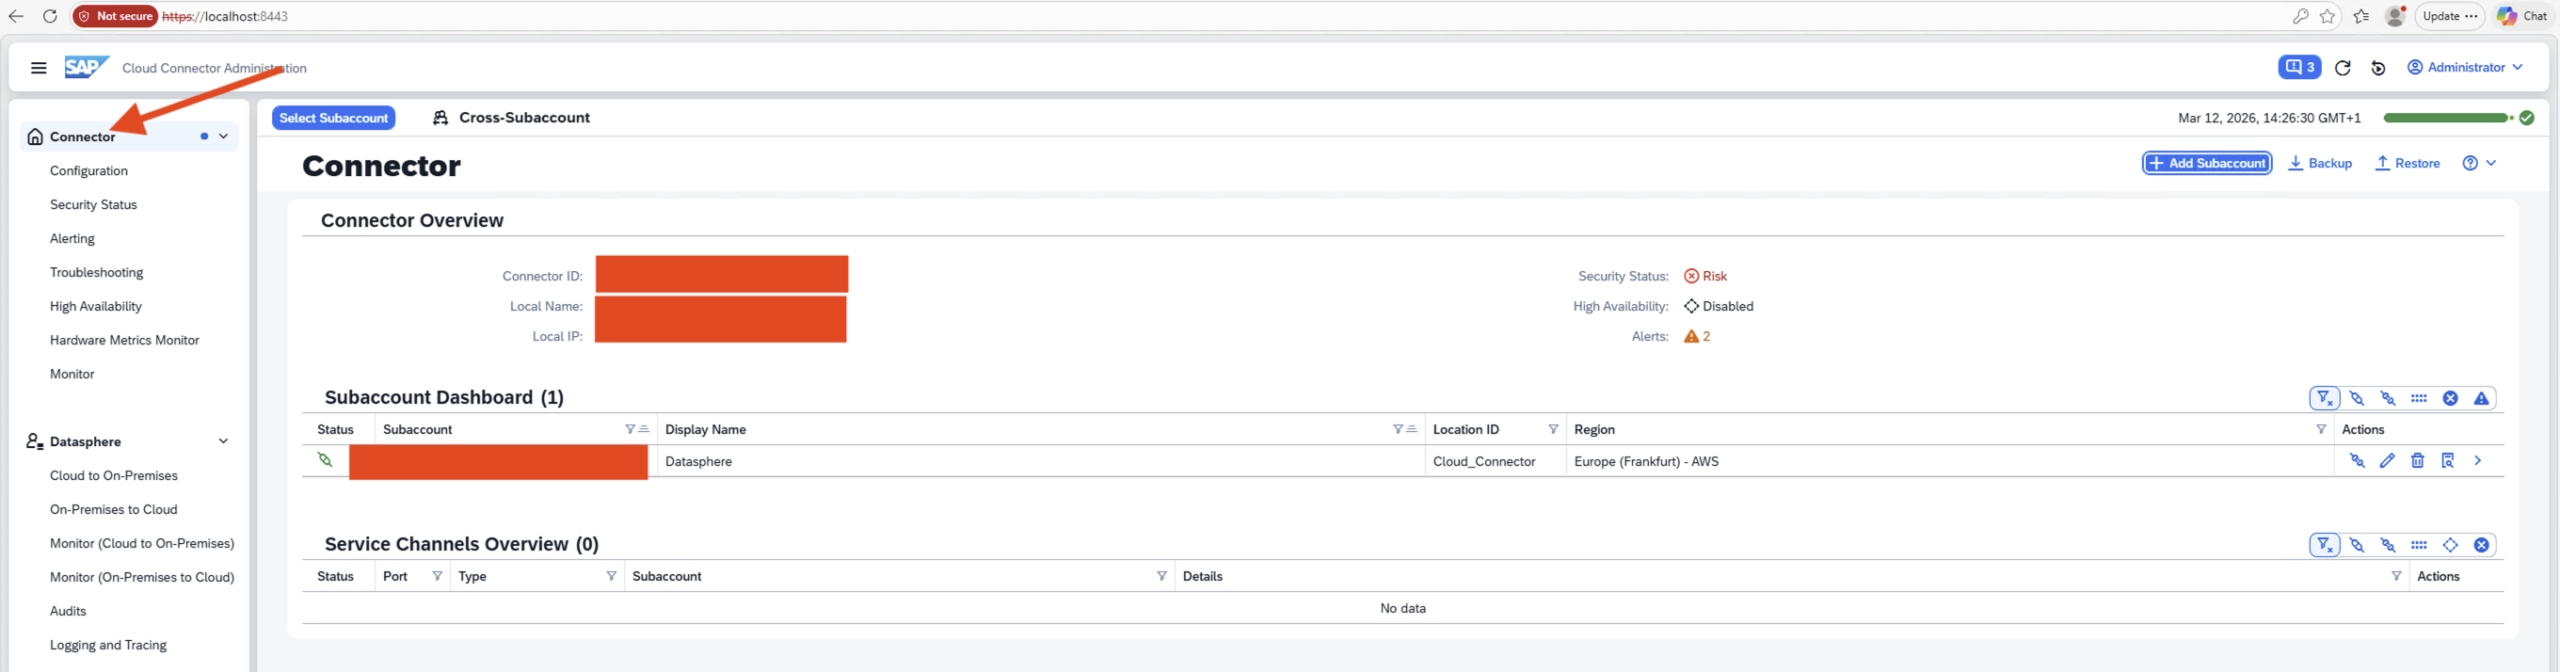
- SAP Cloud Connector Overview
-
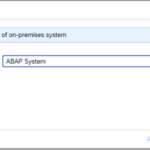
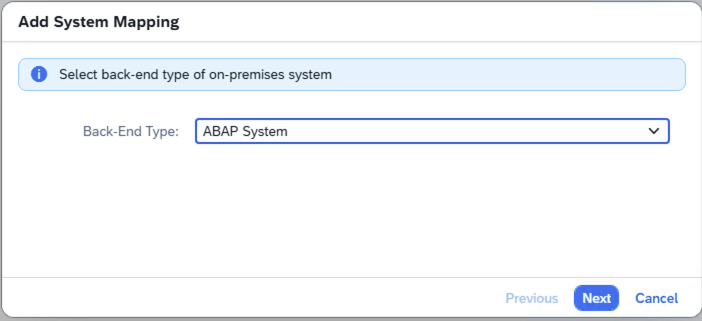
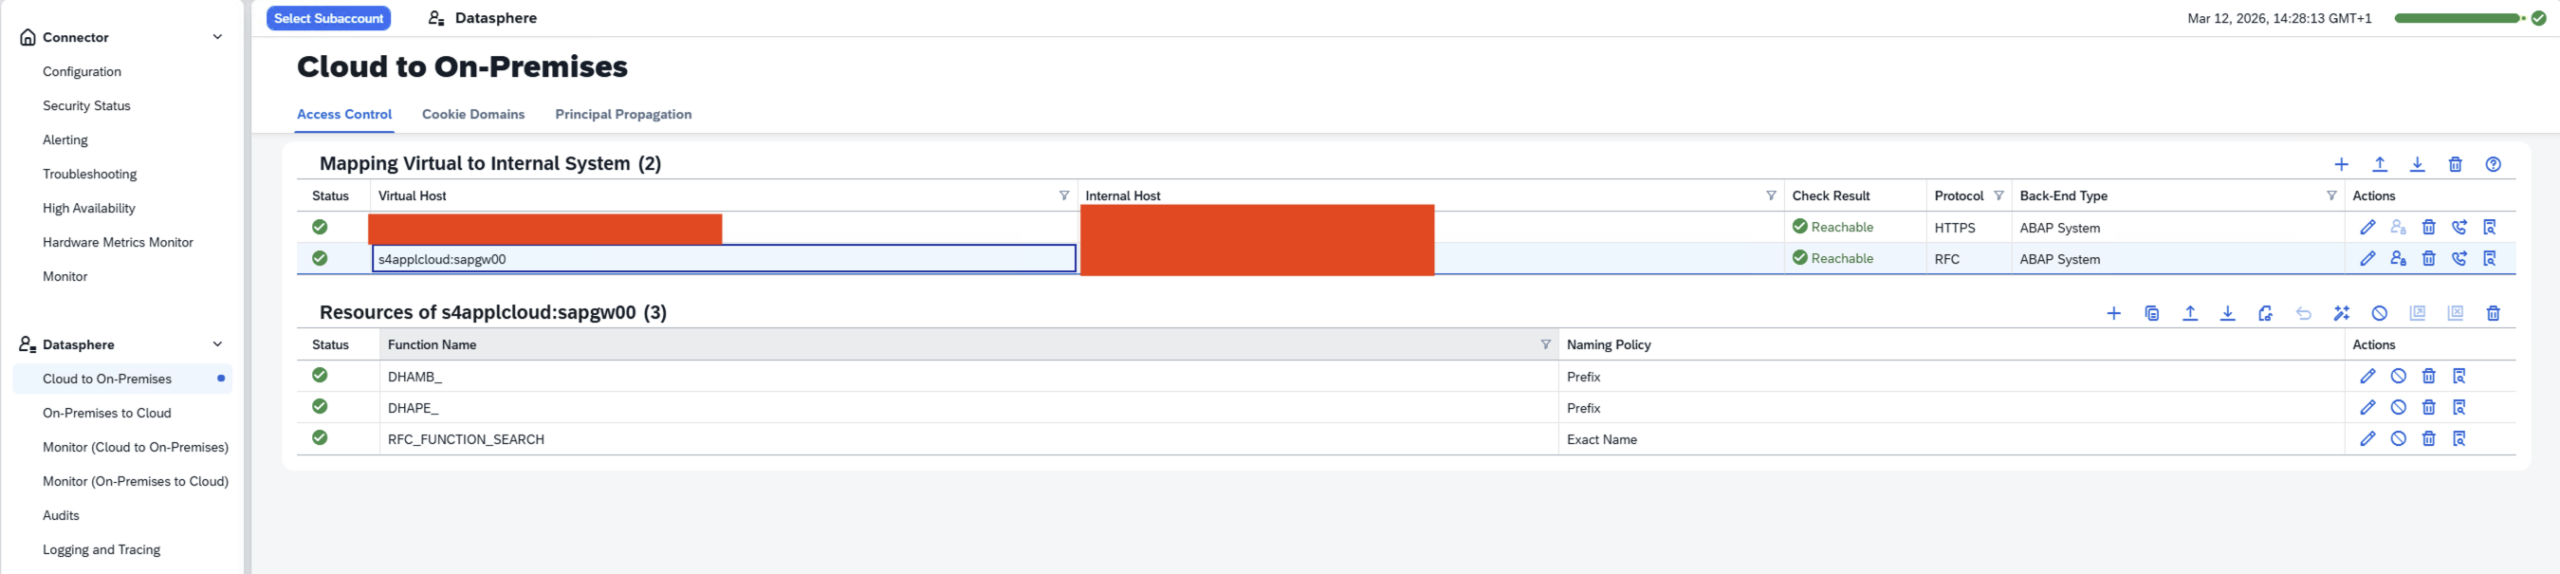
- Step 1 – SAP Cloud Connector Add Internal System – ABAP System
-

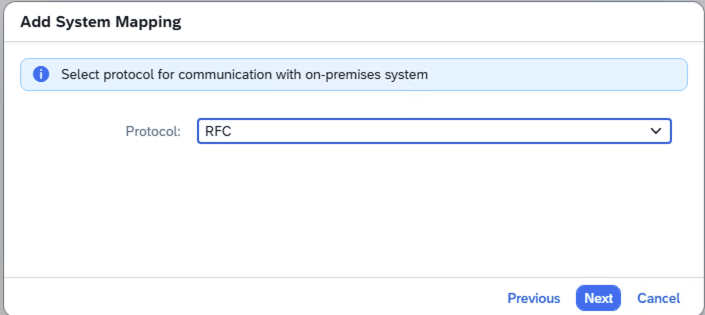
- Step 2 – Use RFC
-
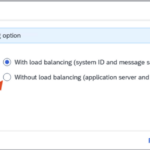
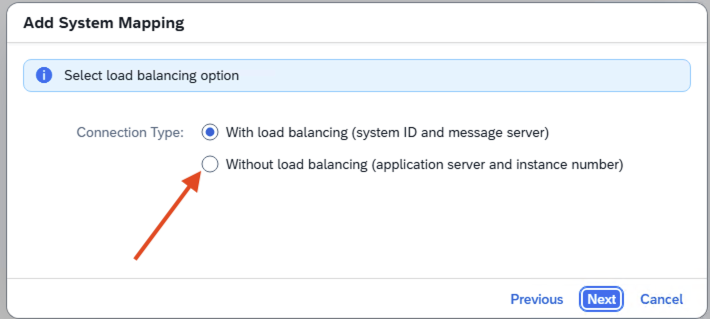
- Step 3 – SAP Cloud Connector Internal System Without load balancing
-
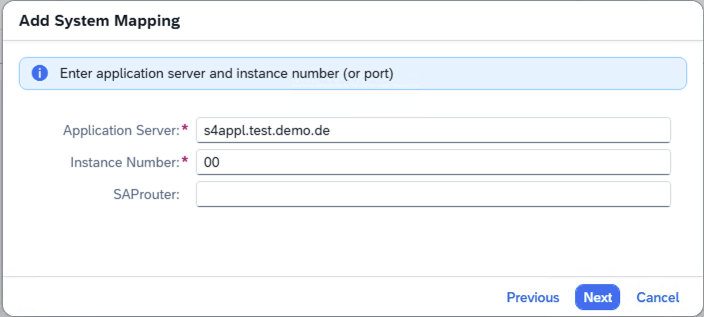
- Step 4 -SAP Cloud Connector Internal System App Server – Instance Number
-
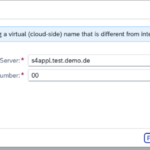
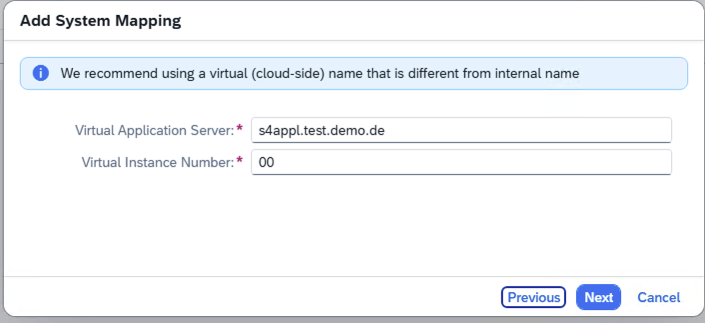
- Step 5- SAP Cloud Connector Internal System Virtual App Server
-
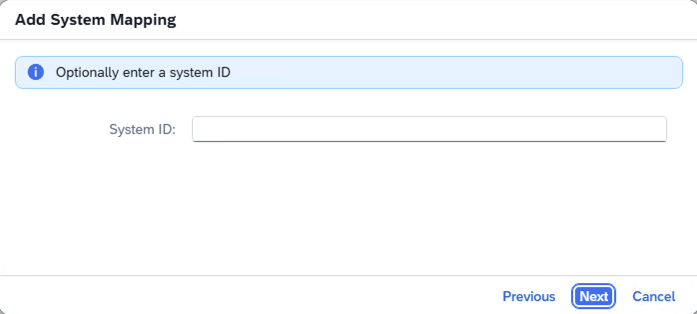
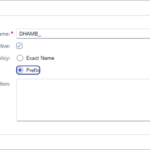
- Step 6 – SAP Cloud Connector Internal System System ID
-
- Step 7 – SAP Cloud Connector Internal System Description
-
- Step 8 – SAP Cloud Connector Internal System Summary
-

- Step 9 – Internal System Reachable

-

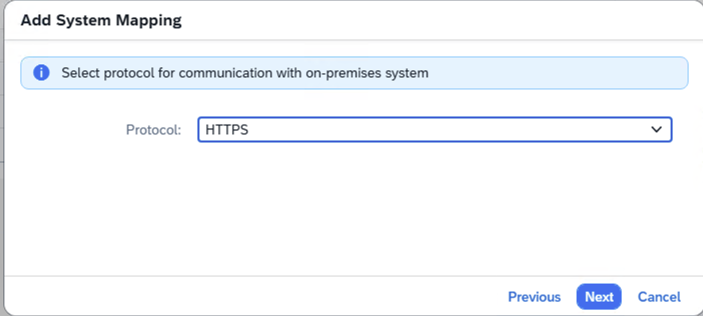
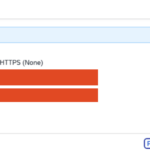
- Step 9 – Choose HTTPS
-
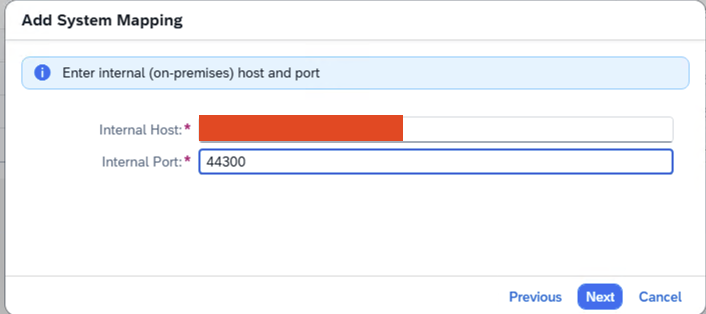
- Step 10 – Add Host and Port
-

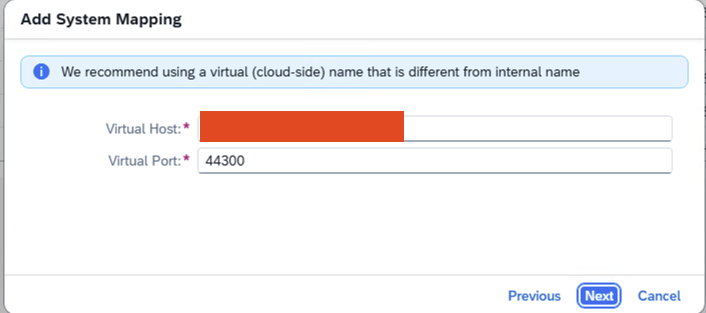
- Step 11 – Add Virtual Host and Port
-
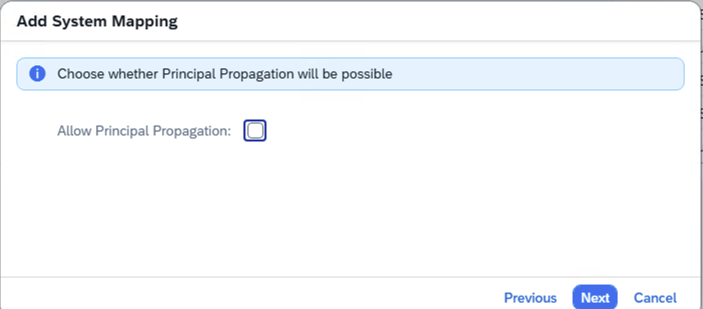
- Step 12 – Uncheck Allow Principal Propagatin
-
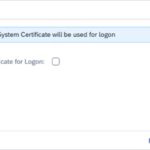
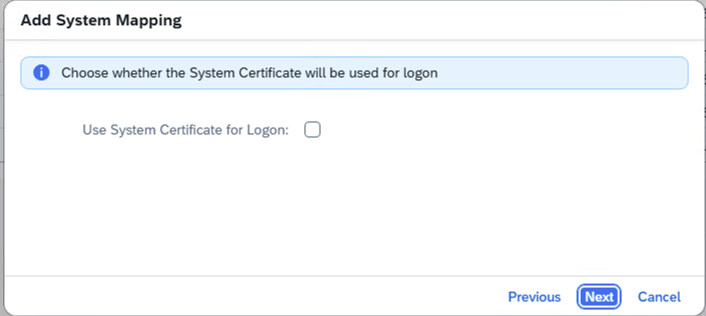
- Step 13 – Uncheck Use System Certificate for Logon
-
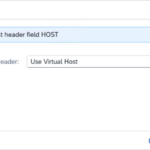
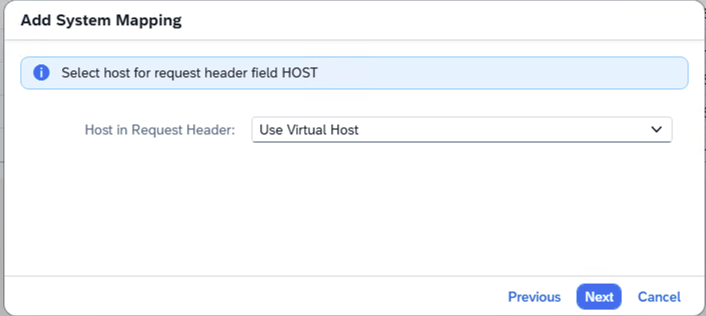
- Step 14 – Use Virtual Host
-

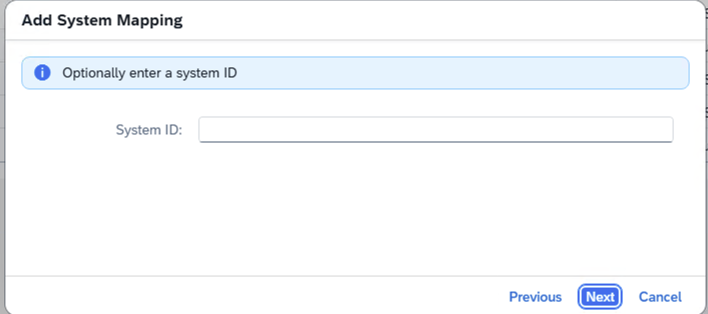
- Step 15 – System ID is Optional
-
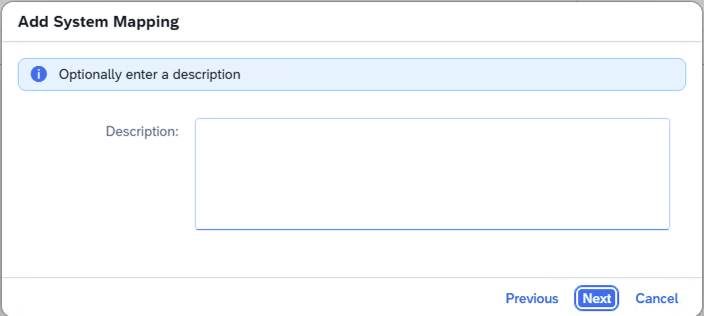
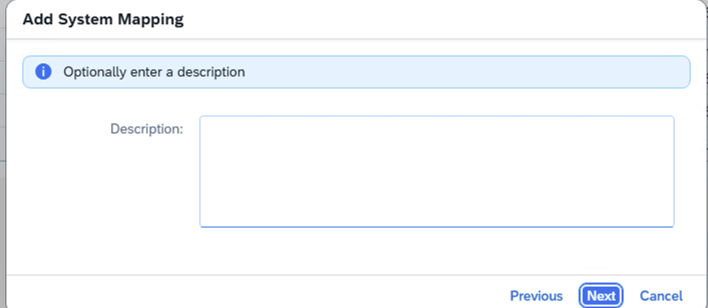
- Step 16 – Description
-
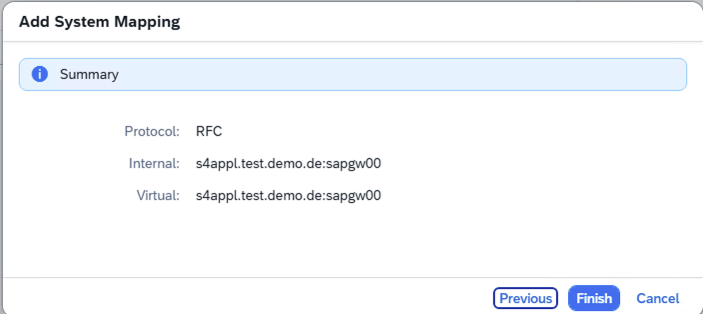
- Step 17 – Summary of Connection

-
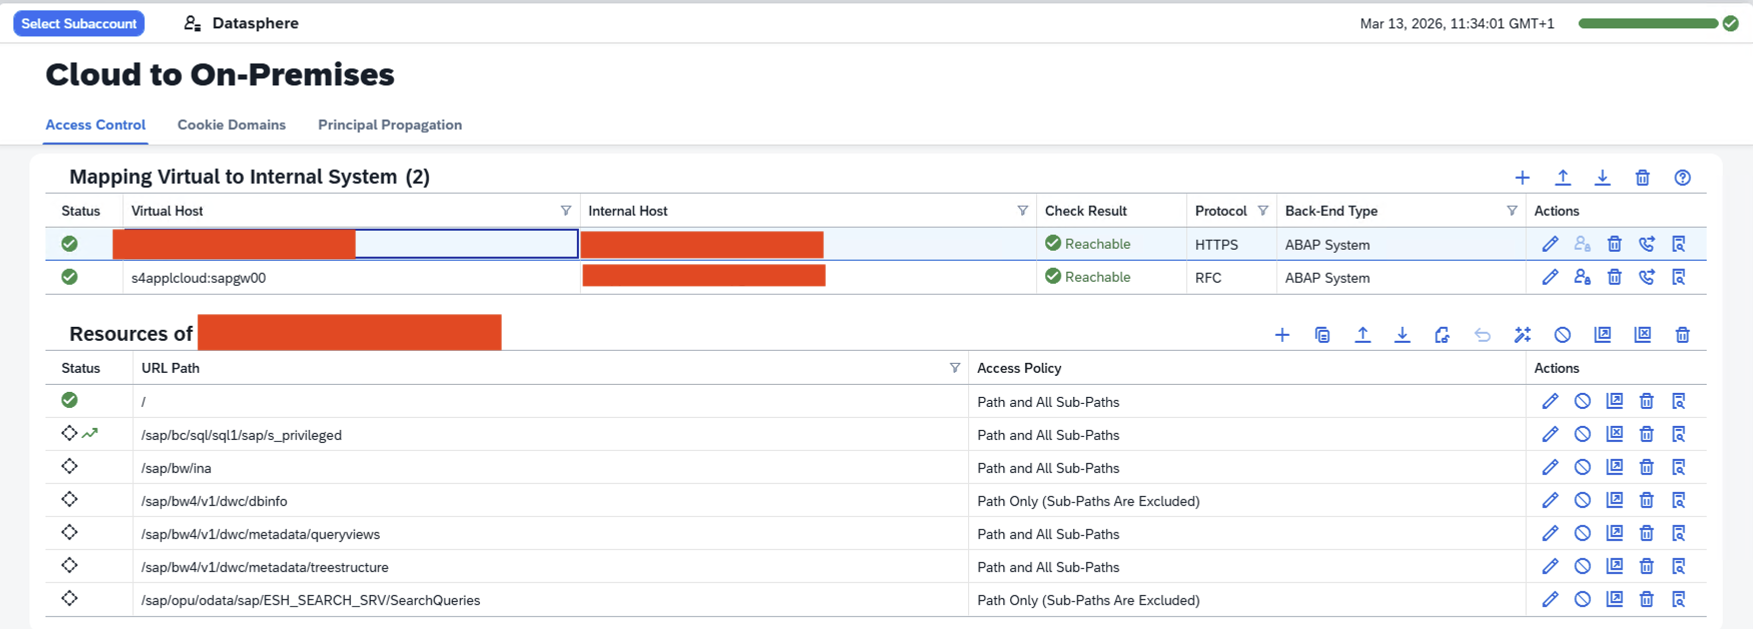
- Step 1- Add Resources

-
- Step 2- SAP Cloud Connector Add Internal Resources Example

-
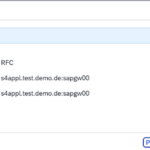
- Step 3- Summary RFC
-
- Step 4 – Summary HTTPS
-
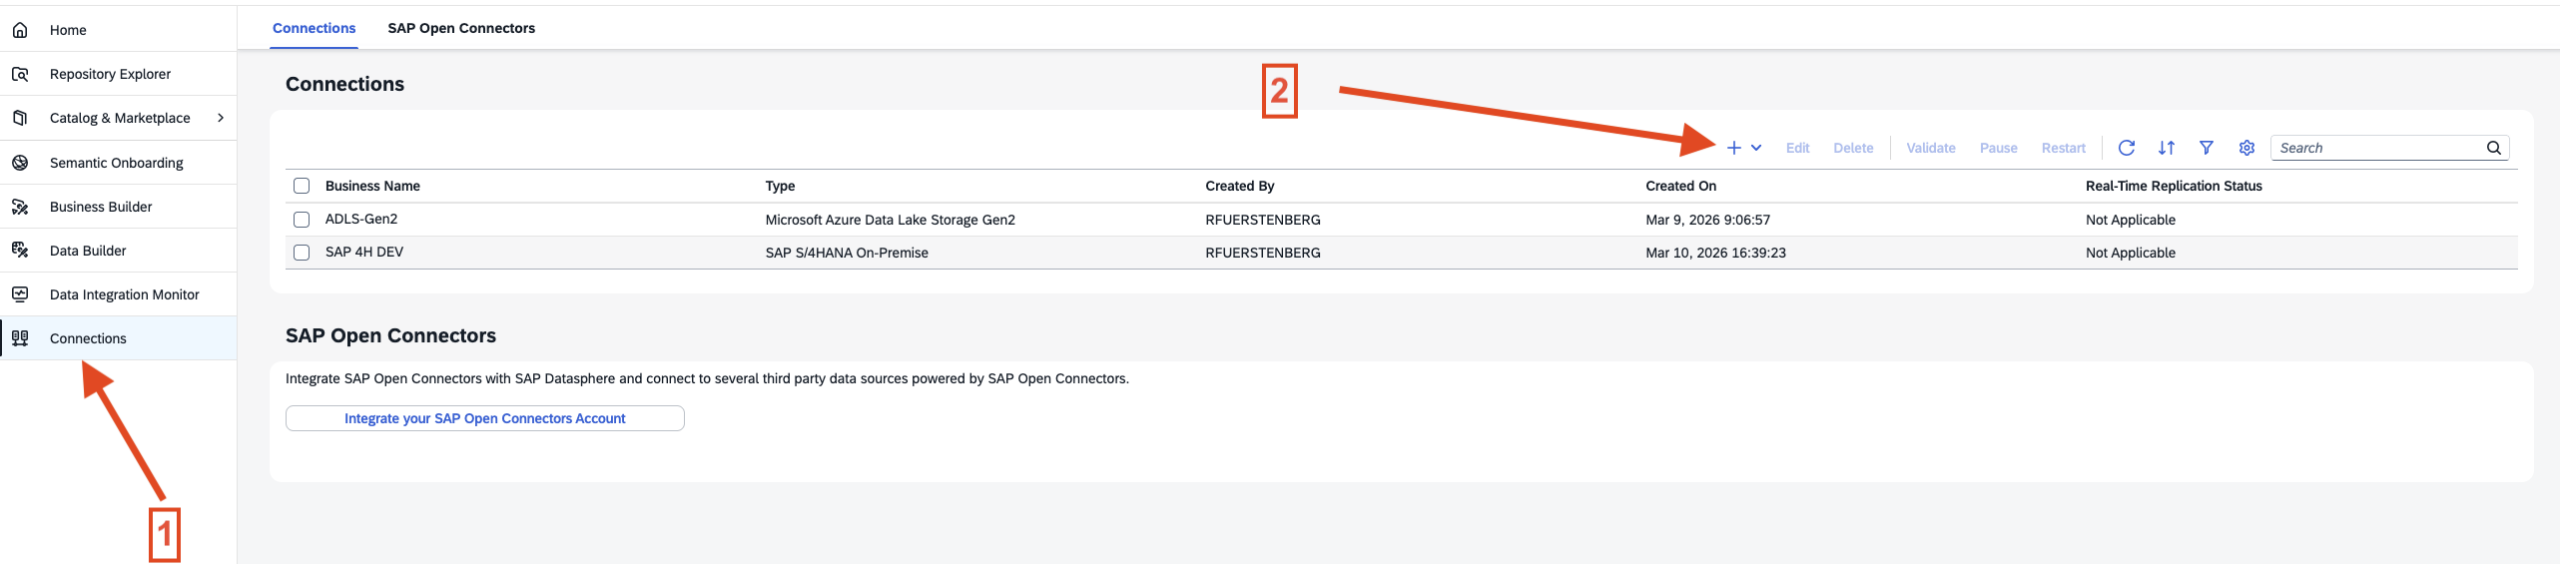
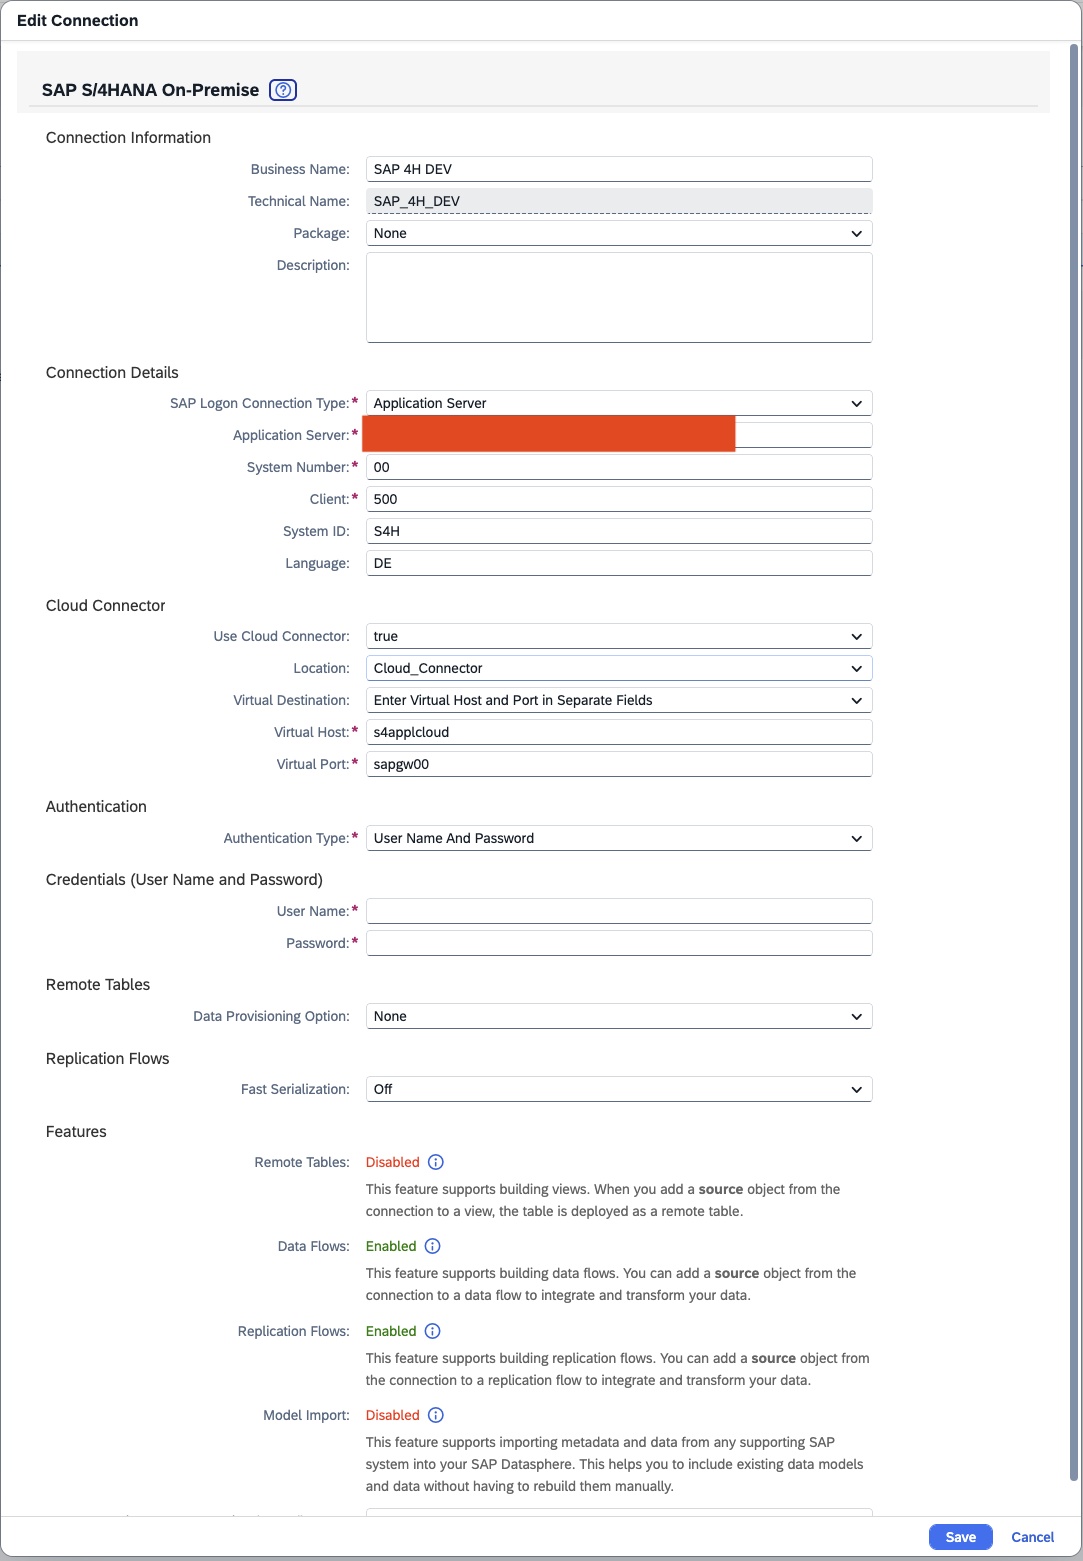
- Step 1 – Connections in Datasphere
-
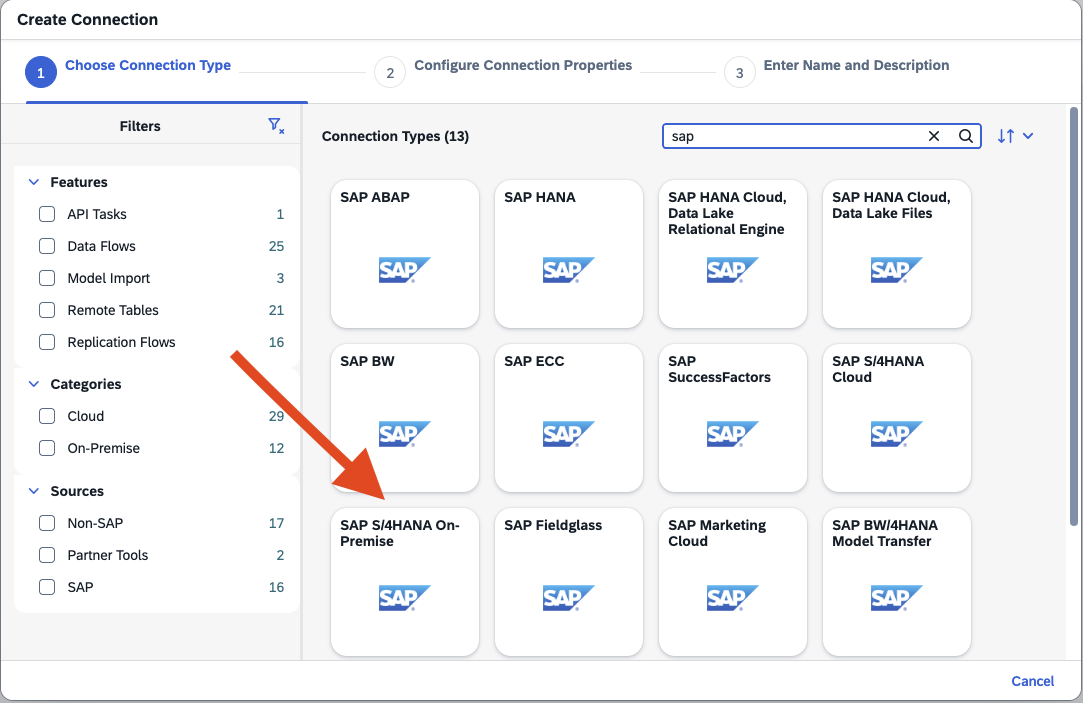
- Step 2 – Add Source
-
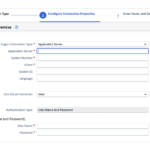
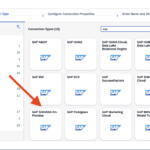
- Step 3a – Fill the fields
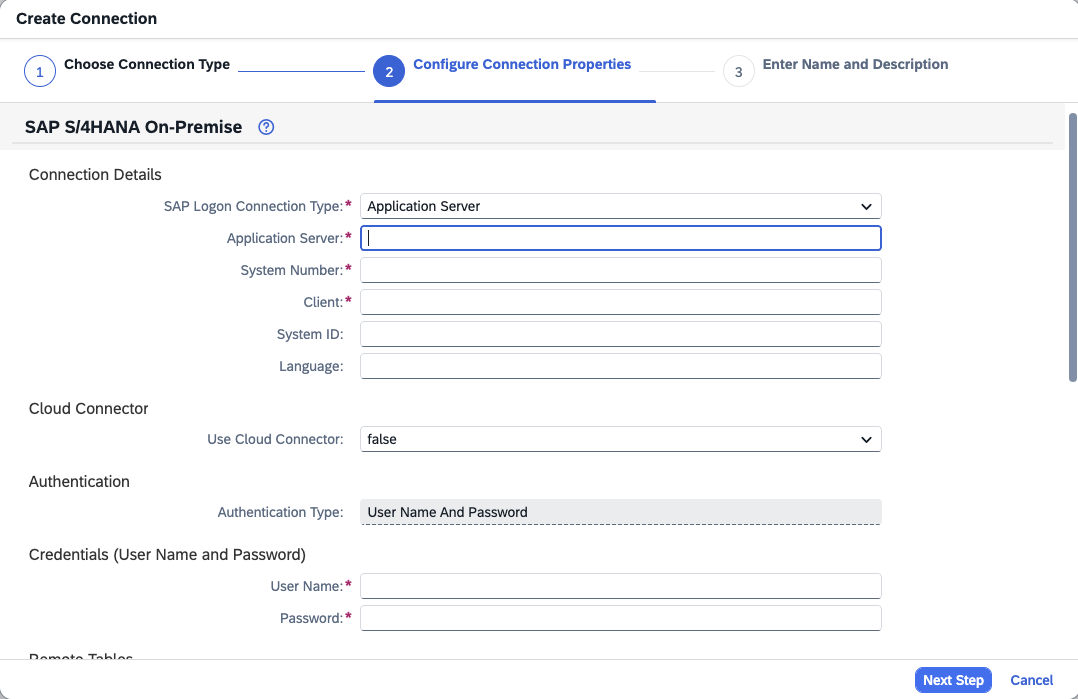
-
- Step 3b – Fill the fields
-
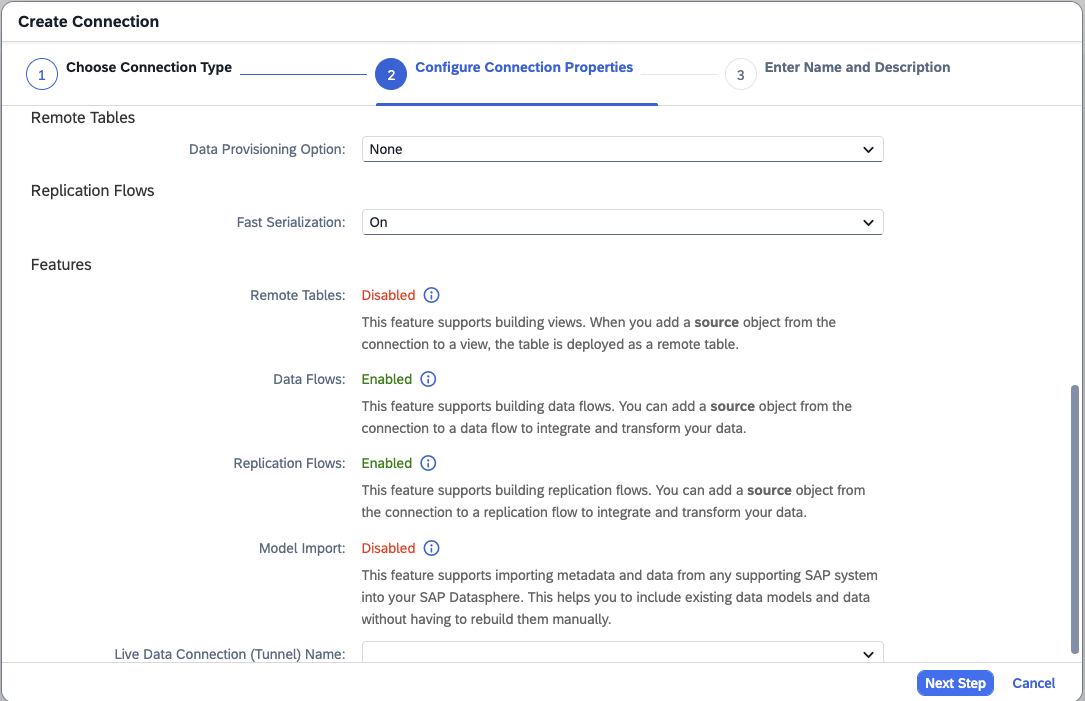
- Step 4 – Show the Connection Details
-
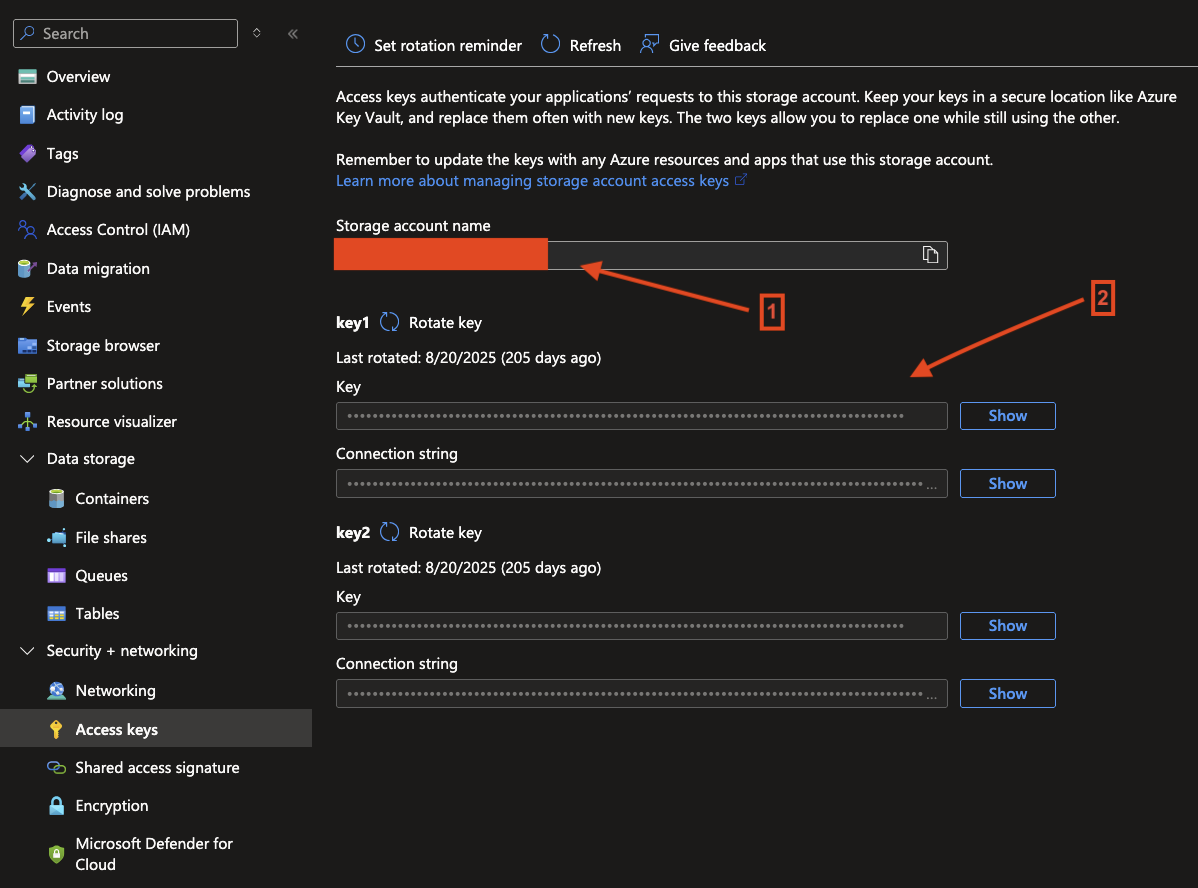
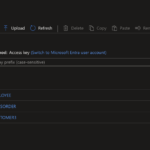
- Storage Parameter for Connection
-

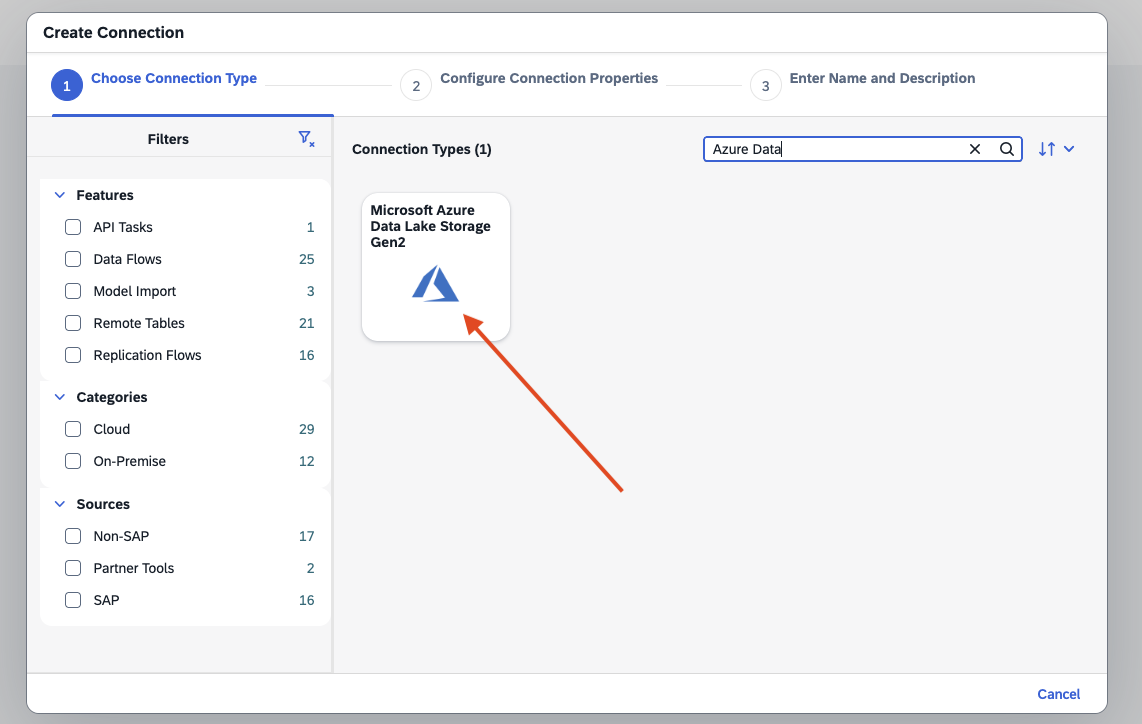
- Step 1 – Create Connection

-
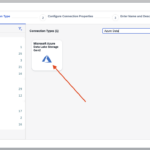
- Step 2 – Add Data Lake Gen2
-
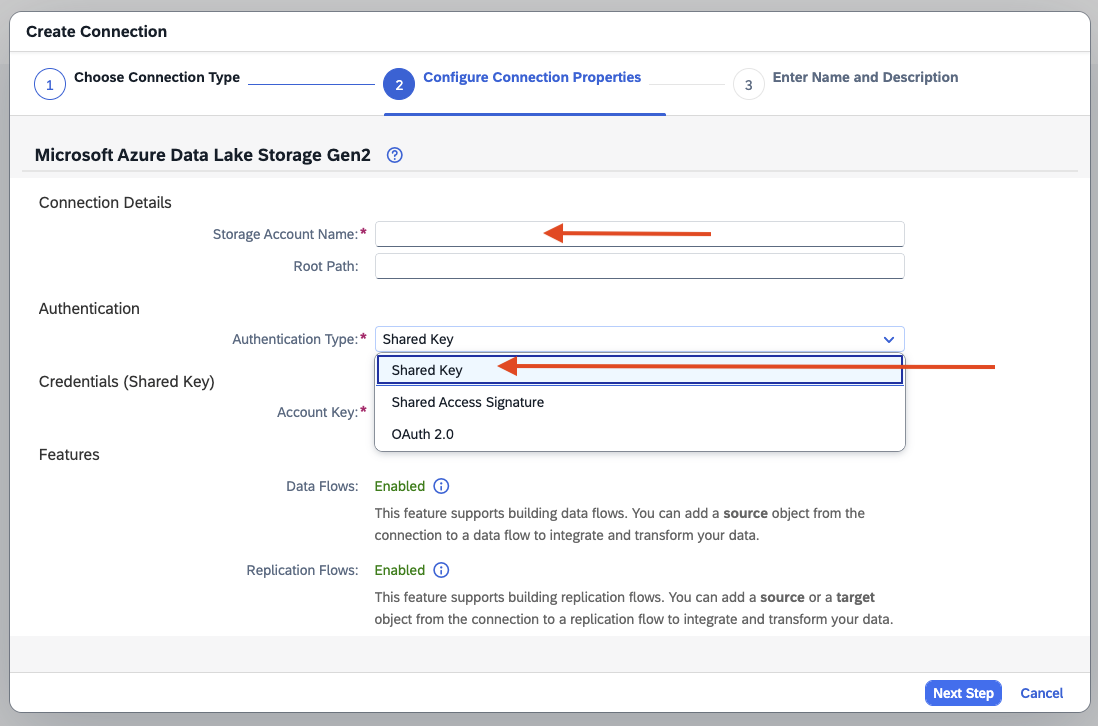
- Step 3- Fill out fields
-
- Step 4 – Give a Name

-
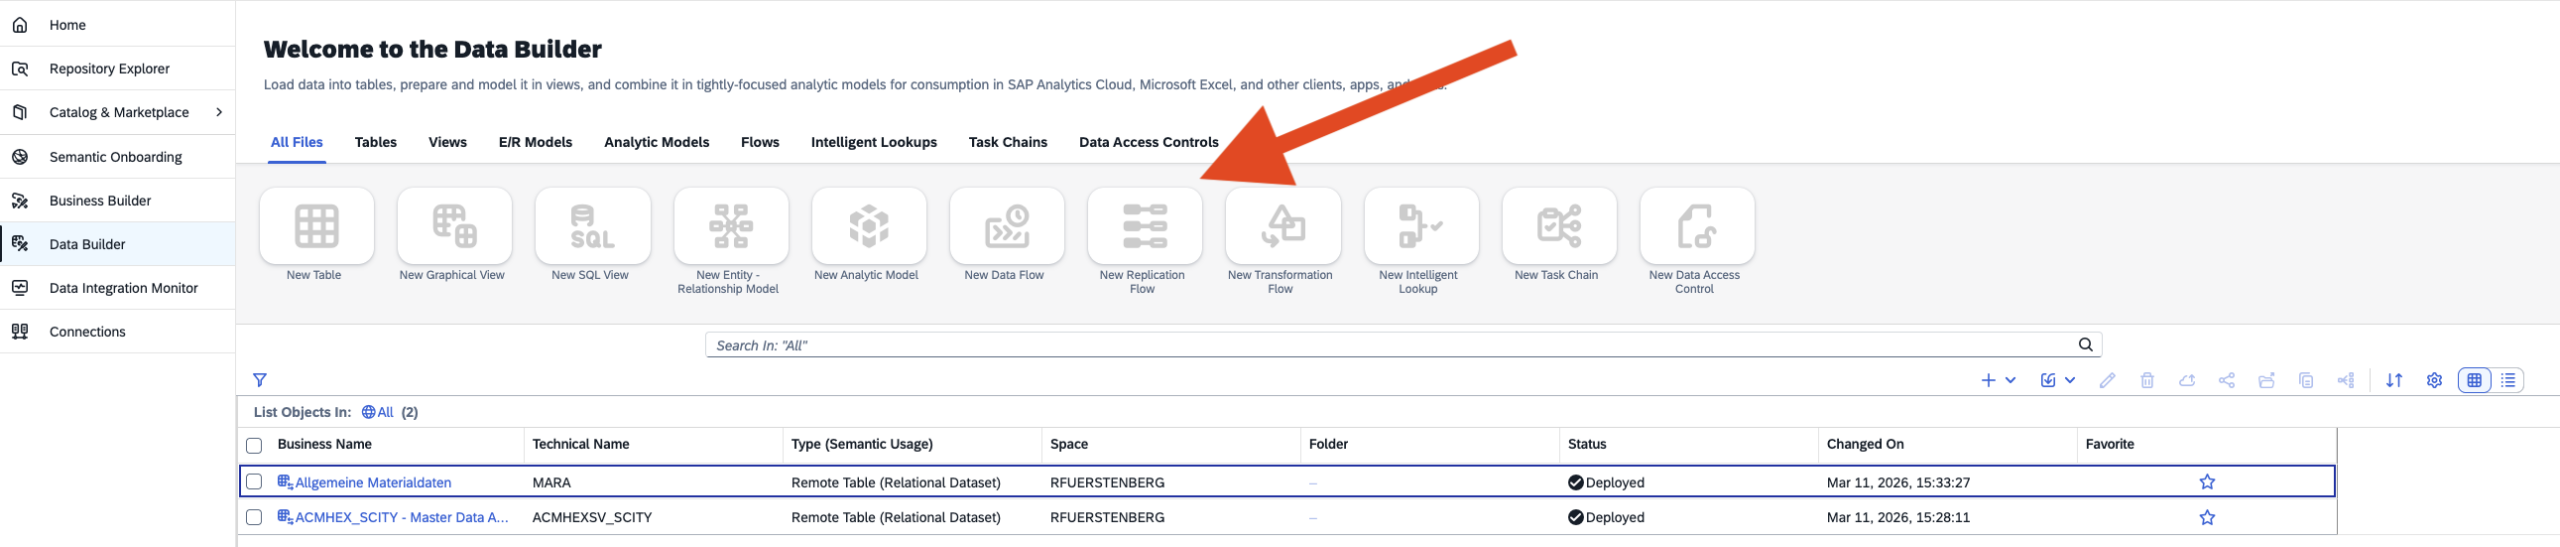
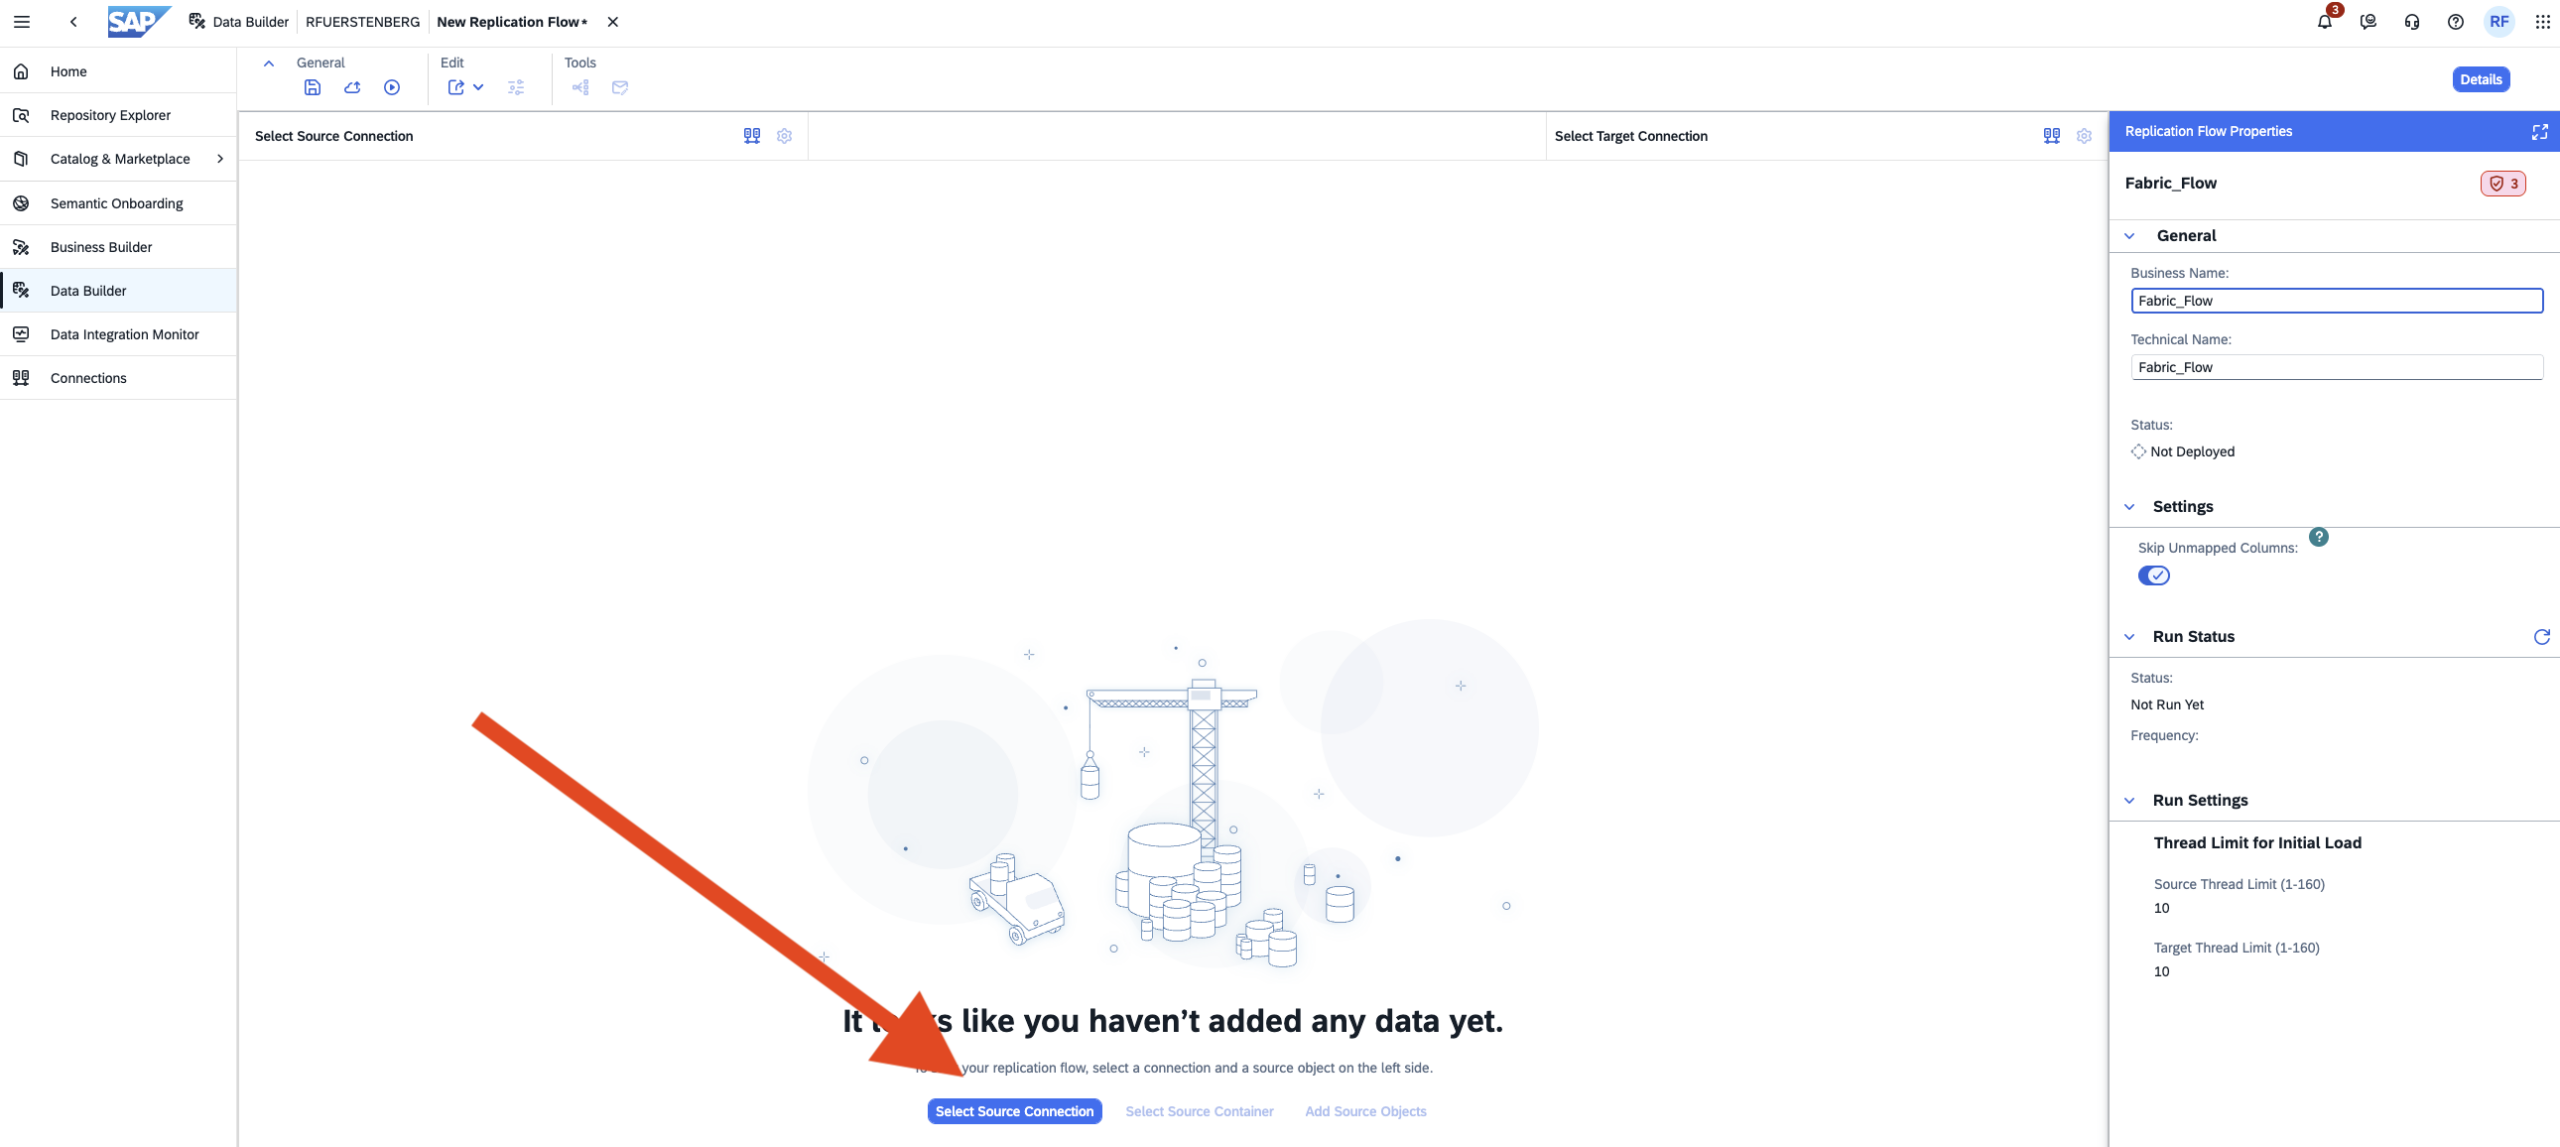
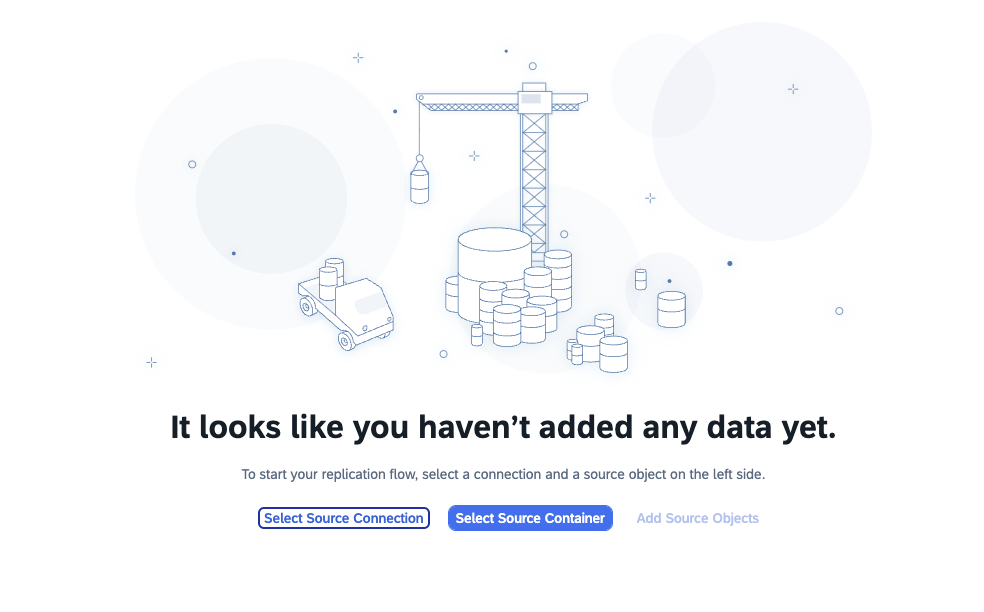
- Step 1 – Replication Flow
-
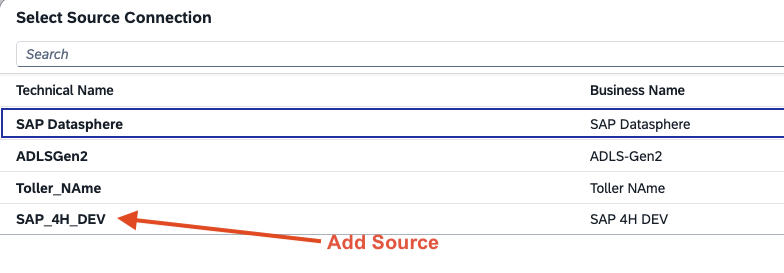
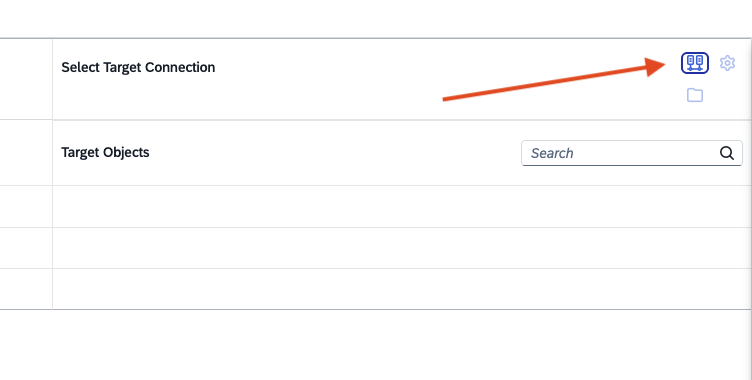
- Step 2 – Select Source Connection
-
- Step 3 – Add Source
-
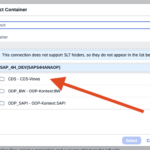
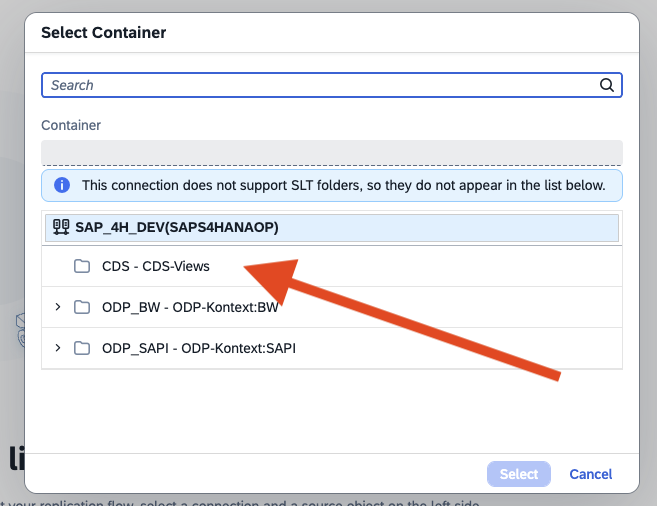
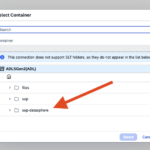
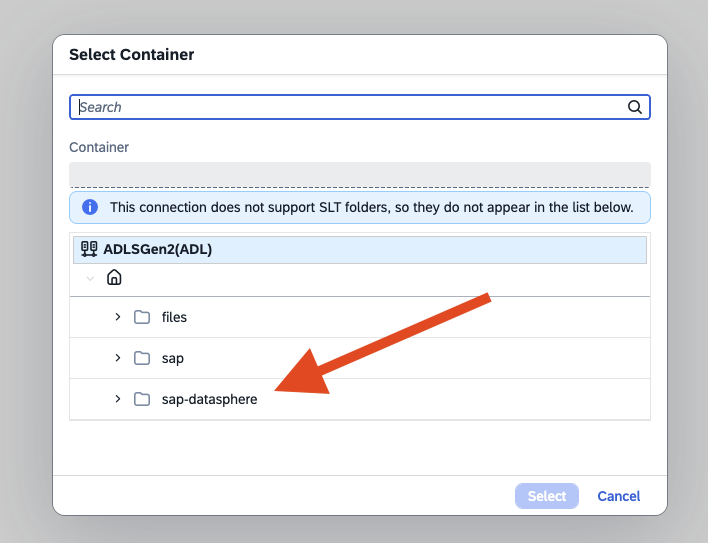
- Step 4 – Select Source Container
-
- Step 5 – Select her cds Views in my case
-
- Step 6 – Select Source Objetcs

-
- Step 7 – Overview Salesorder Objetct

-
- Step 8 – Select Target in Replication Flow
-
- Step 9 – Add the ADLS Gen2

-
- Step 10 – Select Storage Account Container
-
- Step 11 – See Settings of Storage Account Target
-
- Step 12 – Save, deploy und run

-
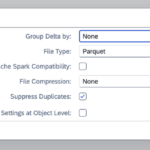
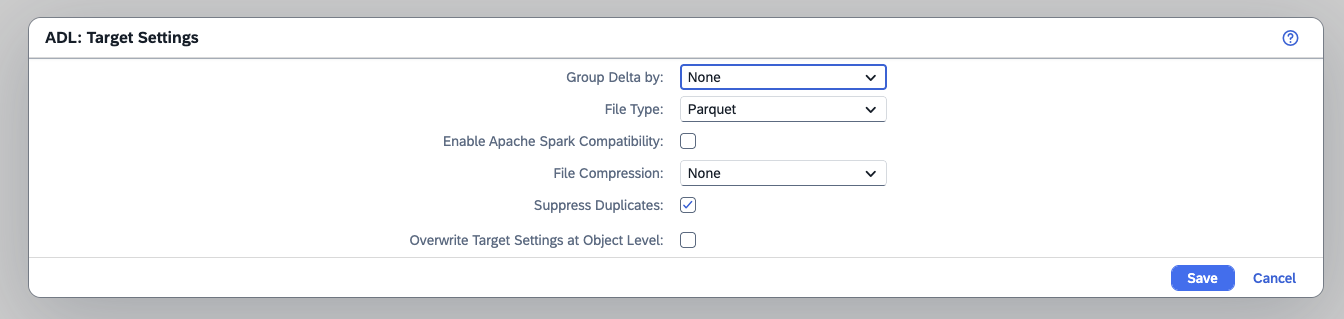
- Additional Settings in Replication Flow

-
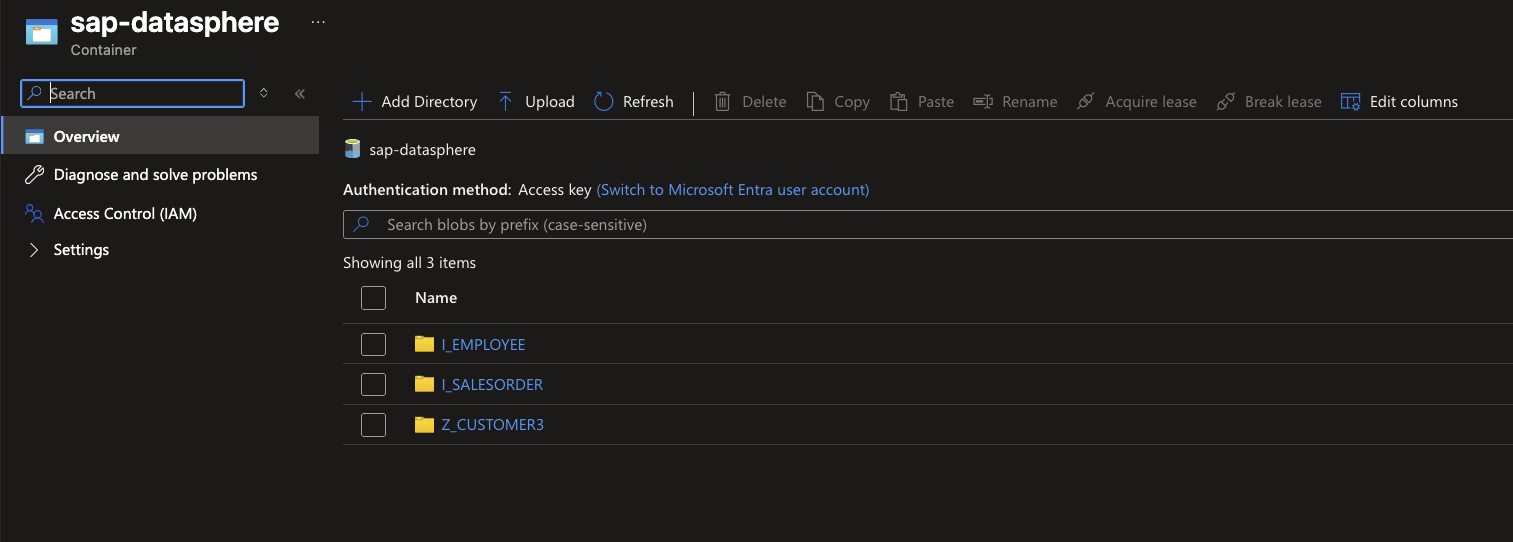
- Data in Storage Account
-
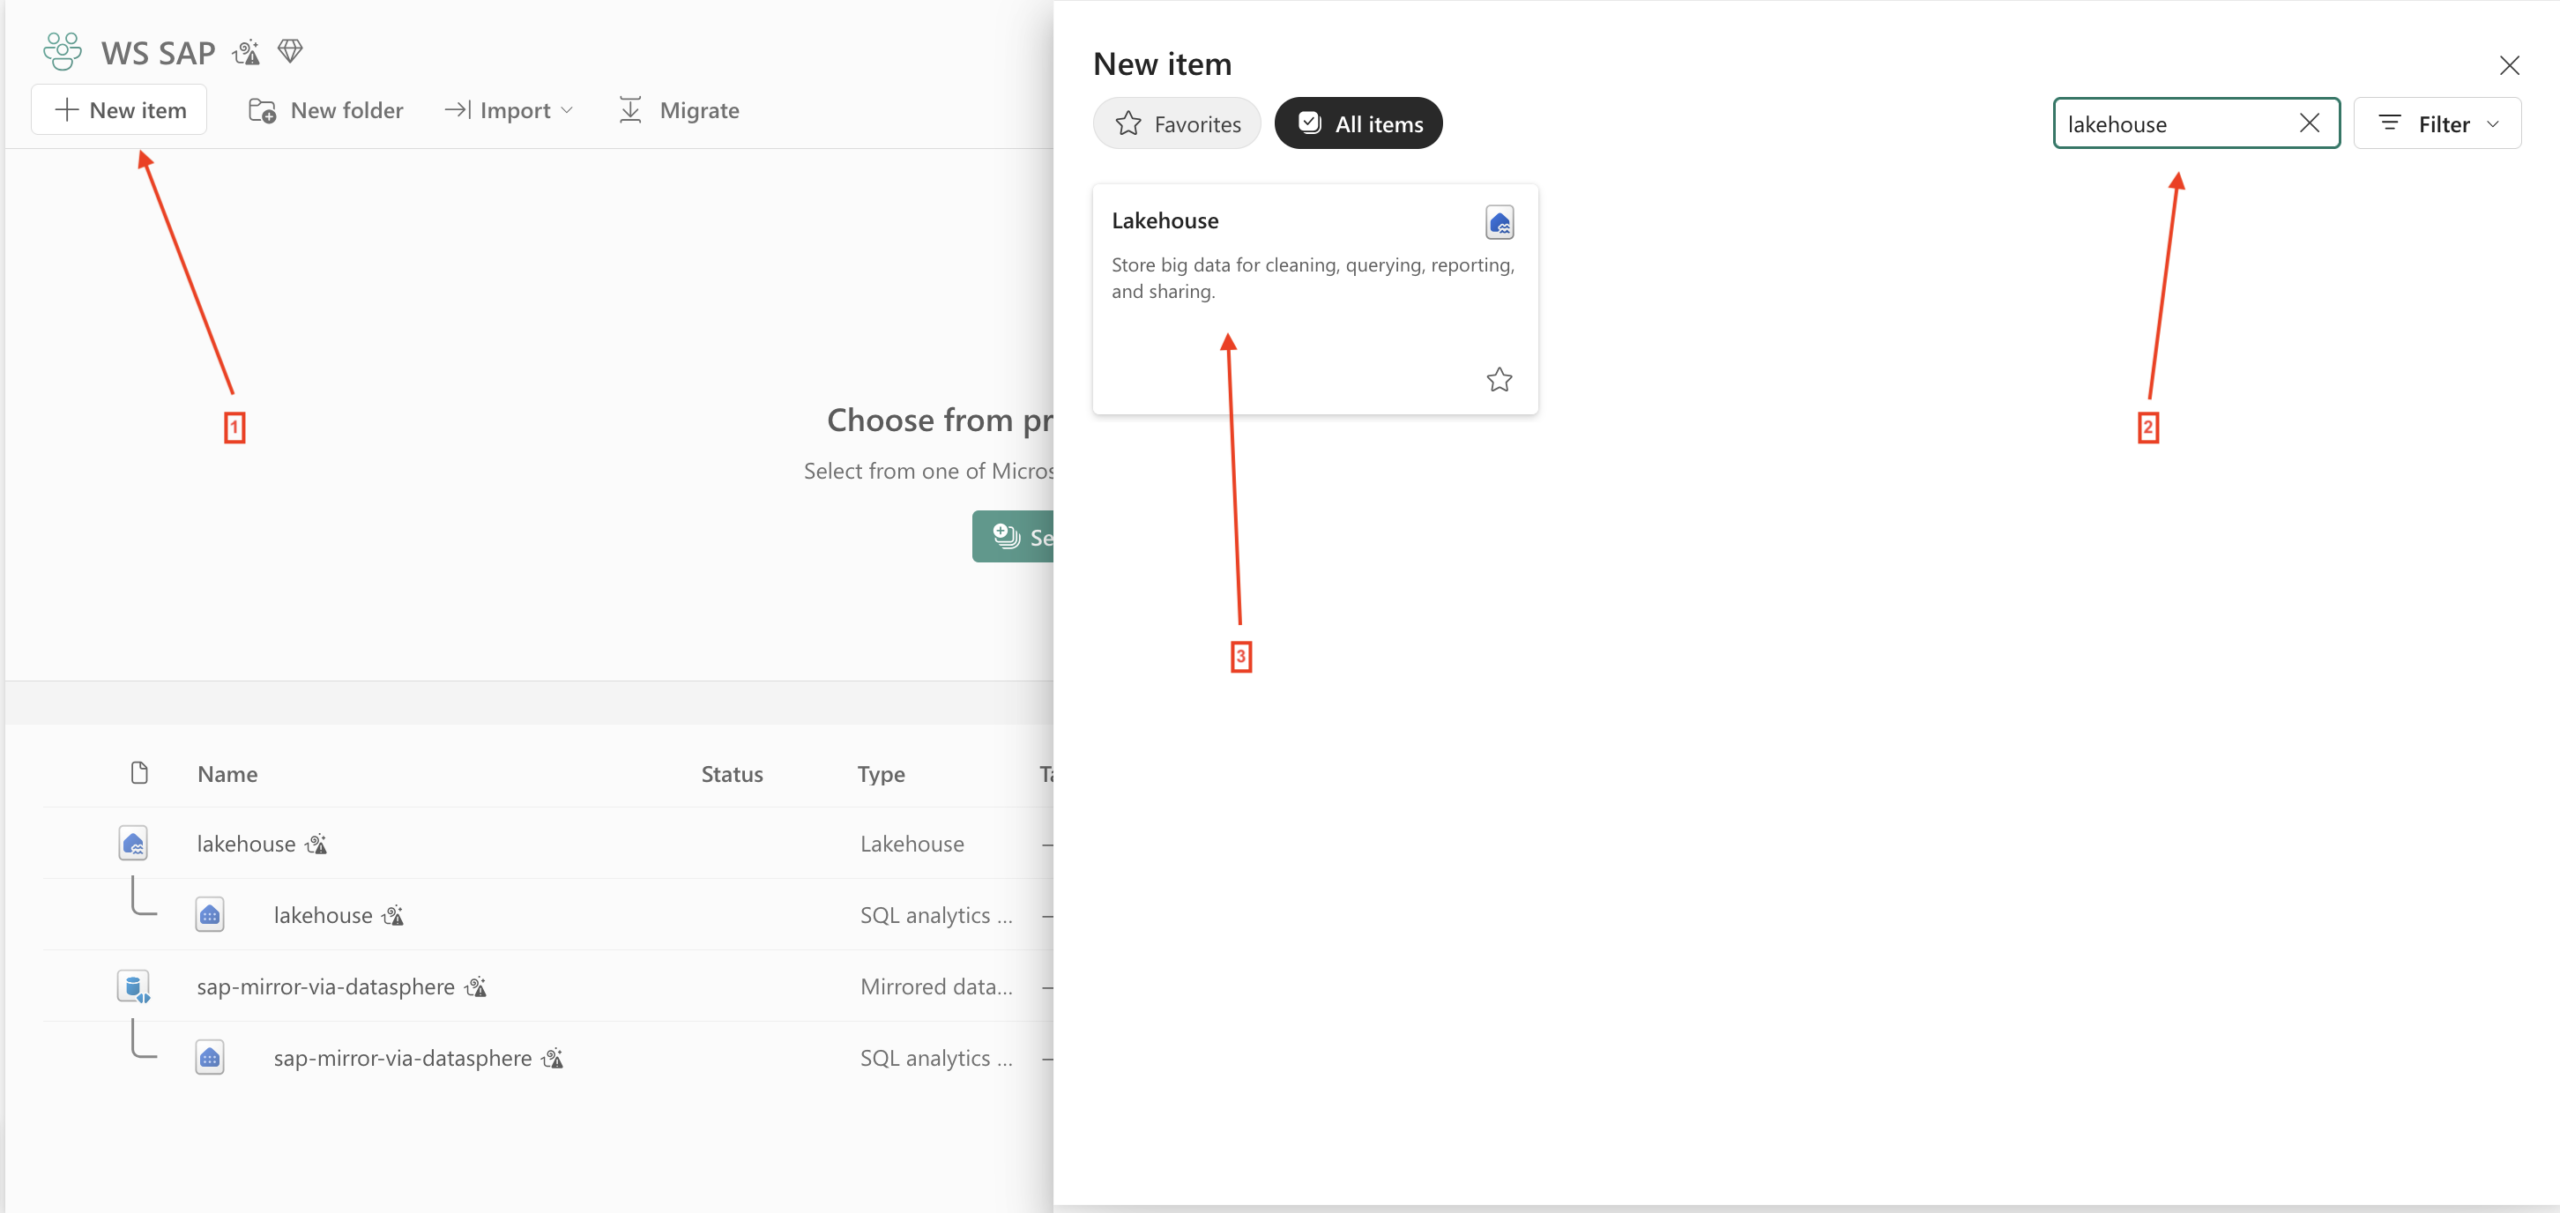
- Step 1 – Create Lakehouse
-
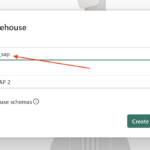
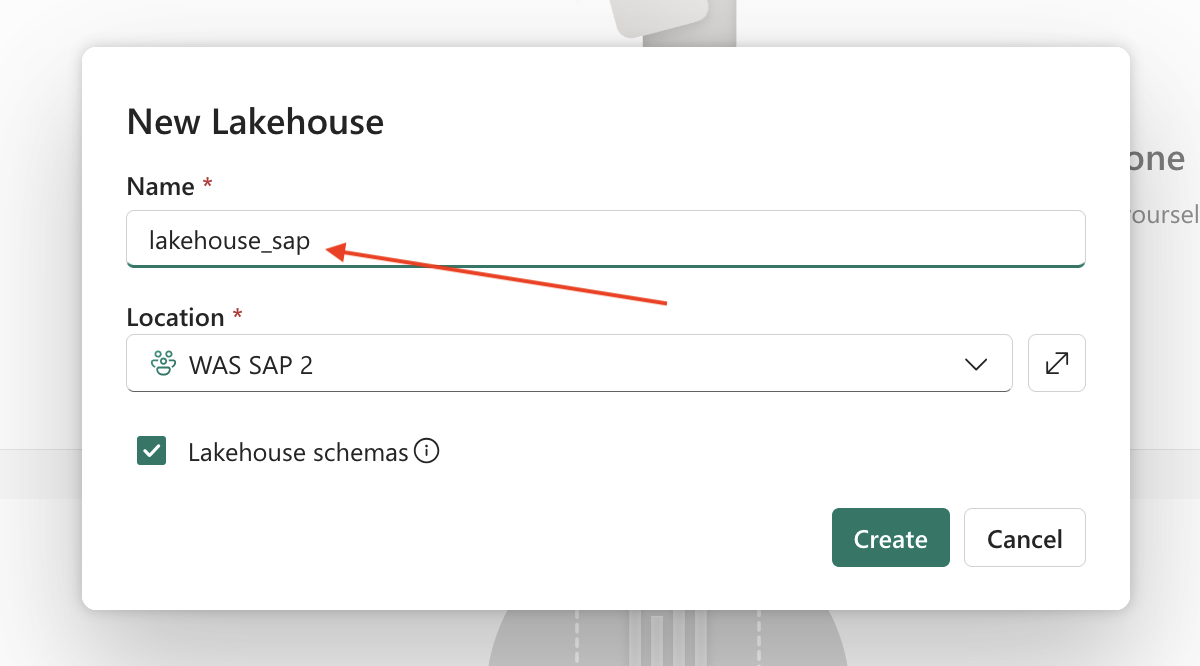
- Step 2 – Add Name
-
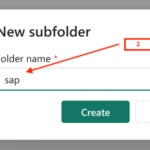
- Step 3 – Add Folder and Shortcut
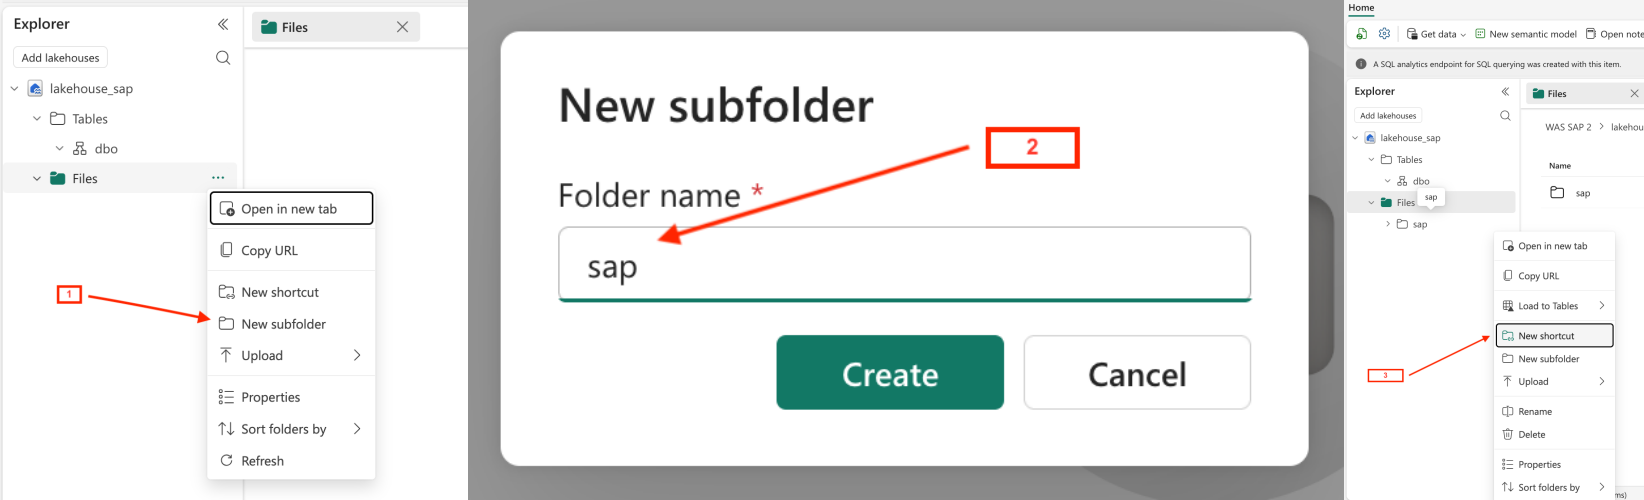
-
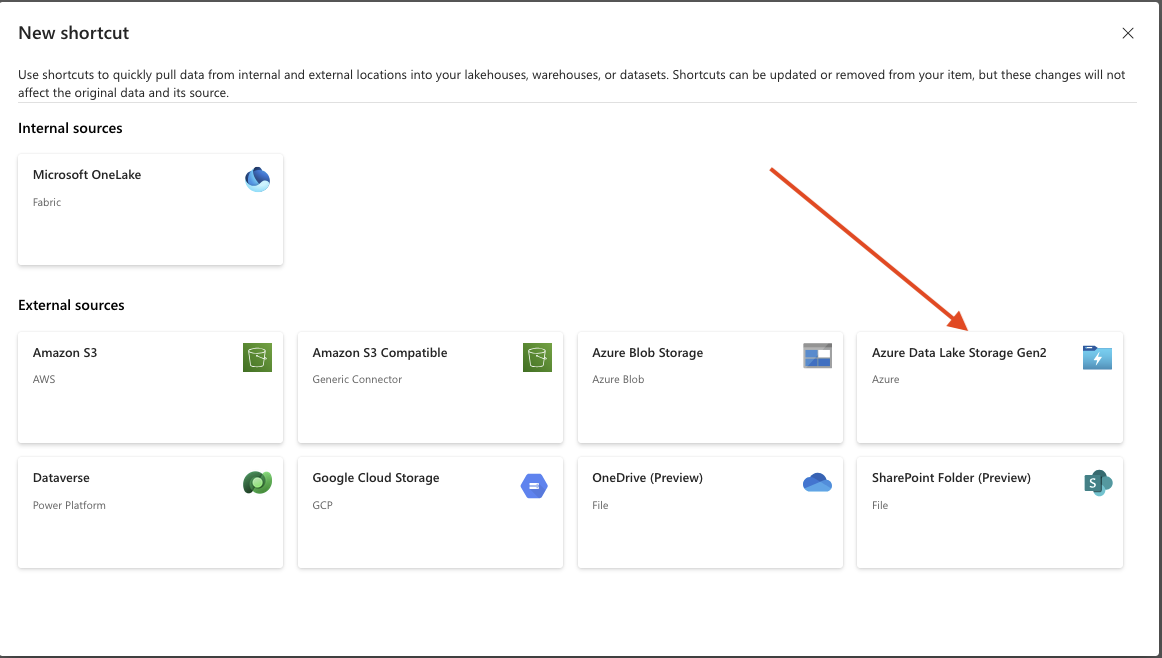
- Step 4 – Add Data Lake Gen2
-
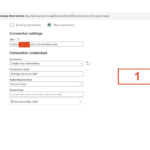
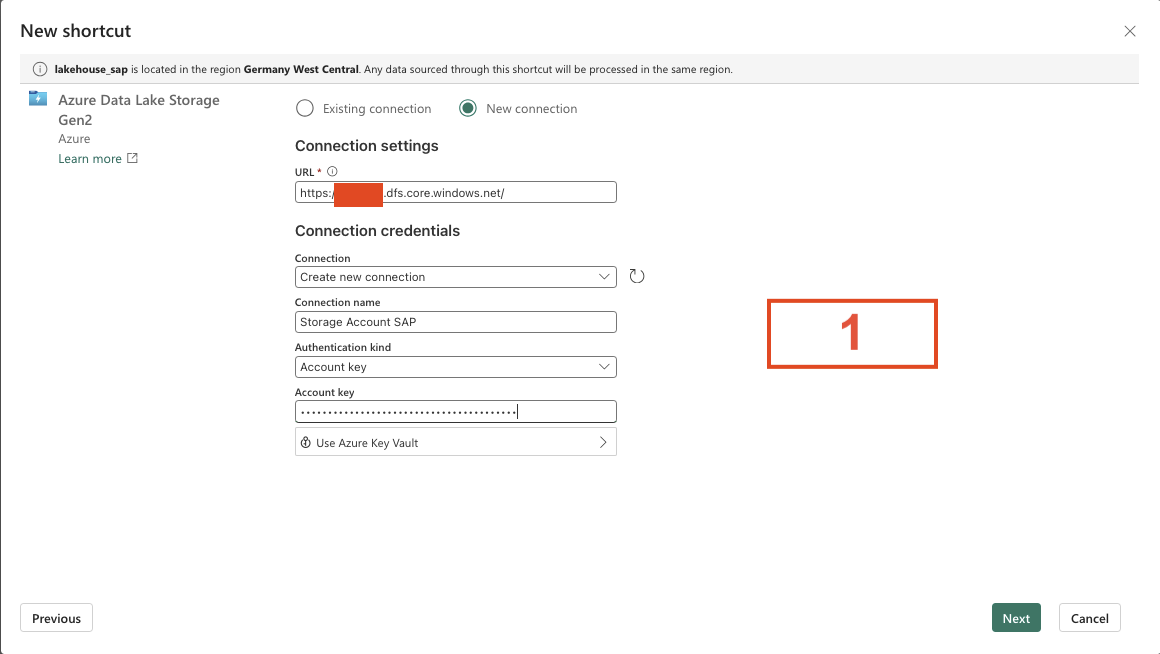
- Step 5 – Add Connection Details
-
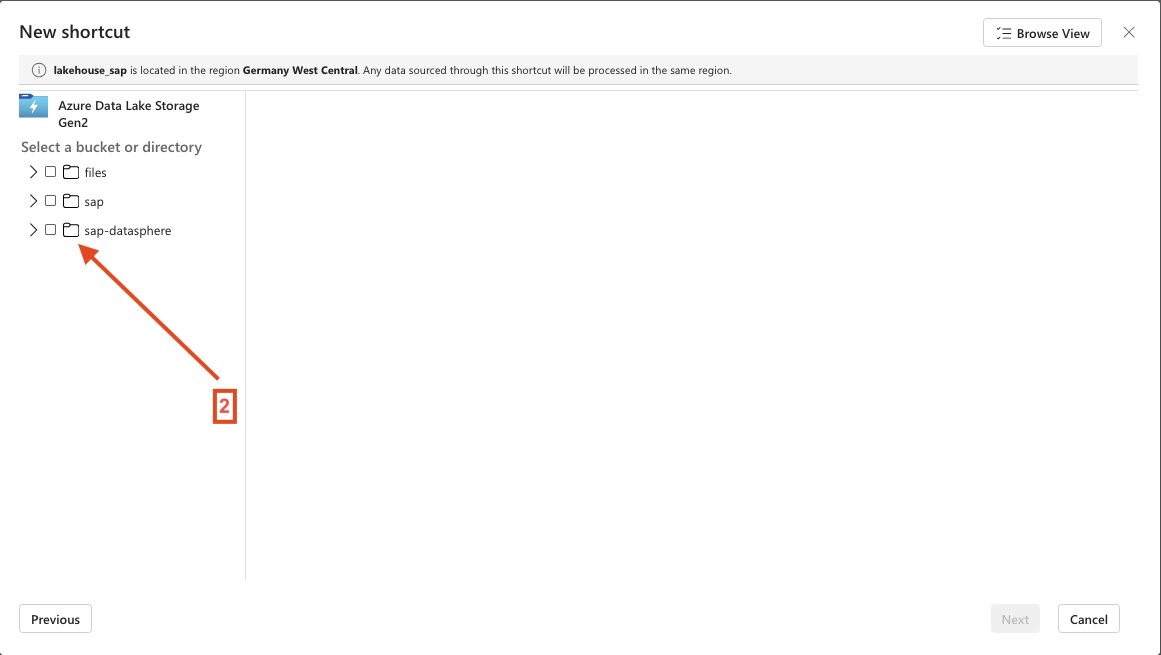
- Step 6 – Add the directory
-
- Step 7 – Summary of Shortcut

-
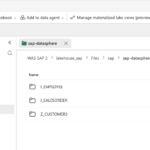
- Step 8 – Overview Shortcut

-
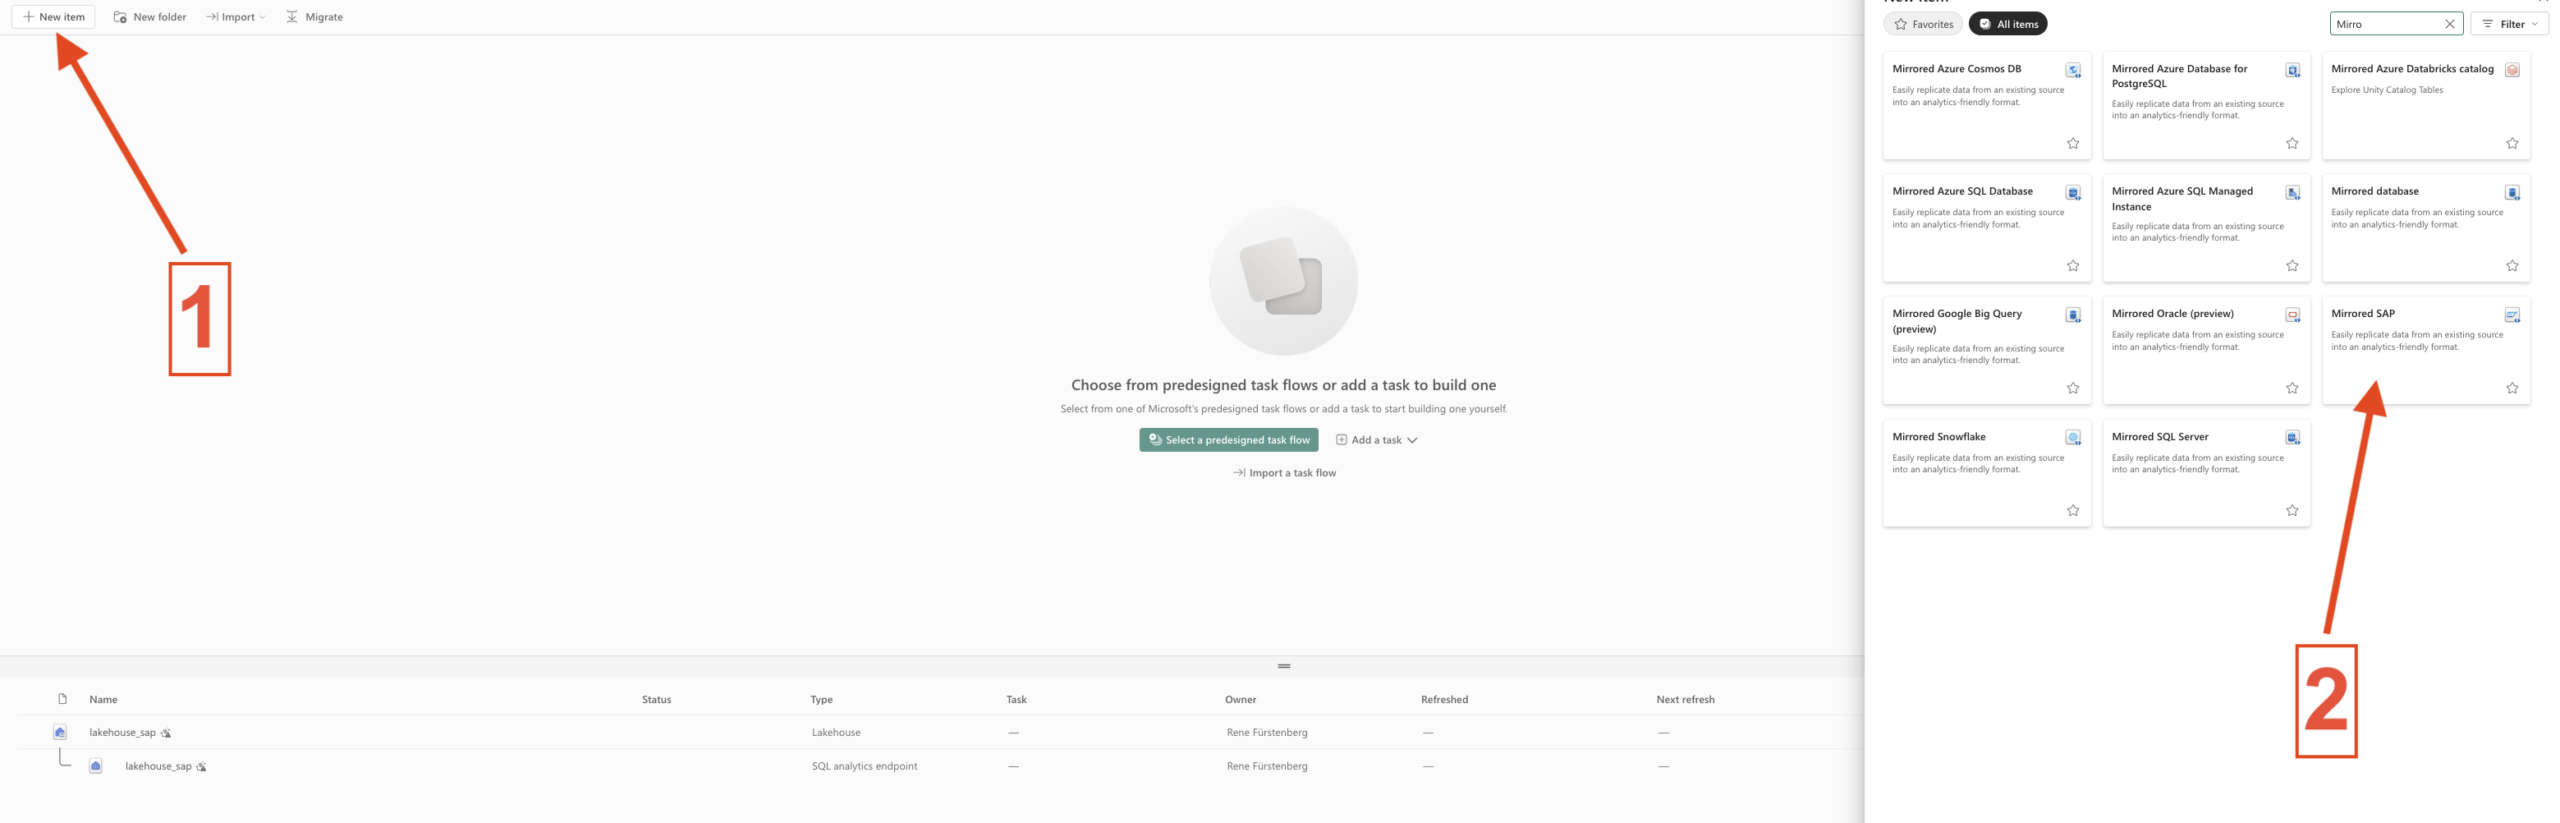
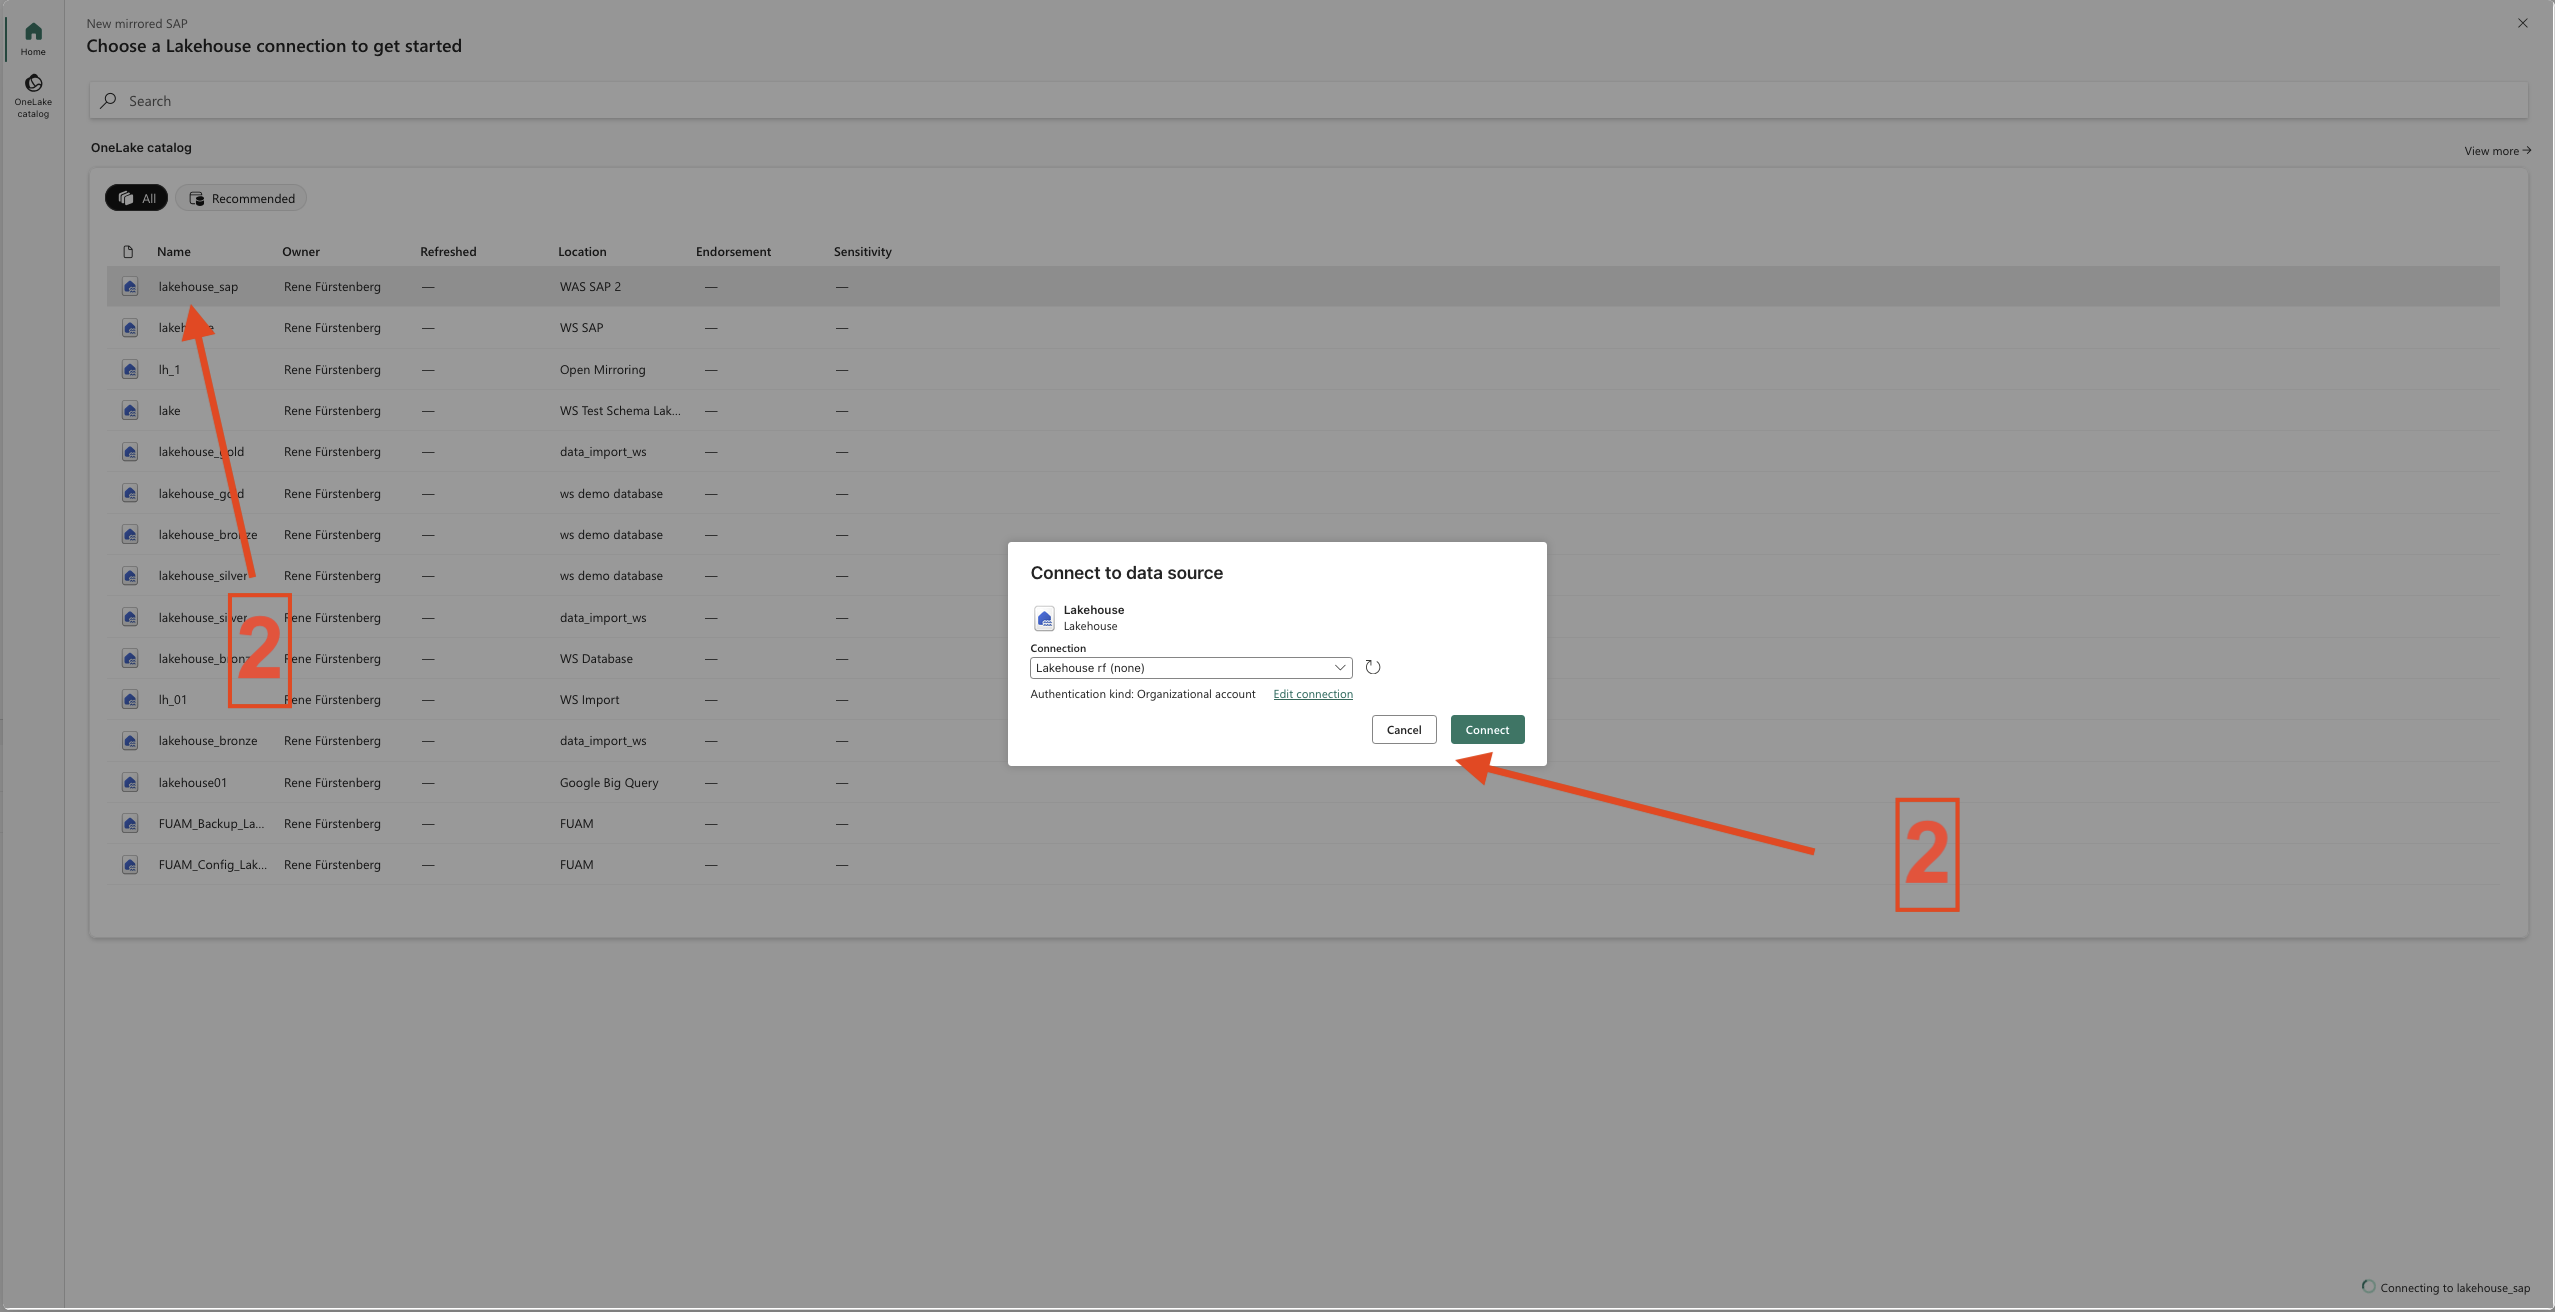
- Step 1 – Add the Mirrored SAP
-
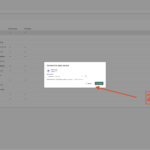
- Step 2 – Chooes the Lakehouse and connect
-

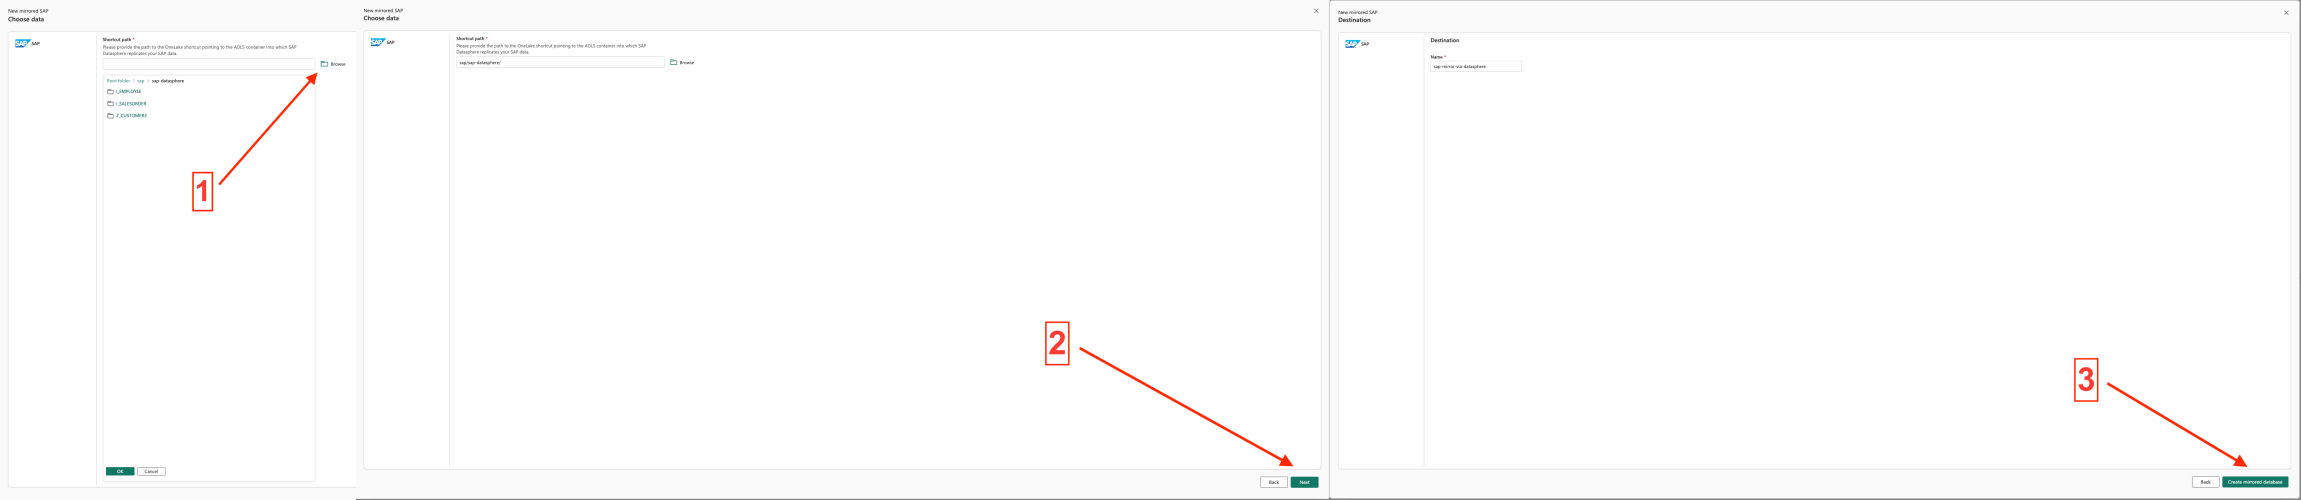
- Step 3 – Choose the folder of SAP in the Storage Account
-
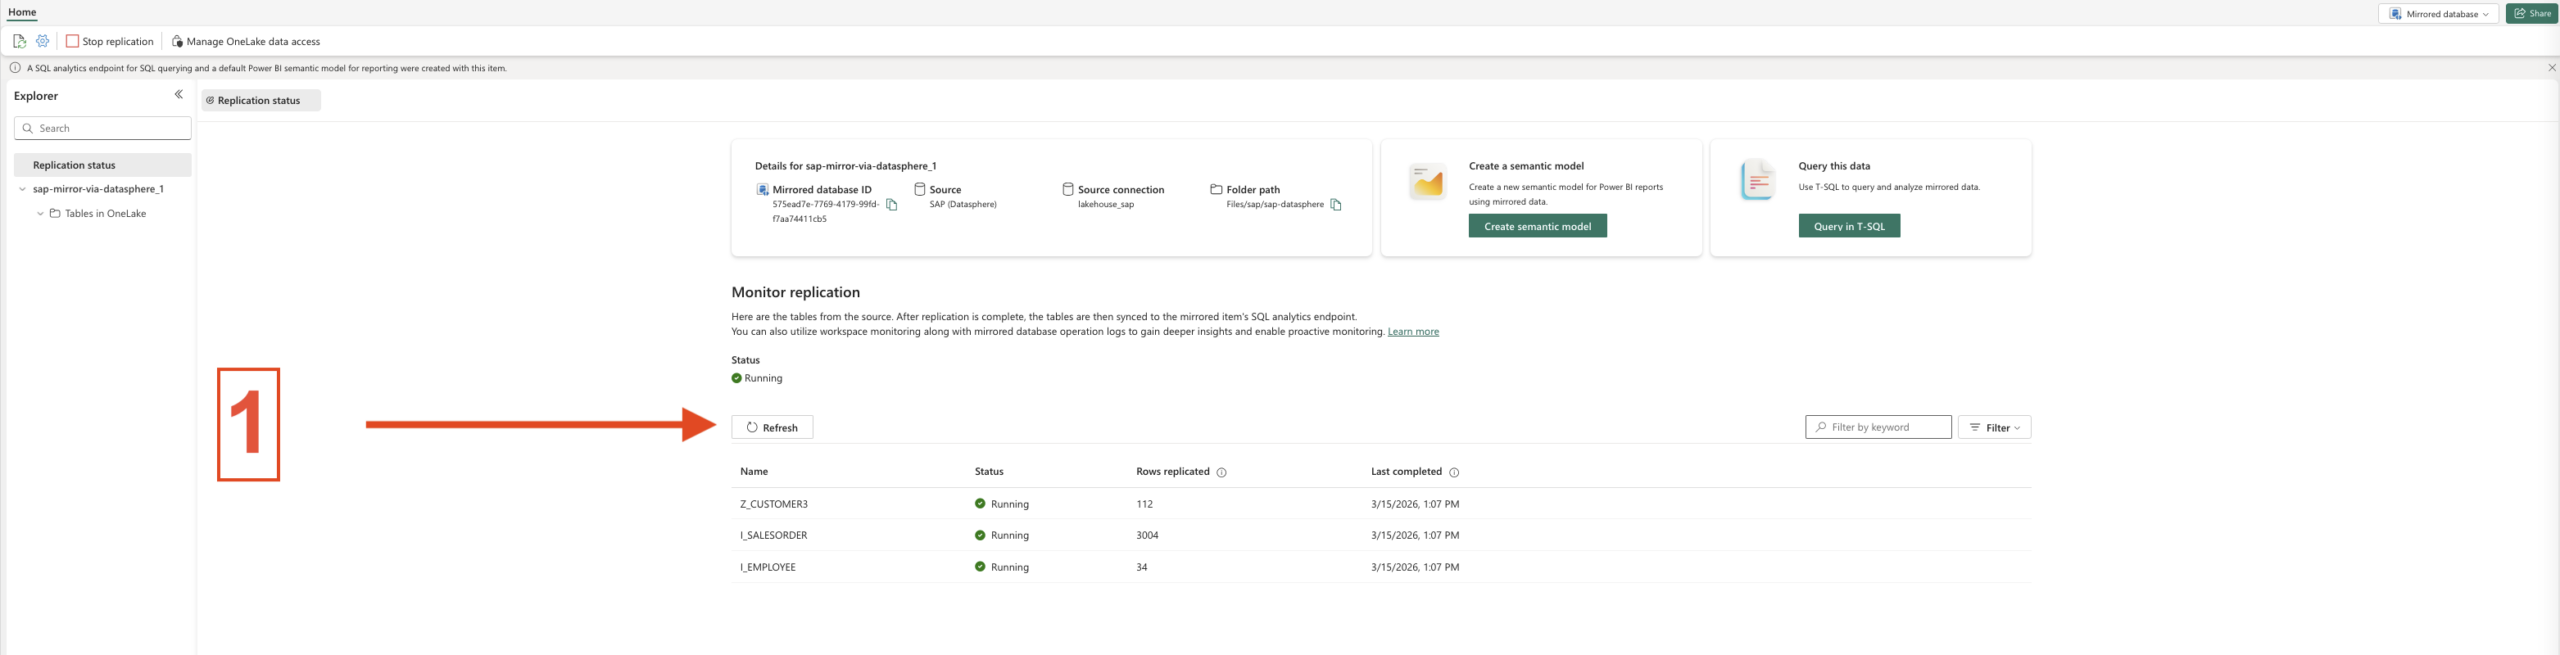
- Step 4 – Click refresh