Introduction
I get asked quite often how to save costs efficiently in Microsoft Fabric. One of the biggest levers is pausing your Fabric capacity when it’s not in use.
What’s important to understand here: storage costs continue, even when the capacity is stopped. You’re only saving on compute. That’s still a huge win, especially if your workloads are not running 24/7.
In this article, I’ll walk through what this can look like in practice and how you can set up a proper solution to stop and start your capacity.
Let’s quickly look at the available options:
- Manually start and stop the capacity
- Automatically start and stop using a Logic App
- Automatically start and stop using Azure Automation
- With Semantic Link Labs
Technically, all of these work. But let’s be honest, manually starting and stopping your capacity every day isn’t something anyone wants to deal with in the long run.
That’s why automation is the only approach that really makes sense.
In my case, I decided to go with Azure Logic Apps, and I’ll show you how to set this up step by step. It’s lightweight, reliable, and easy to maintain, exactly what you want for something that should just run in the background without any manual effort.
Let’s get into it.
1. Create the Azure Logic App
What do you actually need to set this up?
- An Azure Logic App
- A Microsoft Fabric capacity
We’ll assume that the Fabric capacity is already in place. Setting that up is not part of this article.
The first step is to create your Azure Logic App, which will handle the automation for starting and stopping the capacity. From here on, we’ll focus purely on how to build that automation in a clean and practical way.
Follow the screenshots to create an Azure Logic App or use the steps below.
First, search for Logic Apps in the Azure Portal.
In the next step, you can see your existing Logic Apps. Select Create to create a new Logic App.
Select the Consumption plan in my example, and that’s enough here.
Now, we can select an Azure subscription, create a new resource group, or use an existing resource group. Choose a name for the Logic App and select an Azure region. When you’re finished, select Review & Create.
You will see a summary. Select Create and wait for the successful deployment. After that, you can go directly to the Logic App.
2. Configure the Logic App
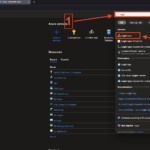
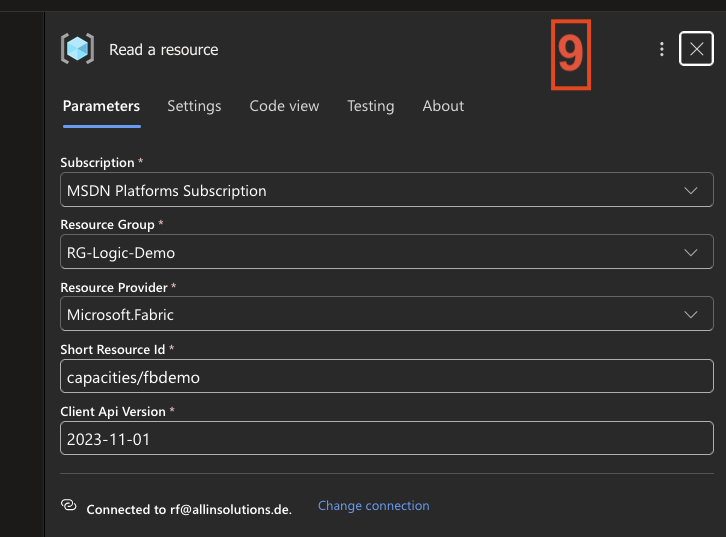
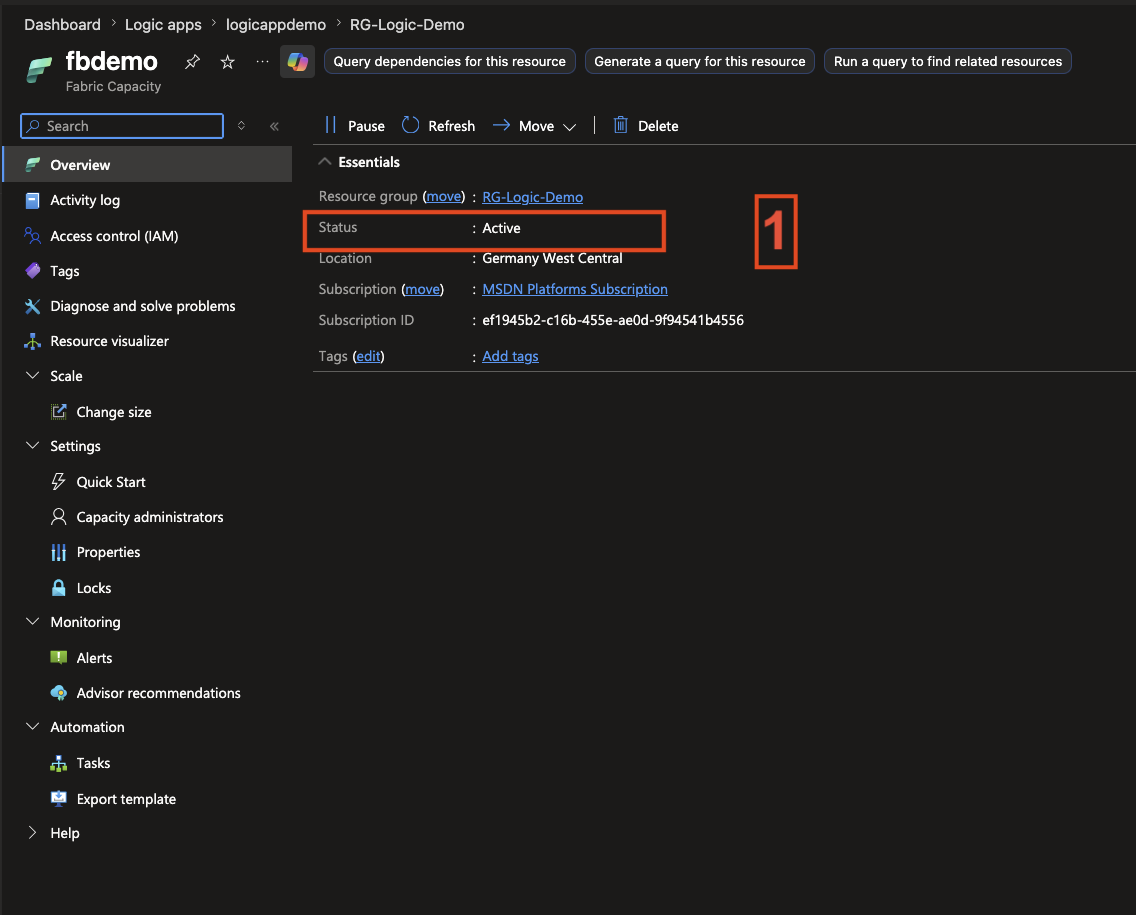
Before we start configuring the Logic App, we first need a few key details about the Microsoft Fabric capacity.
- Name of the capacity
- Client API version
- In which resource group is the capacity
- Short resource ID
For this setup, I’m using the following details for my capacity:
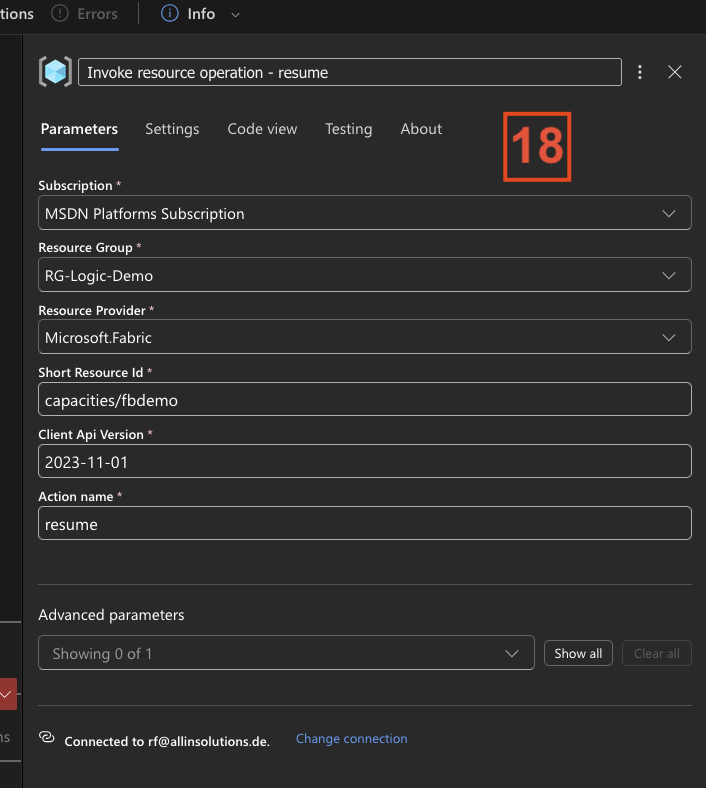
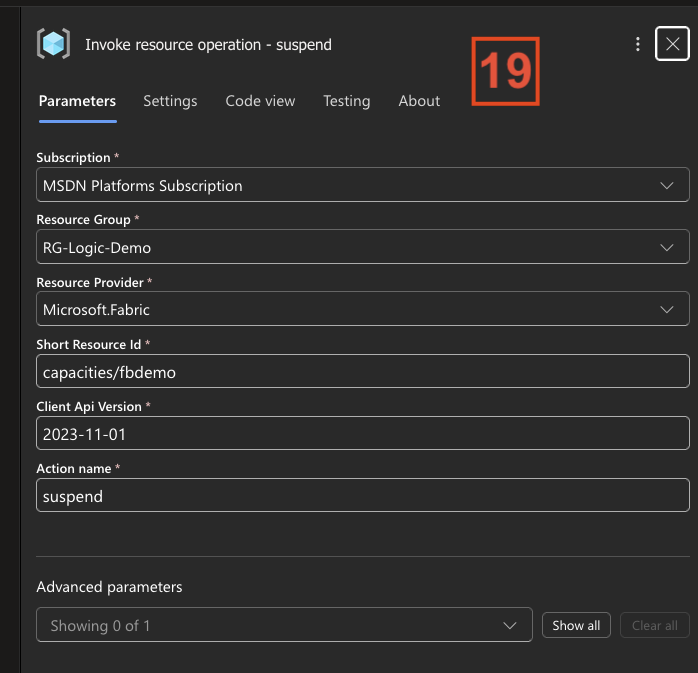
- Name = fbdemo
- Client API Version = 2023-11-01
- Resource group name = RG-Logic-Demo (In my case, it’s the same as with the Logic App)
- Short Resource ID = capacities/fbdemo
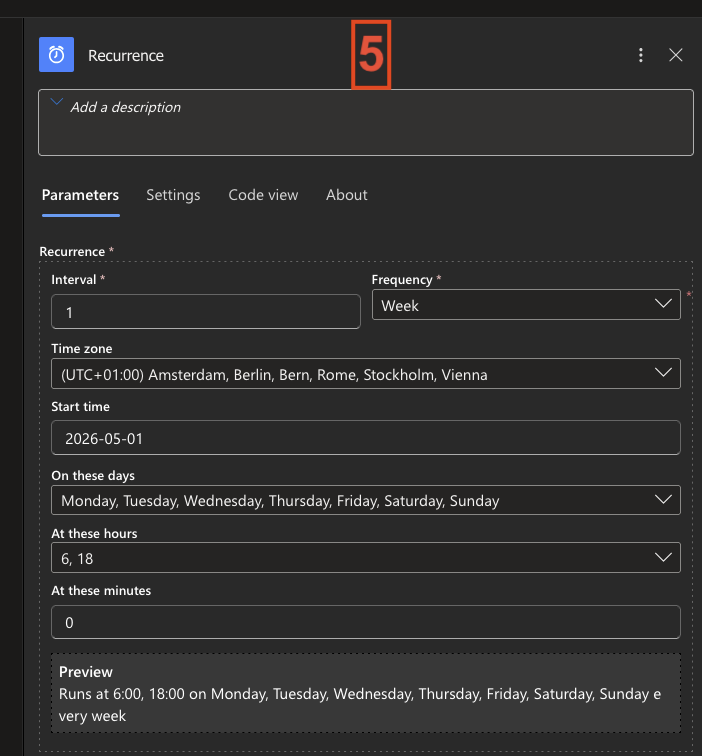
For the Recurrence trigger, I configured it as follows:
- Interval = 1 week
- Time zone = (UTC +01:00) Amsterdam, Berlin, Bern, Rome, Stockholm, Vienna
- Start time = 2026-05-01
- Days = Monday, Tuesday, Wednesday, Thursday, Friday, Saturday, Sunday
- Hours = 6:00 AM and 6:00 PM
- Minutes = 0
This setup ensures that the Logic App runs twice a day, once in the morning and once in the evening, fully automated without any manual interaction.
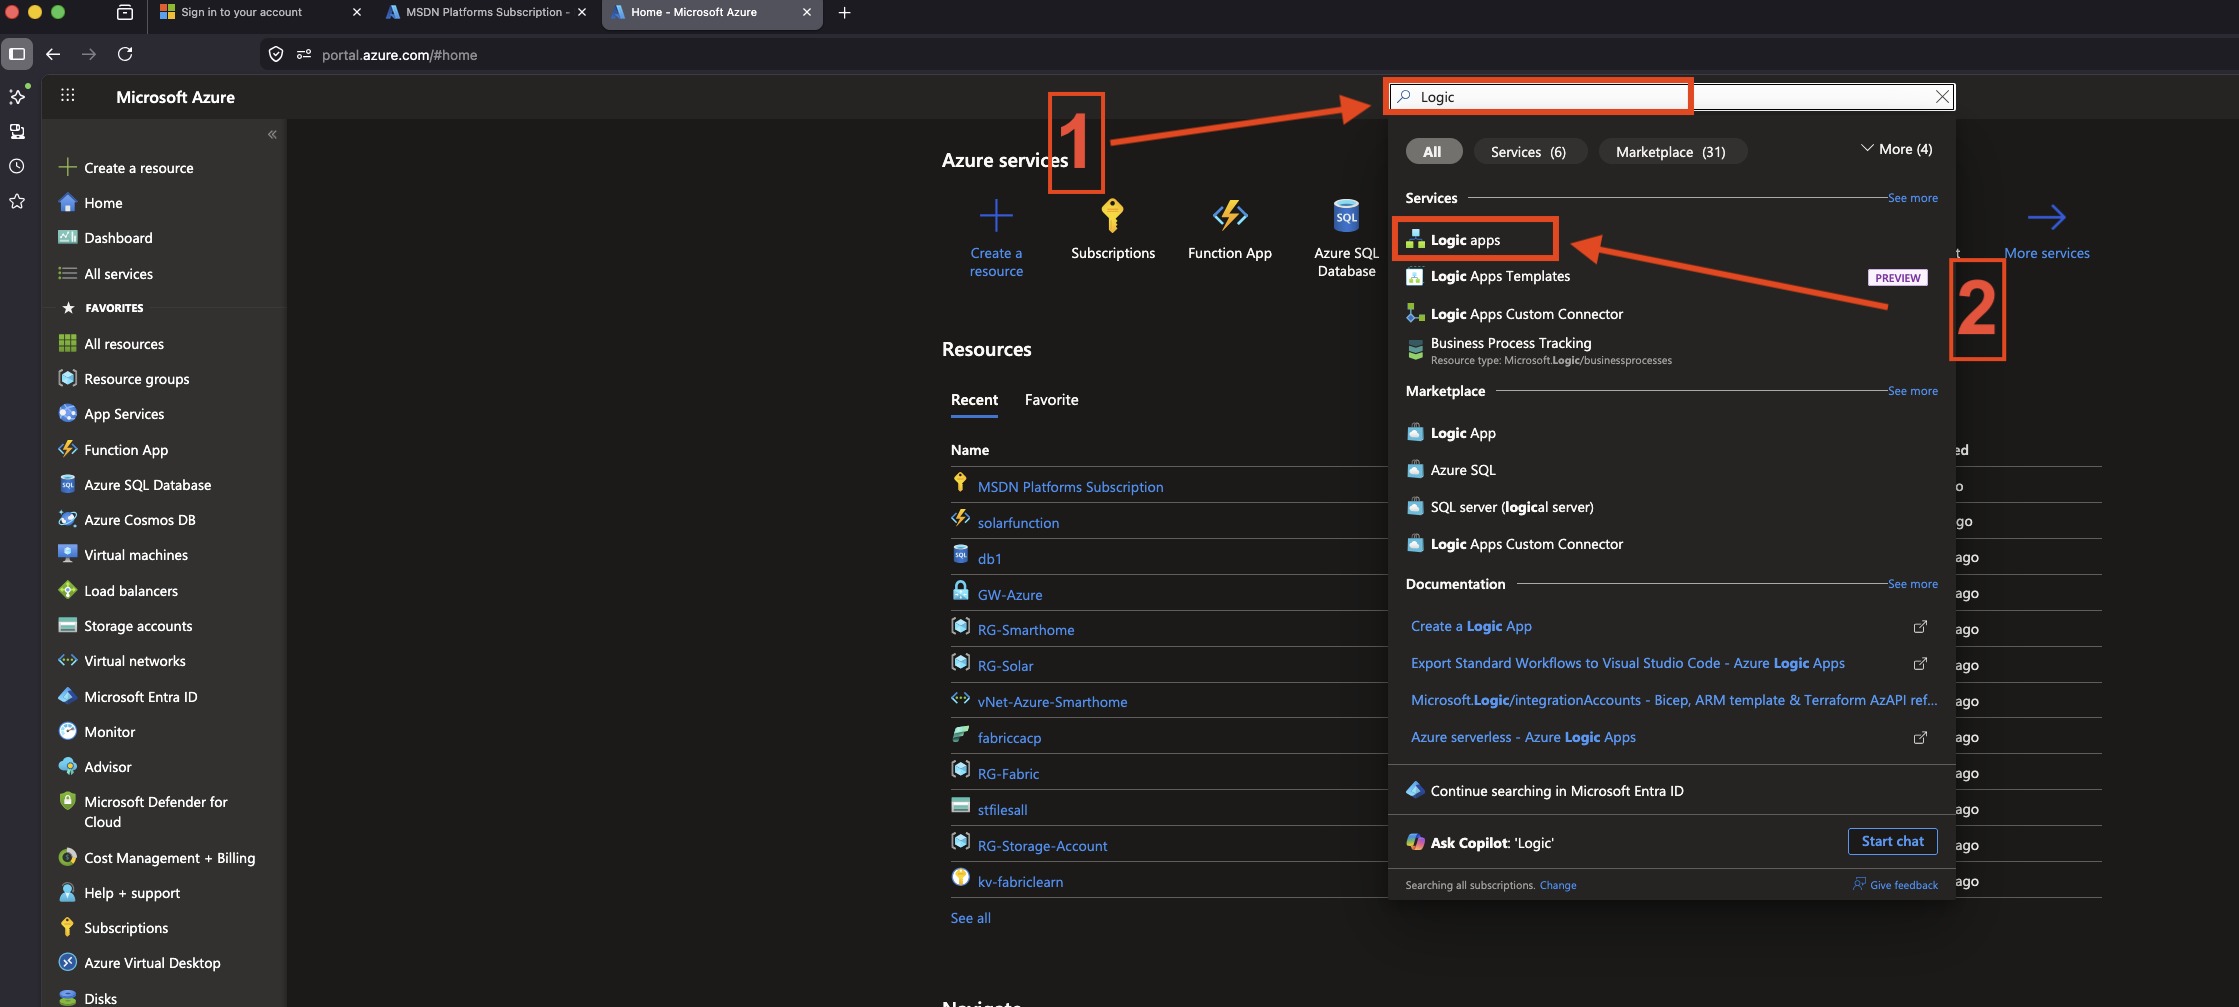
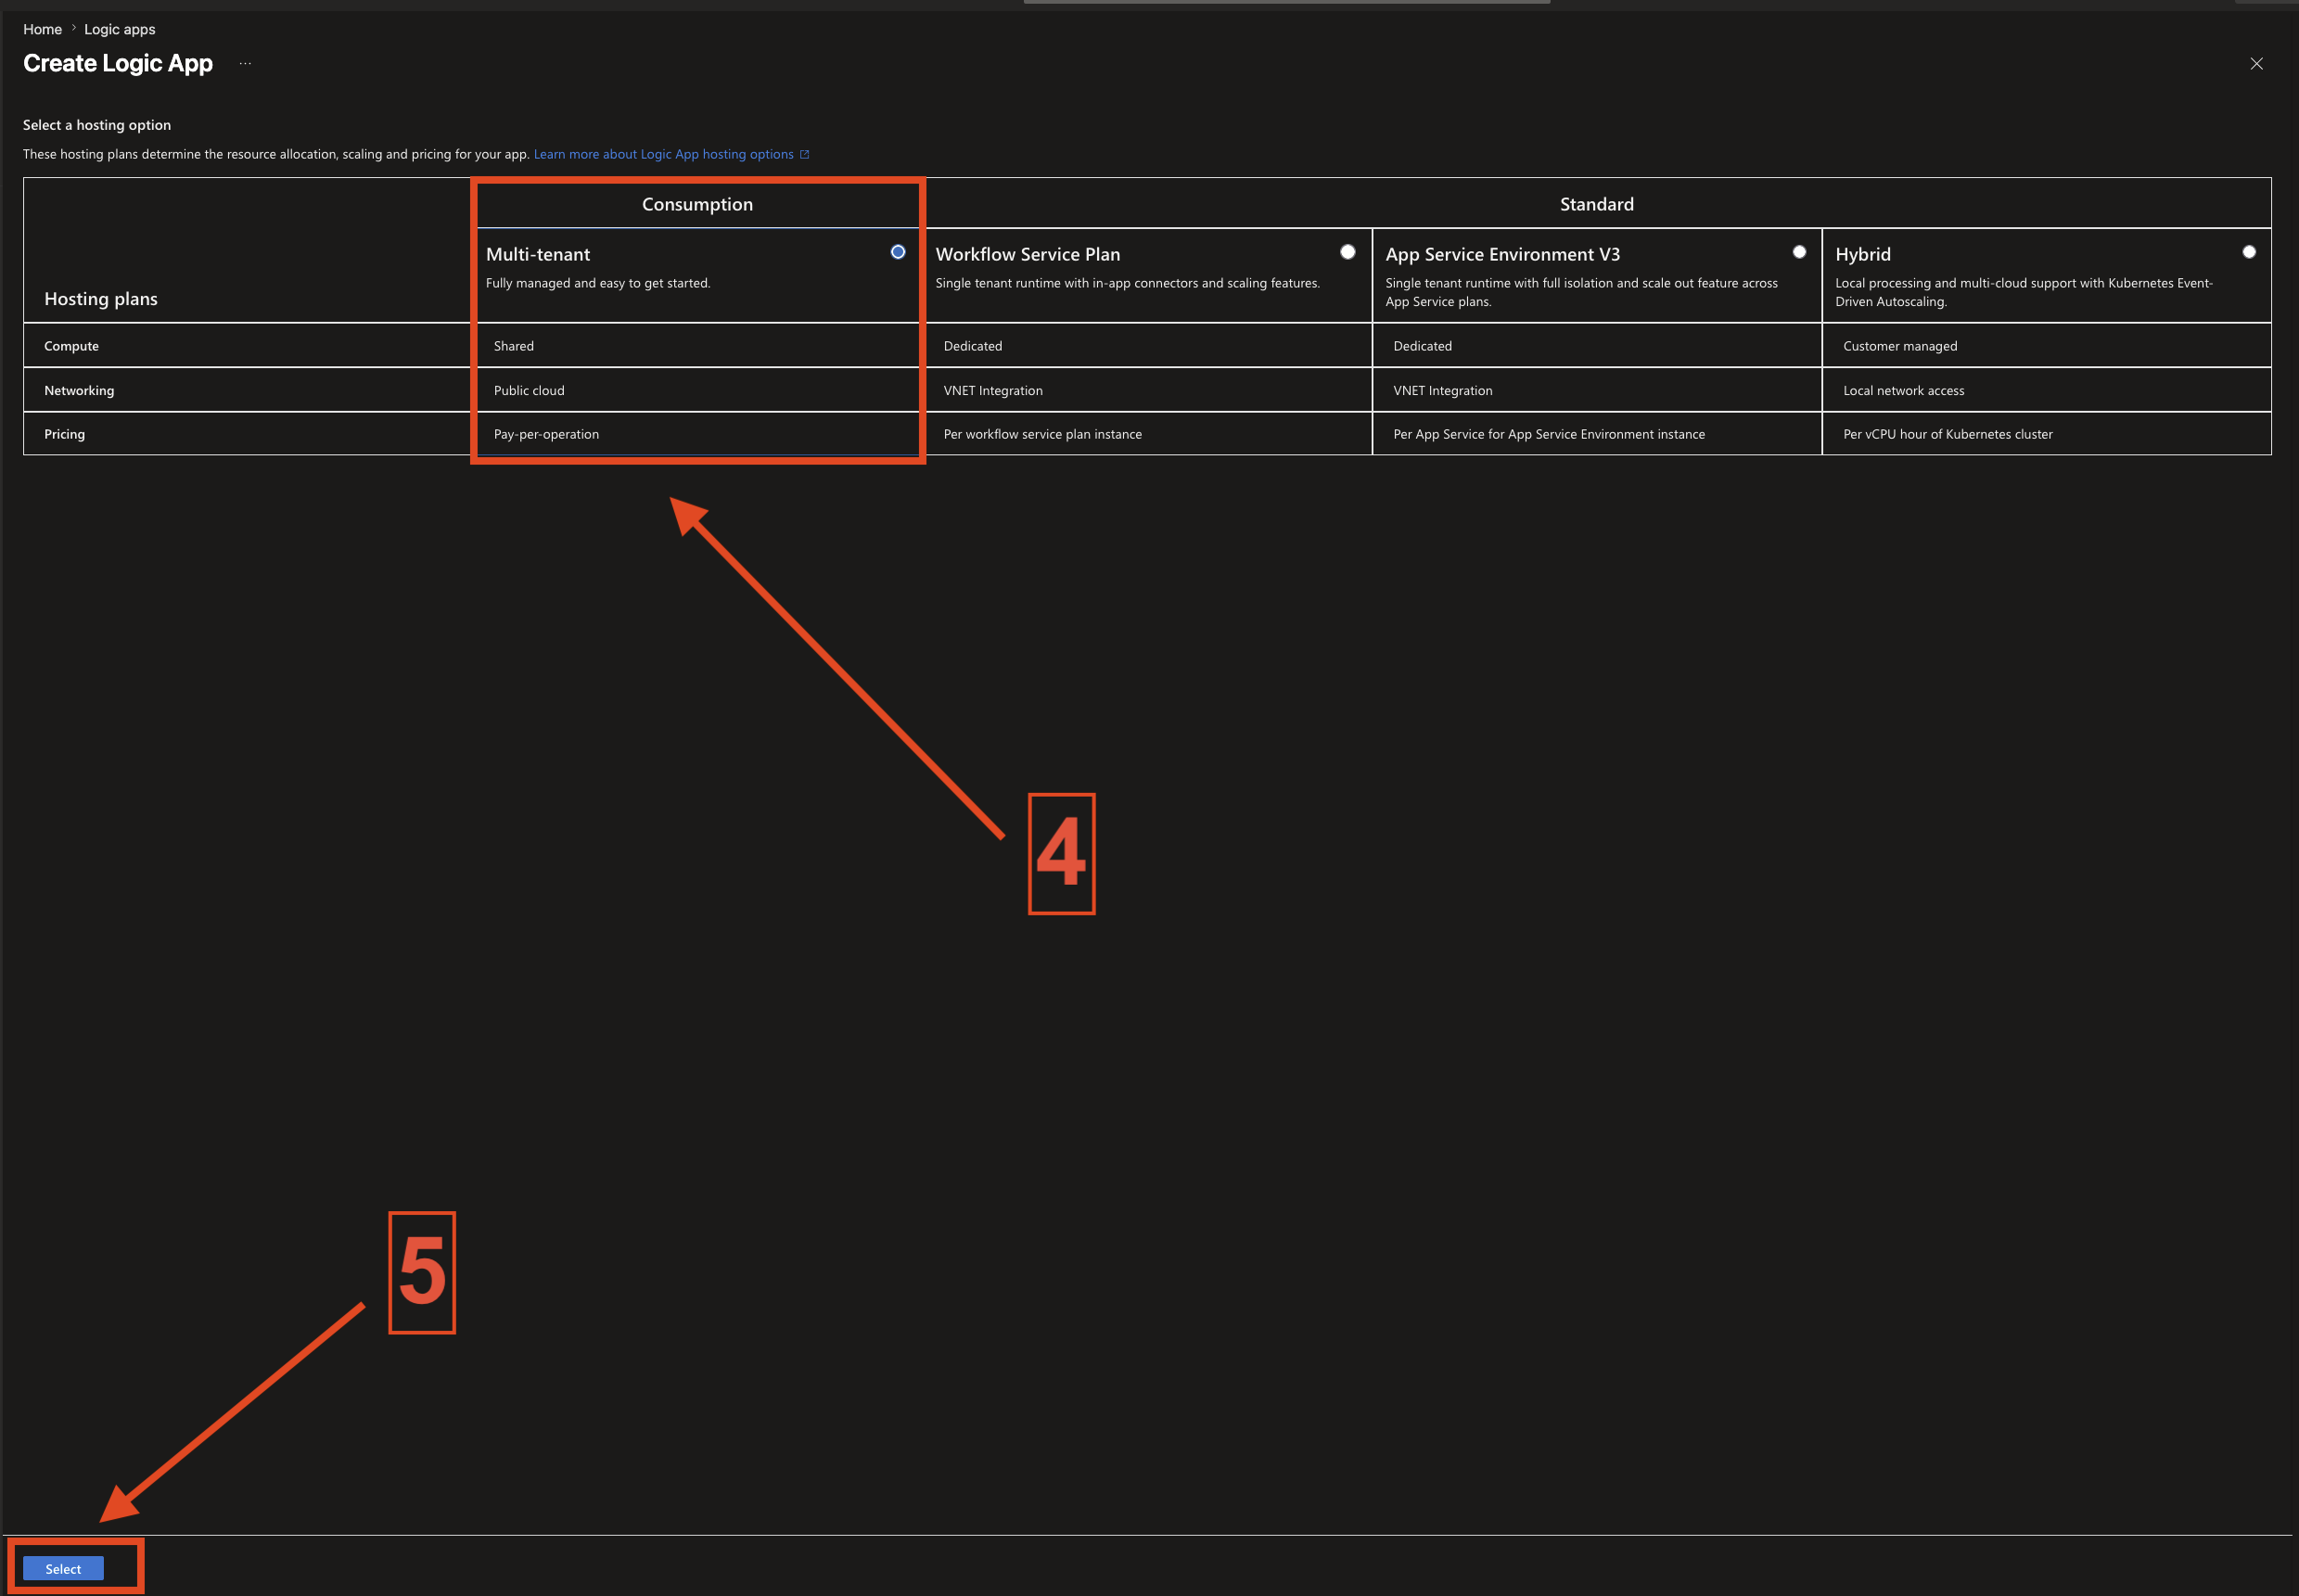
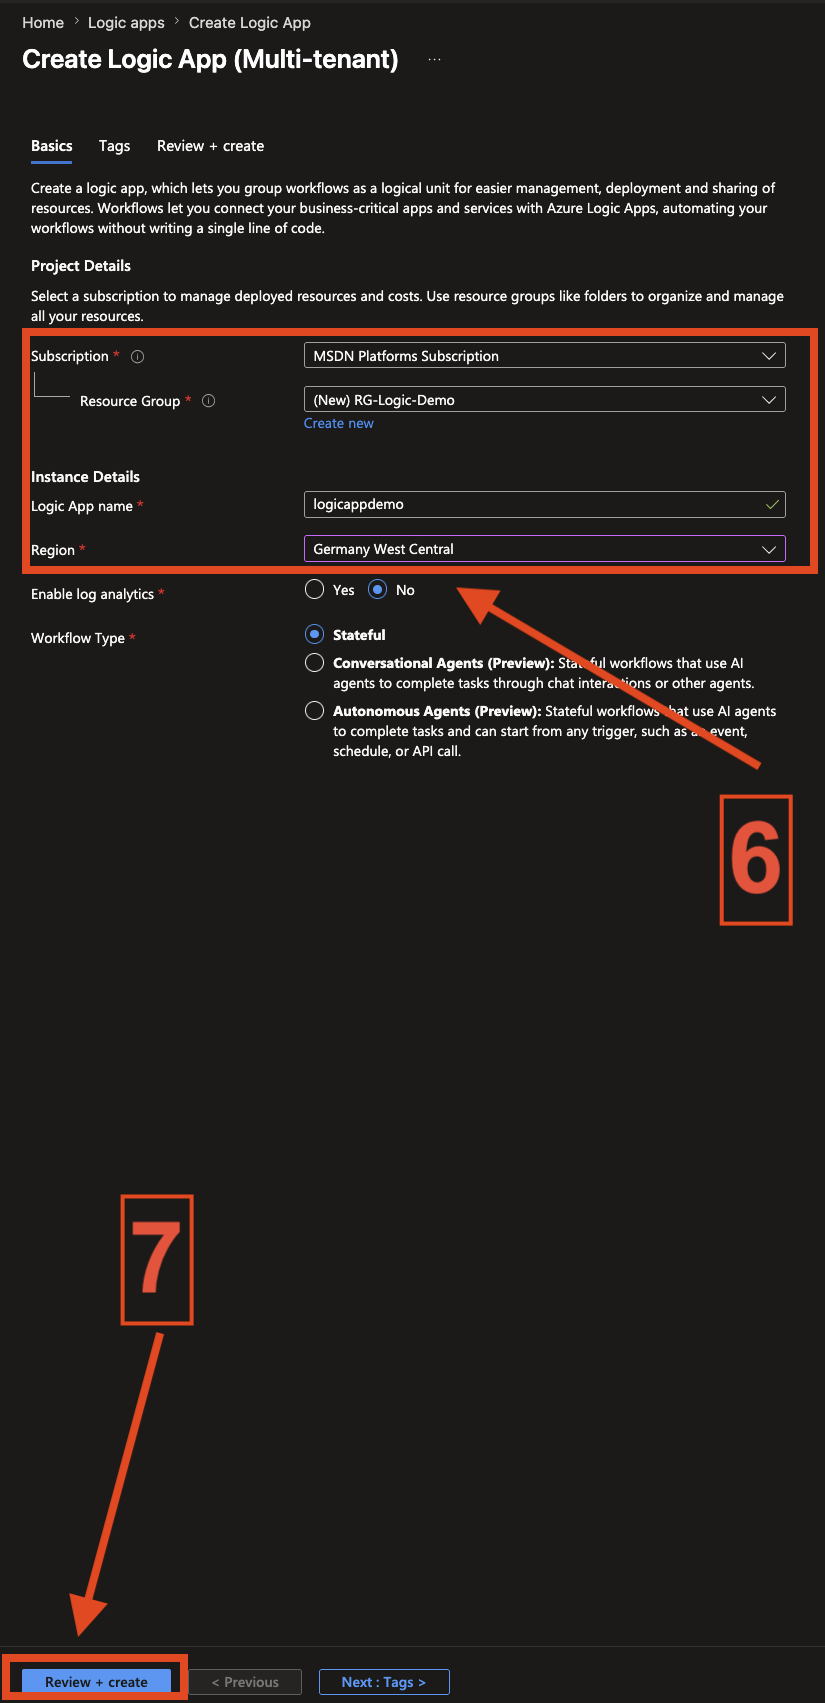
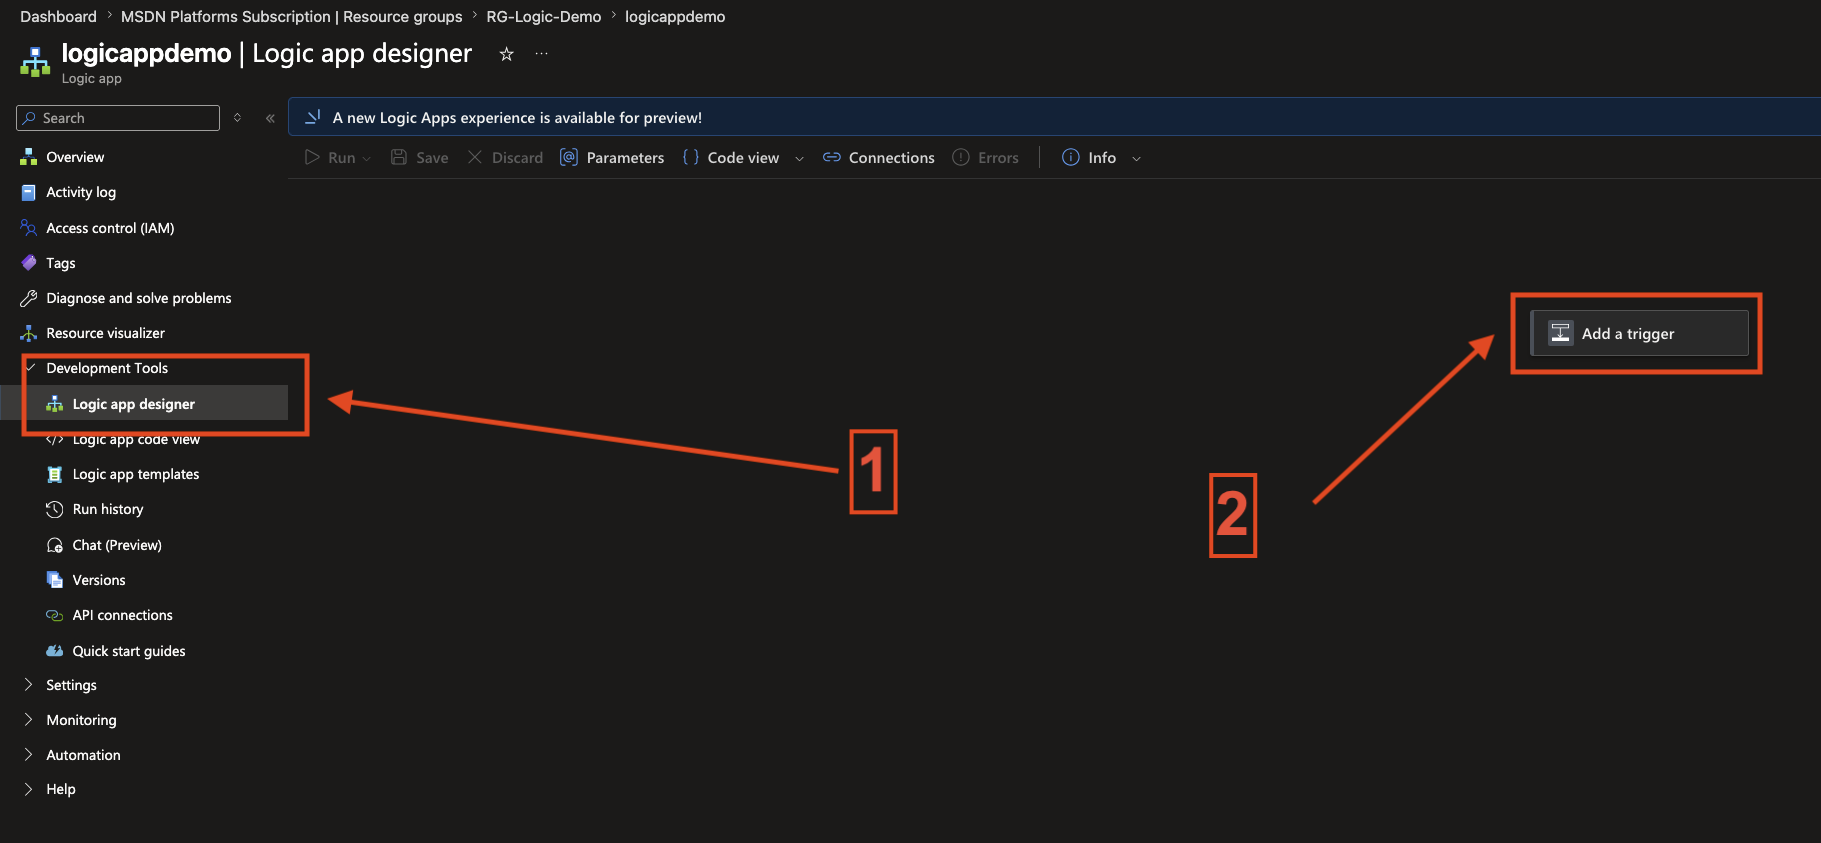
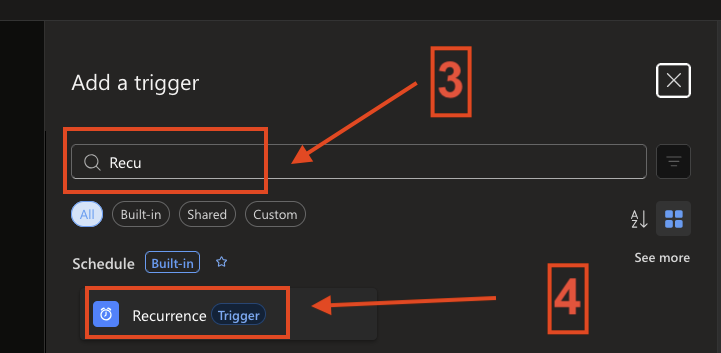
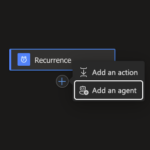
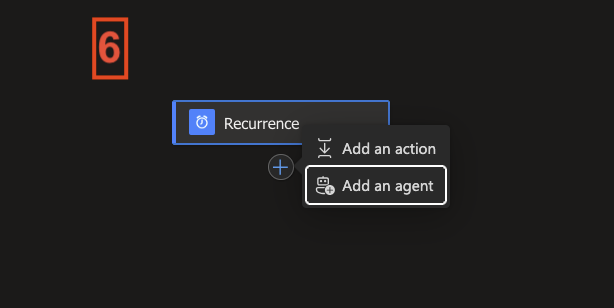
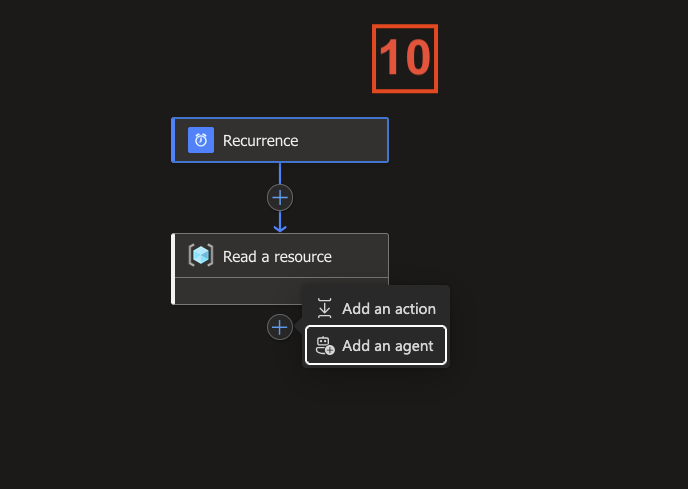
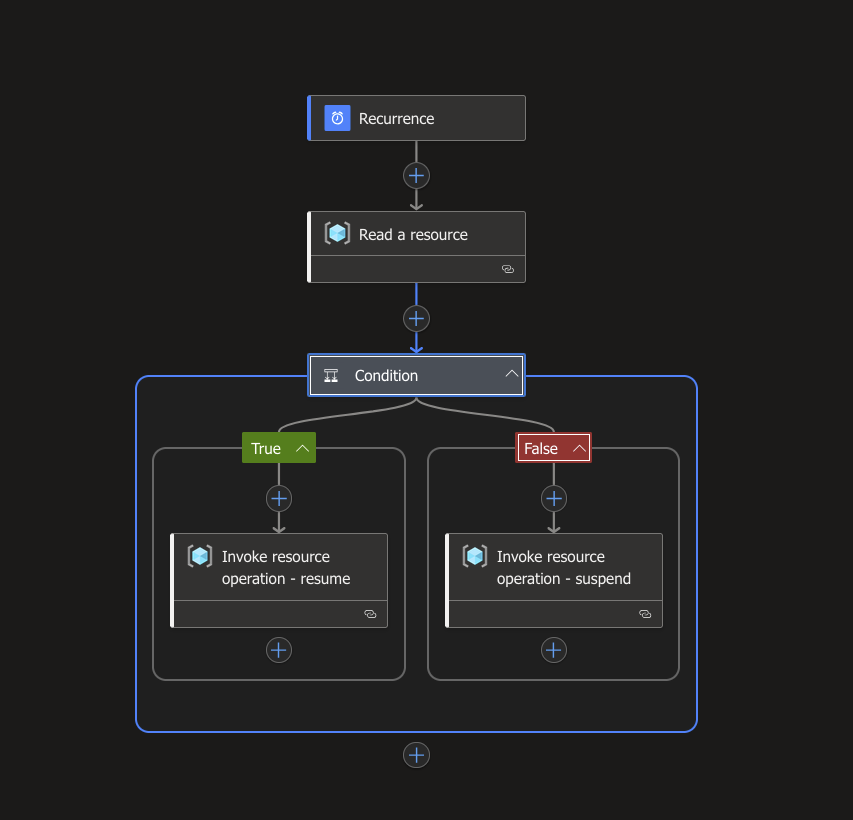
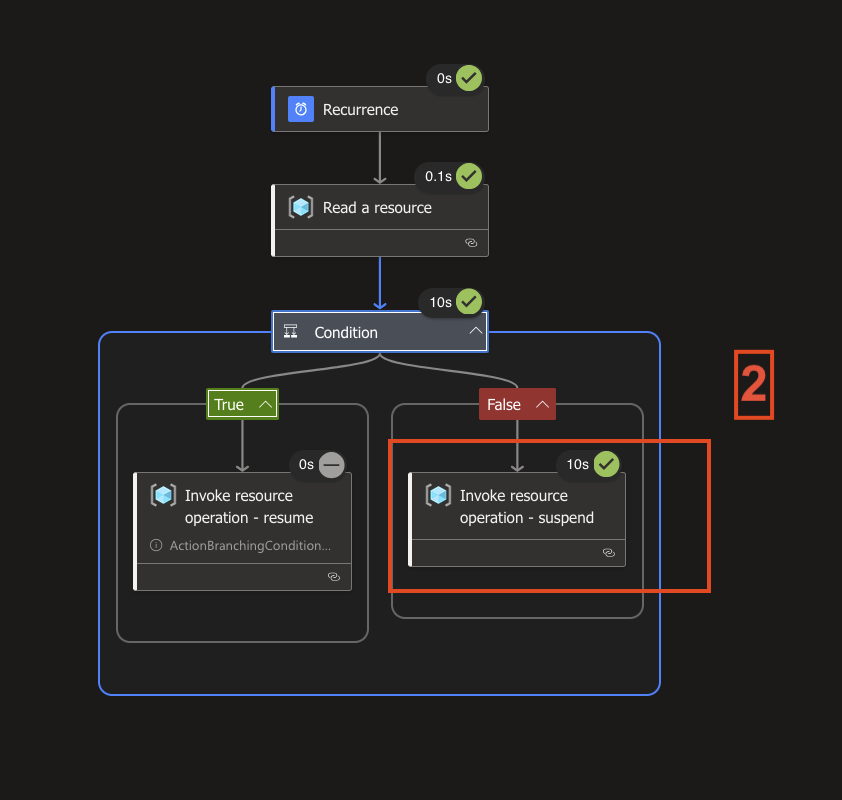
You can follow the screenshots to configure the Logic App. Below is a short description.
Select the Logic App Designer.
Add a trigger (Recurrence). Configure the trigger with the details from the screenshots or use your own parameters, or use the parameters above (timezone, start time, days, etc.).
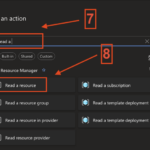
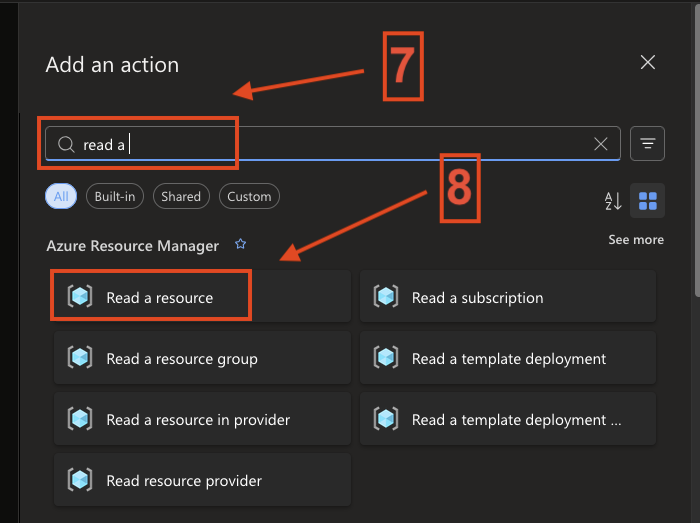
First, add an action Read a resource and select the account that has permission to read the resource. In my case, I used my Entra ID account, this is just for demo purposes.
Then, configure the action with the details described above.
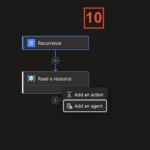
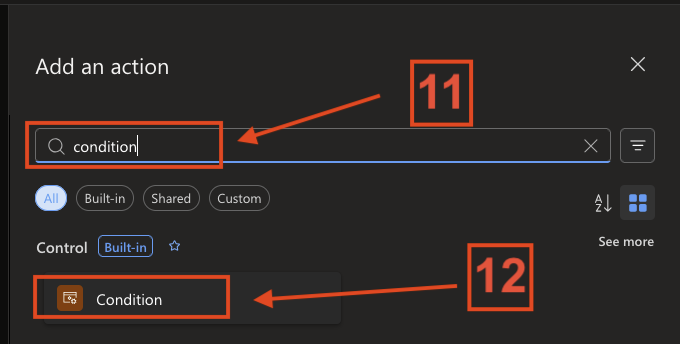
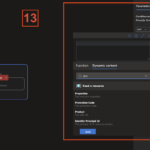
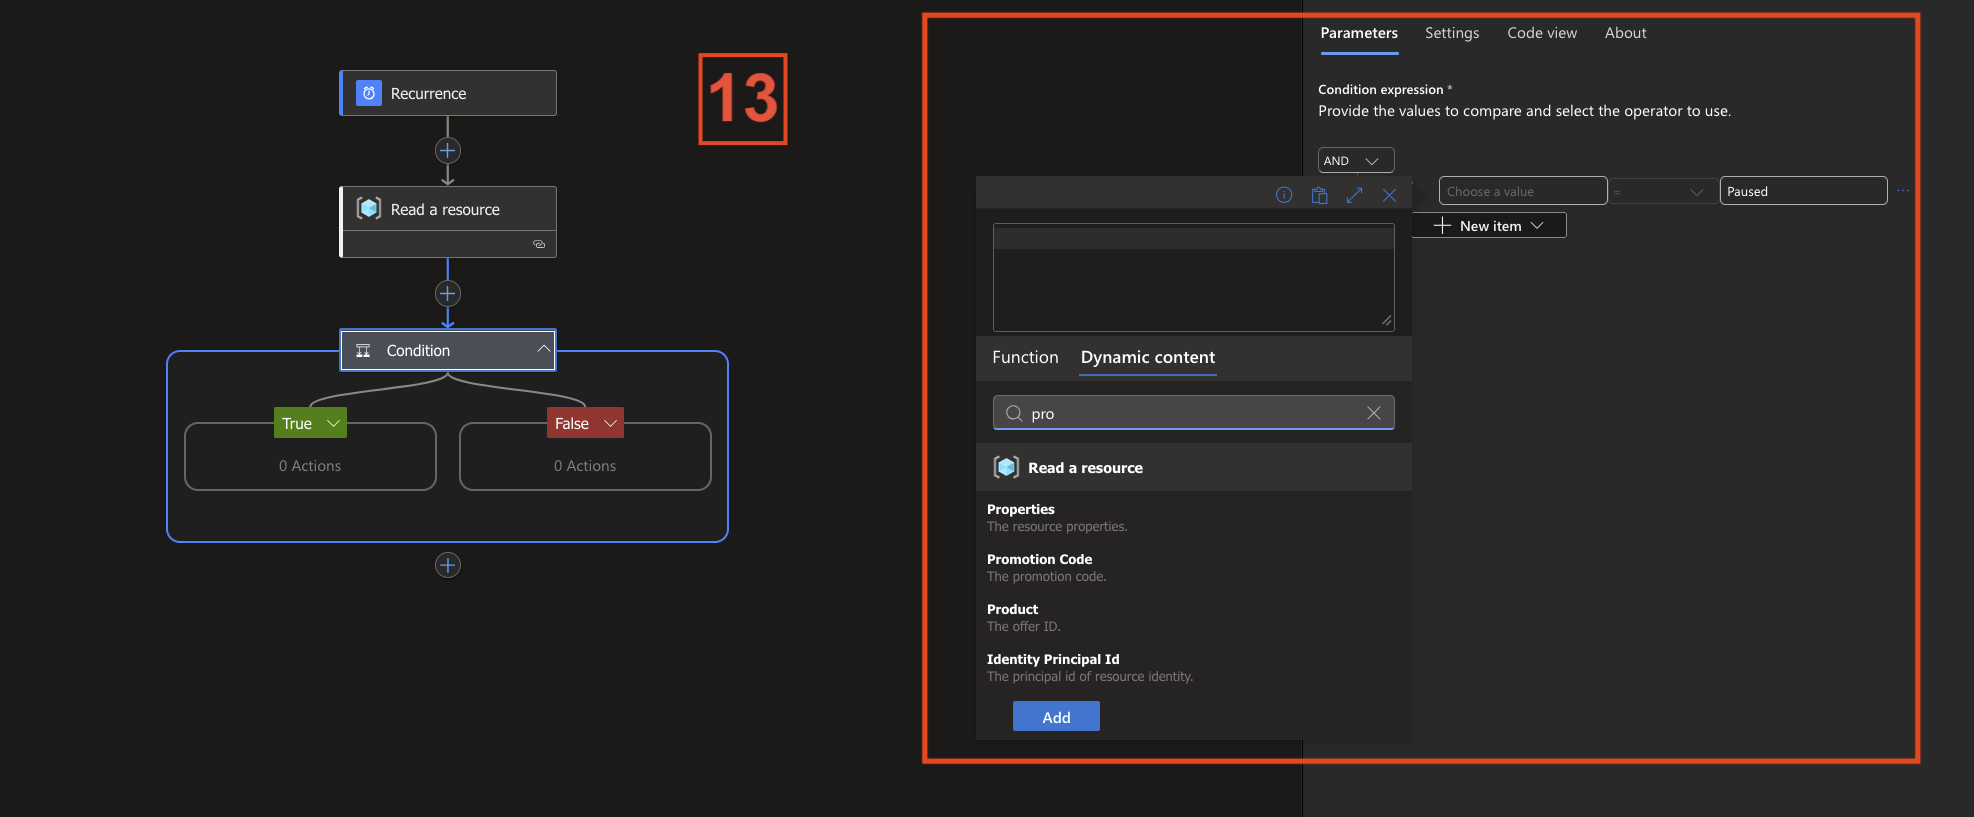
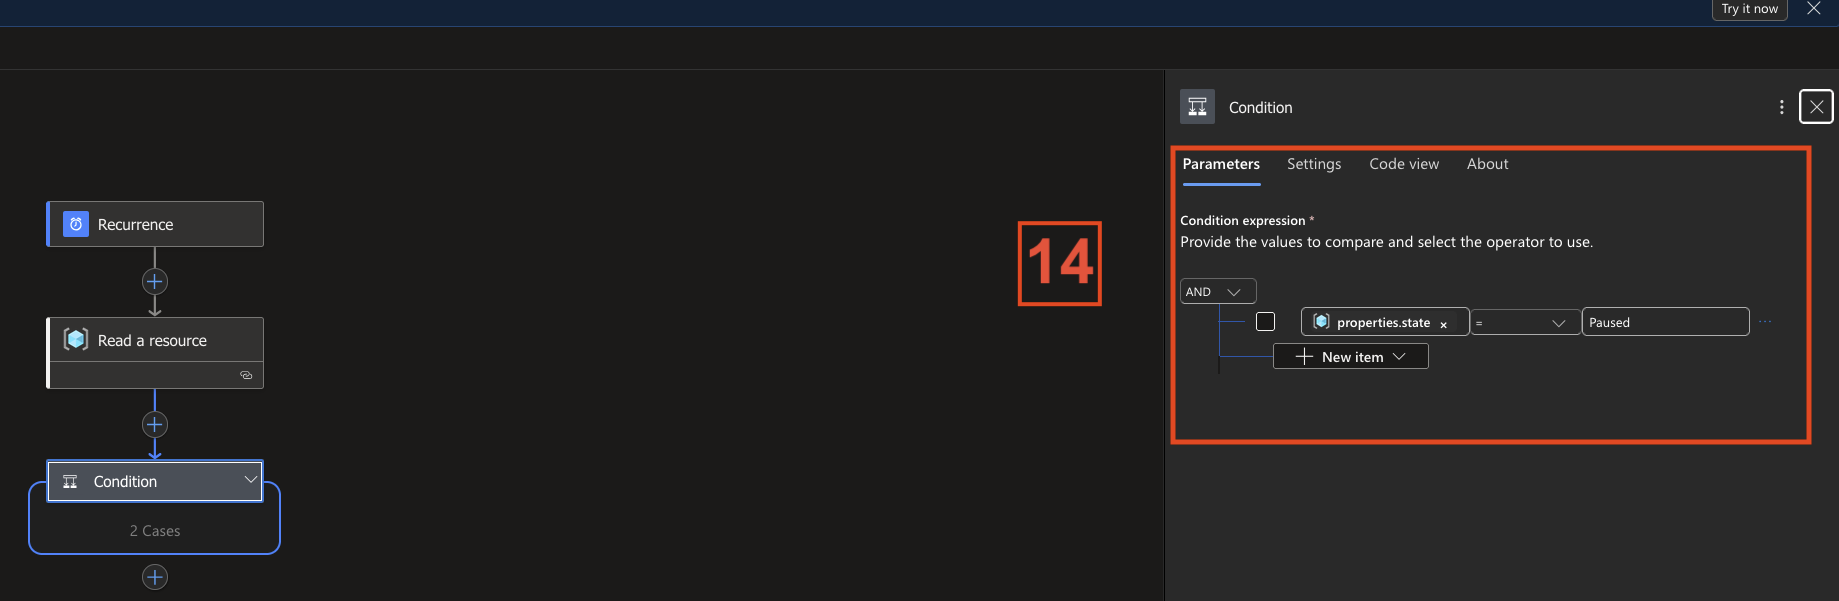
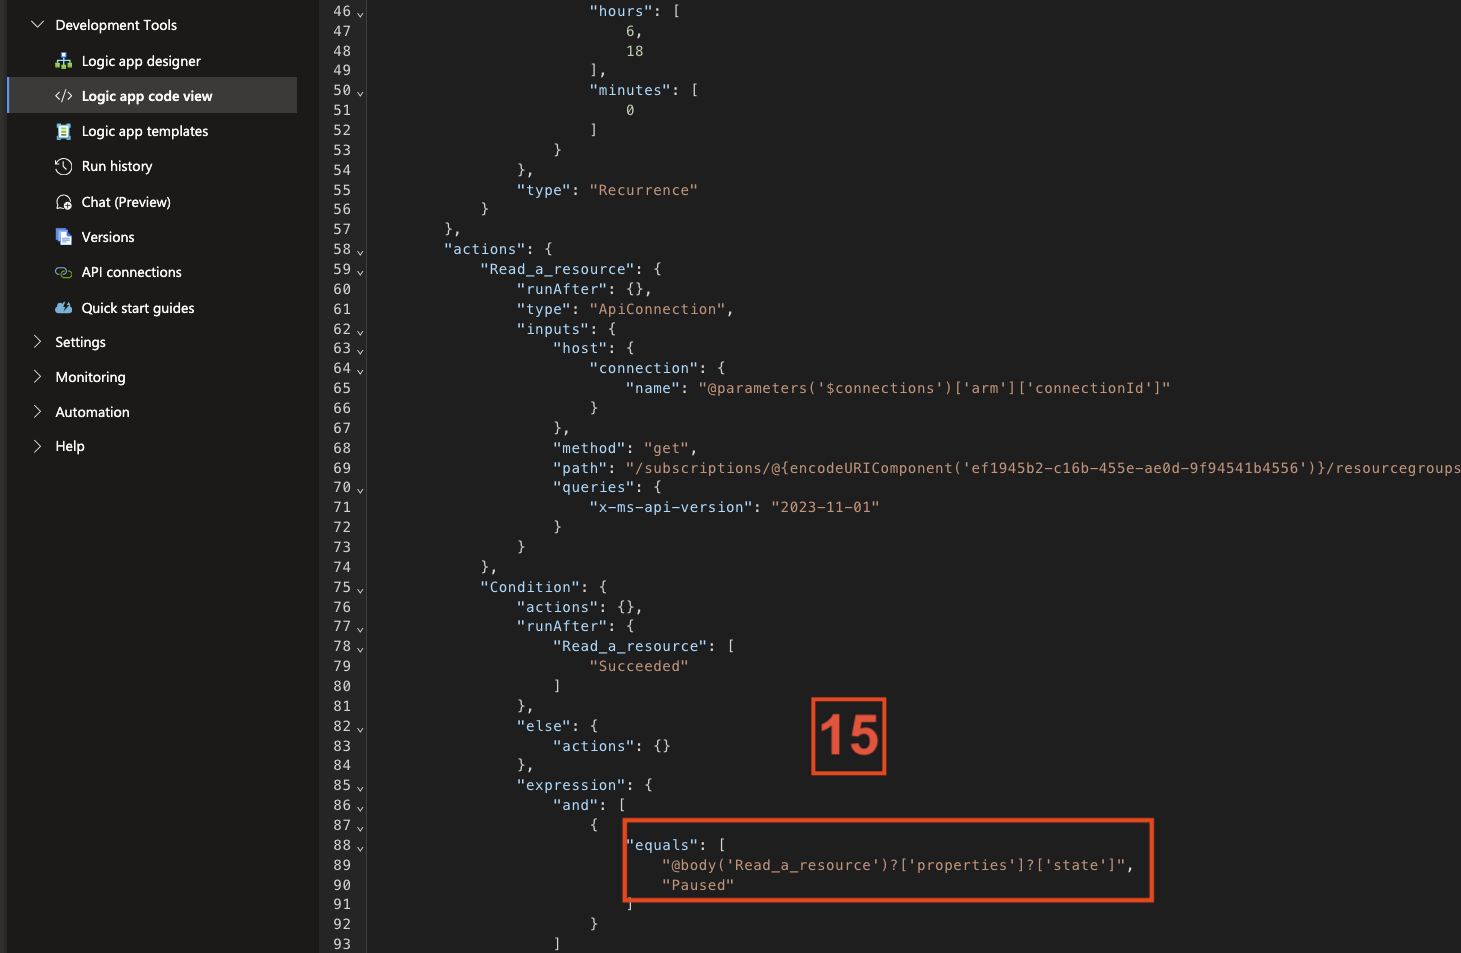
Add another action called Condition. Search for dynamic content properties and configure the state. If that doesn’t work, you can select the properties and then add the state via the Logic App Code View tab. Here is the corresponding code block for this. You can also see it again in Screenshot 11:
@body(‚Read_a_resource‘)?[‚properties‘]?[’state‘]
It’s also a good idea to save the Logic App from time to time using the “Save” tab so that your progress isn’t lost.
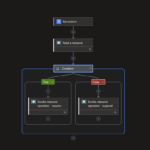
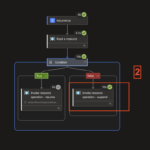
In the last step, we configure the TRUE and FALSE branches.
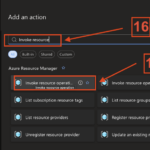
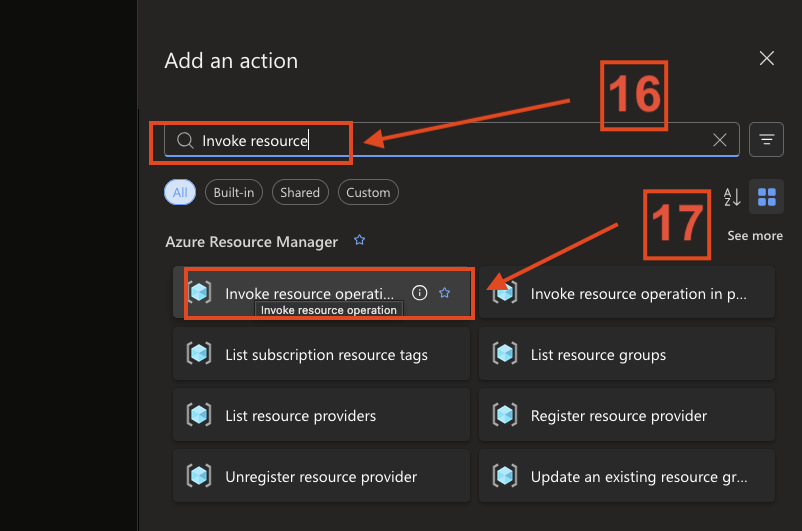
For both branches, add an “Invoke resource operation” action. You can later rename them to something more meaningful. In my case, I used “resume” and “suspend.”
The configuration itself is basically the same as for “Read a resource.” The only important difference is the action name:
- Use “resume” to start the capacity
- Use “suspend” to stop the capacity
In my setup, I assigned:
- TRUE → resume
- FALSE → suspend
This way, the Logic App cleanly controls whether the capacity is running or paused, depending on the condition you defined.
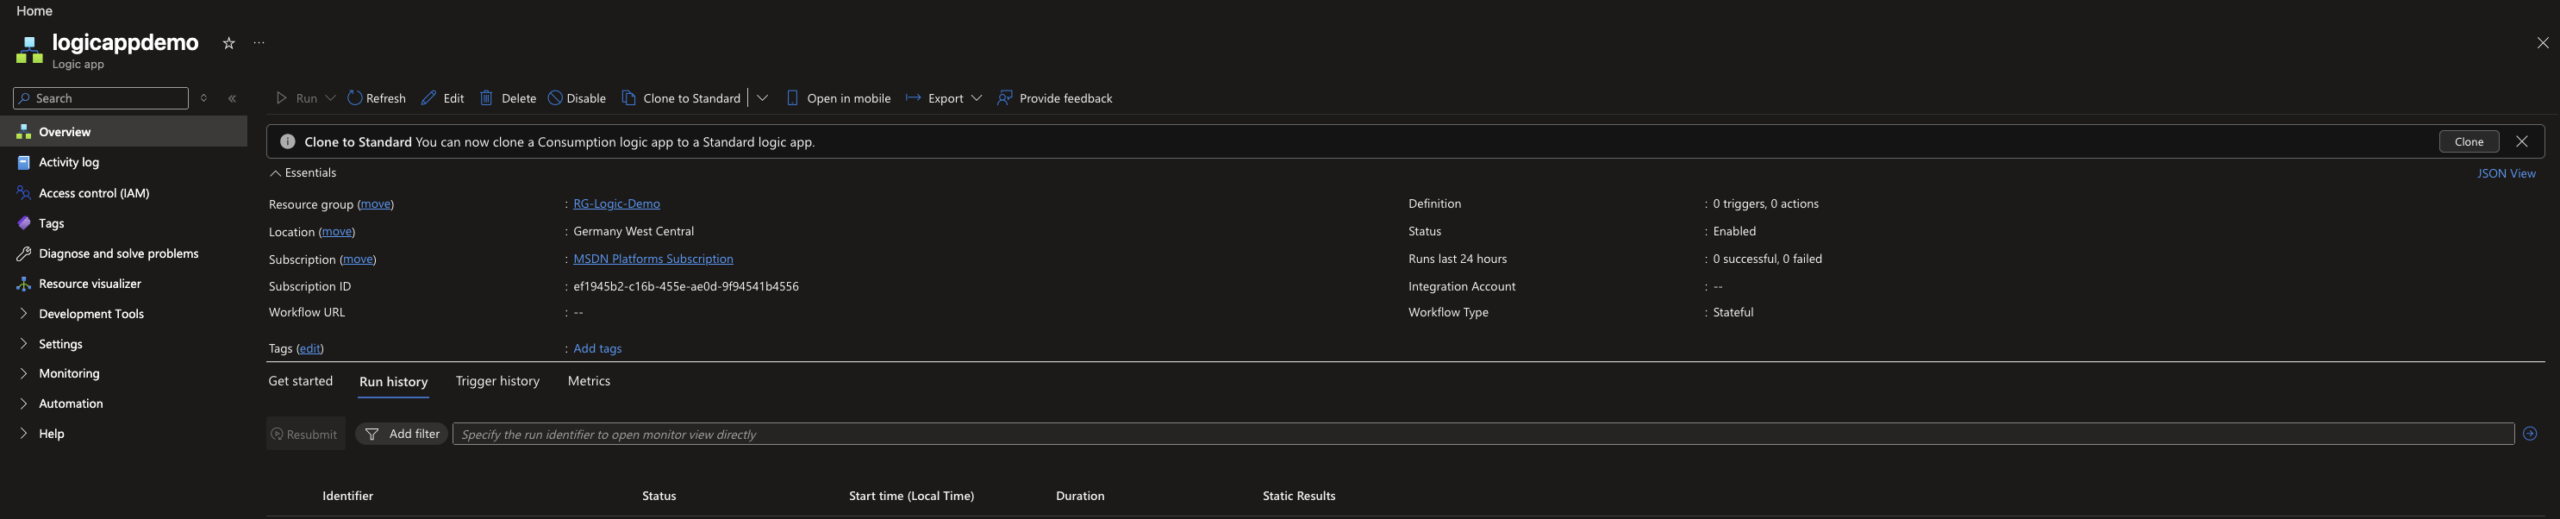
After that, we can save the configuration and test the Logic App.
3. Test the Azure Logic app
Next, I test the Logic App to make sure everything is working as expected by selecting Run.
Before doing that, I checked whether my Fabric capacity was currently running , which it was, as you can see in the screenshot.
In the first screenshot, you can see that the capacity is active.
In the next step, I select the Run button to test the Logic App. The second screenshot shows that the app has successfully suspended the capacity.
To verify this, we take another look at the capacity and can clearly see that it has been stopped.
So the Logic App works.
Since we’ve set up a schedule, in my example the capacity is started at 6:00 AM and stopped again at 6:00 PM.
4. Conclusion
Time for a conclusion: as we can see, it’s relatively easy to save costs just by pausing the capacity. However, it’s also clear that stopping the capacity is not the right approach for every scenario. In many cases, it still needs to run 24/7.
But in development environments, this is a very effective way to reduce costs. There are also scenarios where a capacity might not be required in production at all times . For example, outside business hours or during weekends.
The Logic App can of course be extended further. One example would be adding an email notification when the app is triggered, indicating whether the capacity has been started or stopped.
It’s also important to mention that storage costs will still continue, and only the compute costs are eliminated.


